Buyer Guide · Used Market · 25-Point Inspection Protocol
Buying a Used Square Baler: 25-Point Inspection Checklist
A used square baler is one of the riskiest farm equipment purchases per dollar spent — because the component that determines whether the machine ties reliably is a precision mechanism not visible from the outside, and most sellers do not know its condition. This 25-point checklist tells you exactly what to inspect, what tests to run and which findings justify walking away.
Covers: documentation · knotter inspection · pickup wear · chamber condition · drive train · frame welds · field test protocol · red flags · price negotiation
A used tractor or disc mower shows most of its wear on components you can see and measure — tyres, hitch points, visible welds, hour meter. A square baler is different: the most critical determinants of whether the machine will work reliably in your first season are inside the knotter mechanism — a set of interlocking precision components where wear is invisible from outside the guard covers and meaningless to the untrained eye even when the guards are open.
A knotter mechanism that has done 80,000 bales is not necessarily worn out. One that has done 20,000 bales with incorrect lubrication may have accelerated wear on the cam follower that will cause miss-ties from the first bale. Neither the odometer nor the cosmetic condition of the machine tells you this. Only systematic inspection of each knotter component against specification reveals the true condition.
Add to this the structural fatigue risk of a baler frame — the cyclic plunger load produces stress at welds that accumulates invisibly over years — and used baler purchase becomes a task that requires preparation, time and the willingness to walk away from machines that look acceptable but are genuinely problematic.
DOC 1
Serial number and model identification: request a photo of the machine identification plate before visiting. Verify the serial number is present and readable — a machine without a legible serial number has no service history, no parts reference and cannot be confirmed as the model the seller describes.
DOC 2
Service history and bale count: ask for any service records the seller has. No seller is obligated to have records, but a complete absence of any documentation on a machine claimed to be well-maintained is a yellow flag. Some digital monitors on newer models record total bale count — request a photo of the current reading.
DOC 3
Original operator manual: a machine sold with its original manual saves you significant time — the manual contains the inspection specifications, shear bolt ratings, lubrication schedules and knotter timing diagrams you need for both the inspection and first-season operation. A missing manual is not a deal-breaker but adds to your setup cost.
1
Bill Hook Tip Condition
Inspect: Remove the guard and examine both bill hooks. Run a fingernail across the curved tip face — any flat spot, rounding or chip indicates wear. Compare the profile to the new-part specification in the manual. Pass: sharp, consistent curved face with no flat spot. Fail: any chip, visible flat section or rounding at the tip. Replace cost: low, but the seller may use worn bills as a negotiating point.
Inspect: The knife blades should have a visible clean edge. A blade that has lost its edge angle to rounding requires replacement before the first bale. Pass: sharp edge visible, no rounding at the cutting face. Fail: rounded, dull or chipped blade. Note: knife blades are an inexpensive pre-season maintenance item and dull blades alone are not a reason to reject the machine — factor replacement cost into your offer price.
Inspect: The friction faces of both tension discs should be smooth and flat with no wear grooves. Pull the twine through by hand with the discs engaged — resistance should be consistent. Pass: smooth faces, consistent hand-pull resistance. Fail: grooved, scored or rough disc faces that snag the twine at any pull point. Disc replacement is moderate cost — budget $80–$150 per set.
Inspect: Measure the cam follower tip radius against the operator manual specification using a caliper. A tip that has worn 1.5mm or more beyond specification produces timing shift — the knotter will miss ties intermittently. Pass: tip radius within 1mm of specification. Fail: tip worn beyond 1.5mm of specification. This is a red flag on an otherwise good machine — cost to repair is moderate but timing problems will appear immediately in use.
Inspect: Rotate the mechanism slowly by hand (PTO disconnected) and watch the needle tip at its furthest travel point. Compare to the specification position in the operator manual. Pass: needle tip aligns correctly with bill hook face at maximum travel. Fail: needle tip displaced by more than 3mm from specified position. A bent needle arm must be replaced — straightened arms fail prematurely.
Inspect: Thread a cloth or bare finger along the full twine path from spool to needle. Any snag, rough point or groove in any eyelet will break twine in use. Pass: smooth, uninterrupted path throughout. Fail: any groove deeper than 0.5mm in any guide eyelet. Individual eyelet cost is low — total guide eyelet replacement on a neglected machine can add $50–$100 to the first-season budget.
7
Tine Complement and Profile
Inspect: Count all tines across both reel rows. Note any missing, bent or shortened tines. Pass: all tines present, no visible bends beyond 10mm from original line. Fail: more than 3 missing tines or a complete row section with multiple adjacent tines missing. Tine replacement costs are modest — the issue is what the missing tines say about how the machine was maintained.
8
Hub Bearing Radial Play
Inspect: Grasp the pickup reel tube near each hub and push radially. Acceptable play is under 1mm at the tube surface. Rotate the reel by hand — any grinding or gritty resistance indicates bearing damage. Pass: under 1mm play, smooth rotation. Fail: over 2mm play or grinding. Bearing pair replacement: $80–$200 depending on model.
9
Fork Feeder Tine Condition
Inspect: Examine the fork feeder for bent, broken or missing tines. The pushing face should be complete with no gaps that would allow material to accumulate between strokes. Pass: complete tine face, no significant bends. Fail: more than 2 adjacent missing tines or extensive bending across the face — indicates either heavy use in abrasive conditions or multiple plugging events.
10
Pickup Reel Tube Wrapping and Cleanliness
Inspect: Check the reel tube for accumulated wrapping material from previous seasons. Old wrapped material that was cut and partially removed leaves a compressed layer that reduces effective tine extension radius. Pass: clean tube with no accumulated wrapping. Fail: visible build-up of compressed crop material on the tube surface more than 5mm thick.
11
Chamber Wear Strip Measurement
Inspect: Measure chamber internal width at the front, middle and rear positions and compare to the operator manual specification. Pass: within 2mm of specification at all three points. Fail: more than 3mm over specification — the machine will produce persistently light bales even at maximum density setting until wear strips are replaced. Factor $200–$400 wear strip replacement into your offer.
12
Plunger Face Condition
Inspect: With the chamber access open and PTO disconnected, examine the plunger face for deformation, buckling or visible bending. A straight plunger face indicates the machine has not experienced severe blockage overloads. Pass: flat face, no deformation visible. Fail: any visible deformation or off-centre wear pattern on the plunger face — this indicates a structural overload event in the machine history.
13
Star Wheel and Trip Mechanism
Inspect: Check star wheel tine tip condition — worn flat tips reduce bale length consistency. Test the trip mechanism spring for fatigue by pressing and releasing. Pass: tips with distinct points, spring returns crisply. Fail: flat or rounded tine tips, slow spring return. Budget $50–$100 for star wheel and trip arm set if worn.
14
Drive Chain Wear and Tension
Inspect: Measure drive chain deflection — correct is 10–15mm under moderate hand pressure at mid-span. Also measure total chain elongation: a new chain of 100 links stretches to failure at approximately 3% elongation. Use a caliper across 10 links and compare to specification. Pass: within specified deflection, elongation under 2%. Fail: over 15mm deflection under light pressure, visible stiff links or rust through the pin plates.
Inspect: Remove the gearbox drain plug or level check plug and examine the oil on a piece of white cloth. Pass: golden or slightly darkened clear oil, no metallic particles visible on the cloth. Fail: dark black oil, milky appearance (water contamination), or visible metal particles on the cloth. Metal particles indicate internal gear or bearing damage that is expensive to repair.
16
Sprocket Teeth Condition
Inspect: Examine the drive and driven sprockets for hooked or shark-fin tooth profiles — this indicates the chain has been running on a worn sprocket and the sprocket has deformed under chain load. Pass: teeth with symmetrical leading and trailing faces. Fail: any sprocket with a shark-fin profile — a worn sprocket and a new chain will rapidly destroy each other. Replace worn sprockets at the same time as chain replacement.
17
Density Spring or Hydraulic Cylinder
Inspect: Measure the free length of the density springs and compare to the operator manual specification. Pass: within 5% of specified free length. Fail: more than 8% reduction in free length. A fatigued spring that no longer reaches the required load will not produce target density even at maximum adjustment. Budget $100–$200 for spring set replacement on a high-bale-count machine.
18
Main Frame Weld Inspection at Stress Points
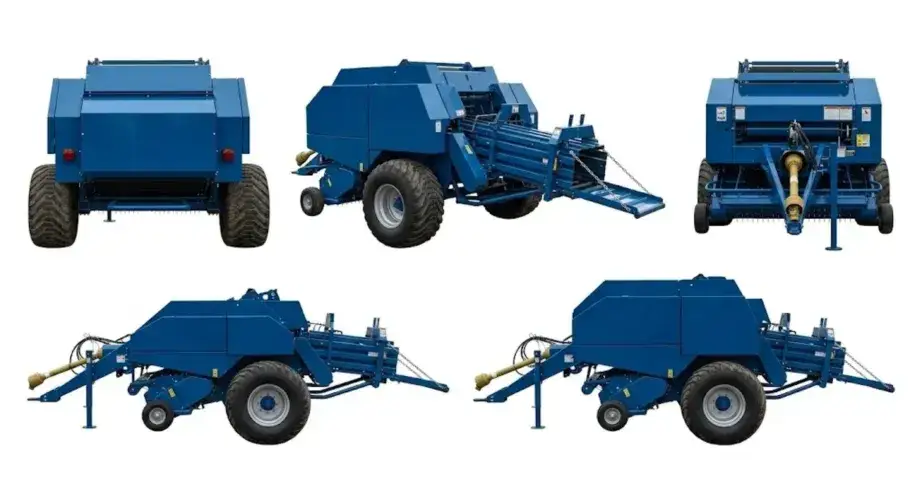
Inspect: Use a strong torch and examine every weld junction on the main longitudinal frame members, the plunger guide rails and the pickup lift arm mounting brackets. Look for radial cracks originating from weld toes — these appear as dark hairline lines extending from the weld edge into the base metal. Pass: no cracks visible at any weld junction under strong light. Fail: any crack originating from any structural weld — this machine requires workshop assessment before use and may represent an unacceptable structural risk.
19
Tongue Hitch and Drawbar Condition
Inspect: Examine the drawbar hitch eye for cracks, weld repairs and excessive wear in the pin hole. Check the tongue for straightness — a bent tongue indicates the machine was pulled at an incorrect lateral angle, placing abnormal stress on the frame. Pass: straight tongue, no weld repairs visible, pin hole round and within 2mm of nominal diameter. Fail: any welded crack repair on the tongue or hitch area — these are high-stress locations and repair welds are a red flag on structural integrity.
20
Fresh Paint — Potential Damage Cover
Inspect: Sections of fresh paint on an otherwise weathered machine are a yellow flag. Fresh paint over weld repairs is a common cover for fatigue cracks that the seller has had welded. Use a torch to examine fresh-paint areas under raking light — a repair weld visible through fresh paint, or a raised paint surface over a repaired crack, is a serious red flag. Pass: uniform paint condition across the full machine. Fail: fresh paint in isolated areas on otherwise aged machine, particularly at weld junctions.
21
Guard and Safety Cover Completeness
Inspect: Confirm all original guards are present, undamaged and secure. Missing guards indicate a previous entanglement event, an impact event, or an operator who removed them for convenience — none of which is a positive signal about machine care standards. Pass: all guards present and secure. Fail: missing guards, particularly over the PTO shaft, flywheel or knotter area. Replacement guards may not be available and their absence is a safety and regulatory issue.
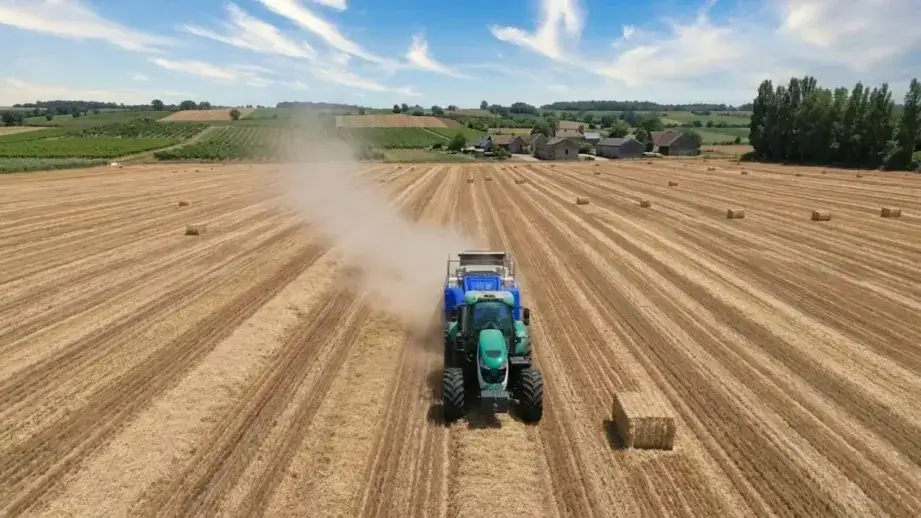
An inspection without a field test is incomplete. Every used baler must be operated and observed baling at least 20 bales before any commitment to purchase. The seller should accommodate this — a seller who refuses a field test on an operable machine is a red flag in itself.
TEST 1
Count missed ties: examine every rope on every bale in the 20-bale test. Zero misses in 20 bales is the minimum acceptable result. Any miss in 20 bales at normal operating speed indicates a knotter problem.
TEST 2
Check rope end quality: all rope ends should show a clean cut face. Ragged or frayed rope ends indicate knife dullness — an inexpensive fix, but note whether the seller acknowledged or concealed this.
TEST 3
Weigh 5 bales: weigh 5 random bales from the test run. Weight variation above 20% of the average at the same density setting indicates chamber wear, spring fatigue or uneven pickup — all documented in the inspection zones above.
TEST 4
Listen for bearing noise: during operation, listen for grinding from the pickup hub area and knocking from the drive train. Normal operational sound is rhythmic and consistent — any irregular grinding, knocking or clanking should be identified and the seller asked to explain it.
TEST 5
Pull on every knot in the test bales: firmly pull on each knot from outside the bale. A correct knot tightens under tension. A loop that slides indicates a bill hook or tension problem. Any sliding loops in the 20-bale test run is a fail.
Frame cracks at any structural weld
Fatigue cracks in baler frames are common at high bale counts and unsafe. Repair cost is unpredictable; recurrence risk is high.
Missing or unreadable serial number plate
No serial number means no parts reference, no service history, and potentially a machine of unknown provenance.
Any miss-ties in the 20-bale field test
Miss-ties in a controlled field test mean the knotter needs attention before reliable first-season use. Negotiate a price reduction or walk away.
Metal particles in gearbox oil
Metallic debris in the gearbox oil indicates internal gear or bearing damage. Repair or replacement cost can exceed the machine value.
Deformed plunger face
A bent plunger face indicates a severe blockage or debris event. Plunger replacement is a major workshop job that can cost more than the machine is worth.
Seller refuses a field test
A refusal to run the machine with crop present before purchase is a major red flag. A machine in good condition that ties reliably will pass a field test — the only reason to refuse is if the seller knows it will not.
If the inspection reveals issues that are not red flags but require attention, use the identified repair costs as the basis for price reduction rather than general negotiation. A specific, documented parts list with costs is far more persuasive than general comments about the machine condition.
How many bales has a 10-year-old square baler typically done?+
A 10-year-old small square baler in regular commercial use may have completed 60,000–150,000 bales, depending on whether the owner used it for personal use (lower volume, often 5,000–15,000 bales) or commercial hay production (higher volume, up to 10,000–20,000 bales per season). This is why bale count matters more than age as an indicator of wear. A 10-year-old machine used for 3,000 bales per year has done approximately 30,000 bales and may have substantial remaining life with appropriate servicing. The same machine in commercial use at 15,000 bales per year has done 150,000 bales and may be approaching major overhaul on several components simultaneously. Always ask the seller for an estimated annual bale volume and multiply by age — then use this number to interpret the component wear findings from the inspection.
What tools do I need to bring to a used baler inspection?+
The minimum inspection toolkit for a used square baler inspection: digital caliper (for measuring spring free length, cam follower tip and chamber dimensions); strong torch or inspection light (for frame crack detection under raking light); clean white cloth or paper towel (for gearbox oil condition check); digital platform scale if the seller has a windrow available for a field test (for bale weight verification during the field test); and the operator manual for the specific model if you can source it in advance. The operator manual contains the specification values against which you compare your measurements — without it, you are inspecting without reference values. Many manuals are available as PDF downloads or can be requested from the manufacturer with the model number before your visit. Download and bring a printed copy or save to your phone.
Is it worth buying a used baler that is missing some guards?+
Missing guards are a more significant issue than their relatively low replacement cost suggests. The practical problem: replacement guards for older or less common models may not be available as standard parts, requiring custom fabrication at significant cost. The safety issue: operating farm machinery without required guards creates liability exposure and may violate OSHA requirements in some operational contexts. The diagnostic signal: guards are removed either from impact damage or for operator convenience. Impact-removed guards suggest a collision event that may have caused other frame or mechanism damage. Convenience-removed guards suggest an operator who was not working within the machine design parameters — which correlates with higher blockage events, harder PTO engagement habits and less careful maintenance. Before purchasing a machine with missing guards, verify availability of replacement parts for the specific model — if available and affordable, factor cost into price negotiation. If not available, the missing guard may make the machine impractical to operate within safety requirements.
Should I buy a used baler if I am a first-time owner?+
First-time baler owners face a practical challenge with used baler purchase: the knotter mechanism inspection requires knowing what a correctly profiled bill hook looks like, what cam follower wear feels like, and what correct twine path tension feels like. Without this reference experience, the inspection checklist above tells you what to look for but not always how to interpret ambiguous findings. The risk of a first-time buyer missing a knotter condition issue is real — and a used baler that misses ties on the first morning of baling is a frustrating start to ownership. If you are a first-time buyer, consider one of two approaches: purchase a new machine where the mechanism is known-good from the factory, which eliminates the risk of inheriting an unknown knotter problem; or bring an experienced baler mechanic or operator with you to the inspection — someone who has serviced knotters before can evaluate the component condition in minutes with the right reference experience. The $100–$200 inspection consulting fee paid to an experienced person is good insurance on a $5,000–$10,000 used machine purchase.
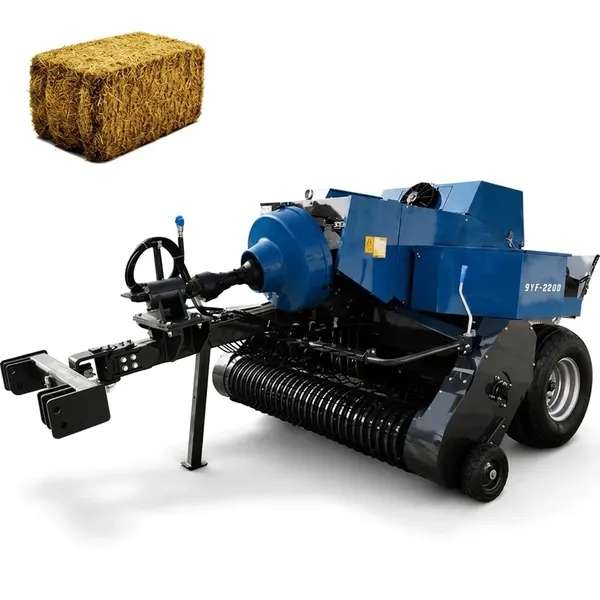
What is a fair price for a used 9YF series square baler in good condition?+
A used 9YF series baler in good mechanical condition with no identified repair needs typically trades at 50–70% of current new price at 3–6 years of age, and 30–45% of new price at 7–12 years of age. The condition multiplier applies on top of this: a machine with identified repair needs should be priced at the age-based percentage minus the total repair budget identified in the inspection. A machine with documented service history commands a modest premium over the same machine without records. Machines with known high-volume commercial use history (farm sale catalogue listings, estate sales from active hay operations) typically trade toward the lower end of the age percentage range because the implied bale count is higher even without a specific count available. Before committing to a price on any used baler, obtain a current price from us for the equivalent new model — sometimes a 3-year-old machine at 70% of new price with $600 in identified repairs is better value than paying 85% of new for the same machine with fewer issues, when the new machine price with warranty is known.
Can I buy a used baler online without seeing it in person?+
Online purchase of a used square baler without an in-person inspection is a high-risk approach specifically because the most critical wear components — knotter bill hooks, cam follower, tension discs — are not visible in any photograph and are not assessed by any online listing. Sellers are not obligated to disclose knotter condition and many do not know it themselves. An online-purchased baler that arrives with a worn cam follower or misaligned needle arm will miss ties from the first field day — and the cost of shipping a machine back to the seller typically exceeds the value of any dispute resolution. For low-value balers below $3,000, the risk may be acceptable if you are mechanically capable of a full knotter rebuild after arrival. For any machine above $4,000, travelling to conduct the in-person inspection described in this guide is the correct approach. Alternatively, hire a local agricultural inspector in the seller location to conduct the inspection on your behalf before purchase — agricultural inspection services are available in most major hay-producing regions and cost $150–$300 for a full used equipment assessment.
What is the correct inspection order to avoid missing anything?+
The optimal inspection order for efficiency and completeness: start with documentation verification and serial number check before touching the machine. Then conduct the visual first pass of the full machine exterior — noting paint condition, guard completeness and overall maintenance indicators — before opening any covers. Next, open the knotter guards and complete Zone 1 inspection (points 1–6) while the mechanism is cold and still — easier to examine than in operation. Then inspect Zone 2 (pickup and feeder, points 7–10) and Zone 3 (chamber and drive, points 11–17). Complete the frame weld inspection (Zone 4, points 18–21) as the final static check. Only then conduct the field test (if a windrow is available). Finish with the gearbox oil check — save this for last because opening the drain plug on a cold gearbox gives the most accurate oil condition reading before any warmup disturbs sediment. This sequence ensures you identify any major disqualifying findings early — if the serial number is missing or a frame crack is found, you can stop the inspection before investing more time.
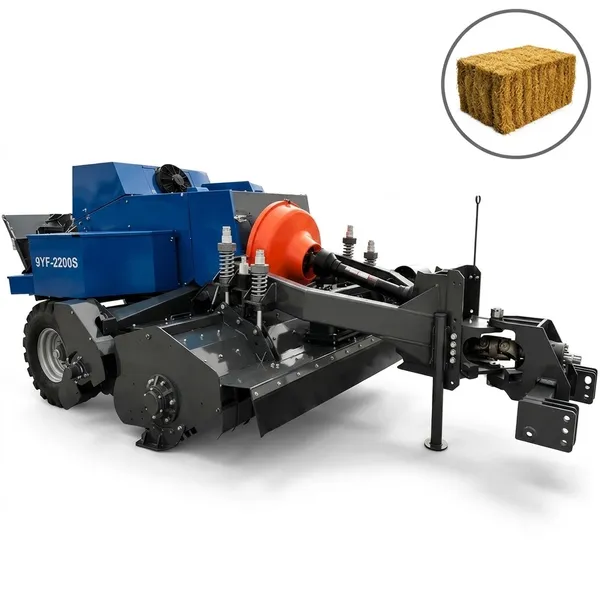
Are there specific things I should check on the 9YF-2200S shredder model that are different from standard models?+
The 9YF-2200S has three additional inspection points beyond the standard model checklist. First: the shredder blade or hammer condition — the shredder elements contact the crop at high speed and wear at the tip face and cutting edge. Worn shredder elements reduce the density improvement the shredder provides and indicate the machine has processed significant volume of hard-stalk crop. Second: the shredder gearbox oil condition as a separate check from the main gearbox — the shredder mechanism has its own oil supply on some configurations. Third: the touchscreen monitor function — verify the monitor powers on, displays correctly and the cable connections are secure. A non-functioning monitor on a 9YF-2200S reduces the value of the machine because the density feedback and fault indication capability is compromised. Budget $200–$400 for shredder blade replacement and $150–$300 for monitor cable or sensor replacement if either is found to be in poor condition during inspection.