Troubleshooting Guide · 9YQ Round Baler · Updated August 2026
Round Baler Not Forming Bale
A round baler that passes over a windrow without forming a bale — the bale-full indicator never triggers, the chamber sounds hollow, and no bale ejects — is experiencing one of six specific faults. The most common is windrow material too thin to initiate core rotation, followed by belt slip, pickup tine damage, wet crop bridging at the inlet, feed roller jam and loose drive chain. Each fault produces a distinct observable symptom that determines the correct field diagnosis and repair.
Covers: how bale formation works · complete 6-cause diagnosis table · repair steps for each fault · field checks with PTO off · prevention through windrow management · when to stop and service
6 Causes — Quick Diagnosis Reference
1. Windrow too thin → increase windrow density
2. Pickup tines damaged → inspect and replace
3. Belt slip or glazing → clean, tighten or replace belts
4. Wet crop bridging at inlet → reduce speed or wait
5. Feed roller jam → stop, PTO off, clear manually
6. Drive chain loose → adjust chain tension
How Round Bale Formation Works — The Process That Must Complete
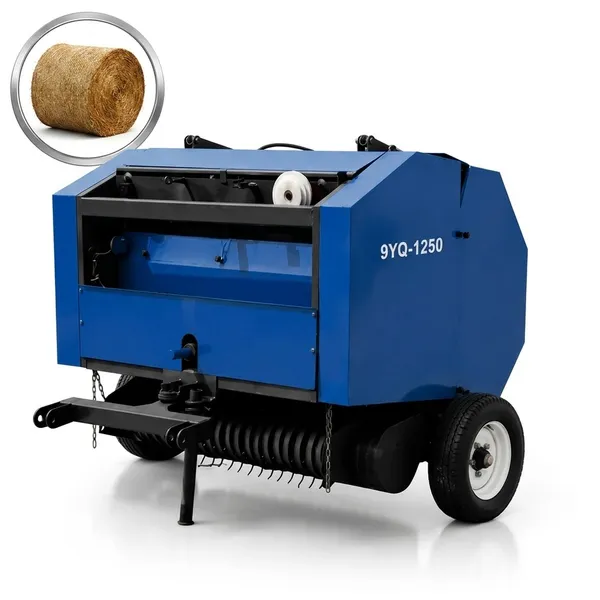
The 9YQ series uses a fixed-chamber design — the bale chamber belts maintain constant tension throughout the formation cycle. Understanding the formation sequence helps locate at which point the failure is occurring:
1
Pickup phase: The rotating pickup reel lifts crop from the windrow and feeds it upward into the machine through the crop intake. The material must be present in sufficient volume and must flow freely — any interruption here starves the chamber.
2
Core initiation phase: The first material entering the chamber must accumulate and begin rotating against the belts. In a fixed-chamber baler this requires a critical minimum volume of crop — too little material per unit time and rotation does not initiate. This is the phase that fails with thin windrows.
3
Growth phase: The rotating core grips new material from the inlet and wraps it around the outside of the forming cylinder. The bale grows in diameter, applying increasing force to the belts. Belt tension increases progressively as diameter grows.
4
Full-bale signal: When the bale reaches the rated diameter, the tension sensor or mechanical trip triggers the bale-full indicator. The operator stops, initiates net wrap, ejects and proceeds. If this indicator never fires, the chamber has not reached full diameter — the bale is not forming.
Complete Fault Diagnosis Table
| Observable Symptom |
Most Likely Cause |
First Field Check |
| Baler passes over full windrow, bale never starts — crop visible in inlet but chamber sounds empty |
Windrow too thin OR belt slip |
Stop at end of row. Open chamber door. Is the chamber empty or is there loose unformed material inside? |
| Crop strips left on both sides of the pickup path; chamber partially fills but slowly |
Pickup tines damaged or missing |
PTO off. Inspect pickup tines by rotating slowly by hand. Missing or bent tines visible immediately. |
| Material enters chamber, bale starts to form but stops growing after 20–30cm diameter; chamber smells burnt |
Belt glazing or slip — belts not gripping the forming bale |
Open chamber door. Touch the belts — glazed belts feel smooth and slightly oily. Check belt tension adjustment (see manual). |
| Crop mats together at the inlet; baler makes grinding or thumping noise at the feed roller area; machine slows |
Wet crop bridging at the inlet or feed roller jam |
Disengage PTO immediately. Do not force the tractor forward. Open the side access to the feed area and inspect for a compressed plug of wet material. |
| Bale chamber belts running but forming bale spins very slowly or unevenly; rattling from belt drive area |
Loose or stretched drive chain to belt system |
PTO off. Inspect the main belt drive chain tension by pressing on the slack side — more than 15–20mm deflection indicates a chain that needs tensioning. |
| Bale starts, forms a partial cylinder, then stops growing despite continuous crop feed; bale is noticeably lighter on one side |
Uneven belt wear or one belt broken/missing |
Open chamber door and inspect all belts for even tension. A missing or broken belt leaves a visible gap in the belt array. |
Cause 1: Windrow Too Thin to Initiate Bale Core Rotation
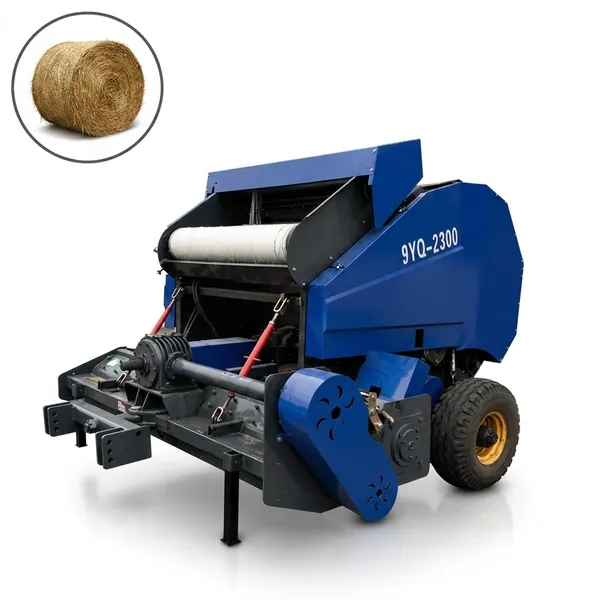
A fixed-chamber round baler requires a minimum volume of material per second flowing through the inlet to reach the critical mass for core rotation. When the windrow is too thin — from a small mower swath, a field with sparse stand or from windrows raked too narrow — the material trickles into the chamber without accumulating enough to begin rotating against the belts. The operator hears the belts running and sees material entering but the bale diameter does not grow.
Field Solutions for Thin Windrow
Reduce forward speed: Slowing down gives more time per metre of windrow for material to accumulate at the inlet — effectively increasing the volume entering per second relative to forward travel.
Combine two windrows: Rake two adjacent windrows into one before baling — doubles the material volume per metre and typically resolves the core initiation problem immediately.
Start bale by hand: Some operators place a small amount of loose material into the chamber by hand before engagement — not recommended as standard practice but useful in the field to verify whether thin windrow is the cause versus a mechanical fault.
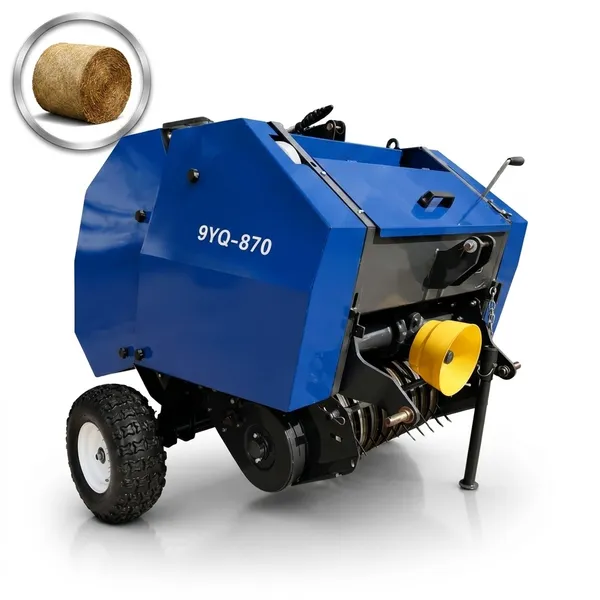
Switch to the 9YQ-870: If the field consistently produces thin windrows (sparse stand or small mower), the 9YQ-870 with its smaller chamber diameter requires less material to initiate core rotation and is the appropriate model for this volume of production.
Cause 2: Pickup Tine Damage — Inspection and Replacement
Pickup tines on the 9YQ series are spring-steel rods mounted on the rotating pickup reel. Each tine is an individual replaceable component. Missing or severely bent tines create gaps in the pickup arc — material in the zone of the missing tine is not lifted and remains on the ground. A pickup reel with 3–4 consecutive tines missing on one side produces both thin bale formation and visible crop strips in the field.
Inspection procedure
Disengage PTO and confirm the machine is fully stopped. Rotate the pickup reel slowly by hand. Inspect each tine for: absence (the mounting hole is empty), severe bend greater than 30 degrees from the normal angle, or a crack at the mounting base. A complete inspection takes approximately 5 minutes.
Replacement procedure
Tines are retained by a bolt and nut through the mounting lug on the reel. Remove the nut, pull the old tine, push the new tine in the correct orientation (tine tip curves in the direction of pickup rotation) and retighten. Carry 10–15 spare tines in the tractor cab during baling season — a mid-field tine replacement takes under 10 minutes.
Annual replacement threshold
Replace all tines as a set when more than 15% show any bend. A pickup reel with mixed old and new tines produces uneven material lift across the pickup width — thin sections where old bent tines contact the crop and full-volume sections with the new tines — producing uneven bale density across the bale width.
Cause 3: Belt Glazing and Slip
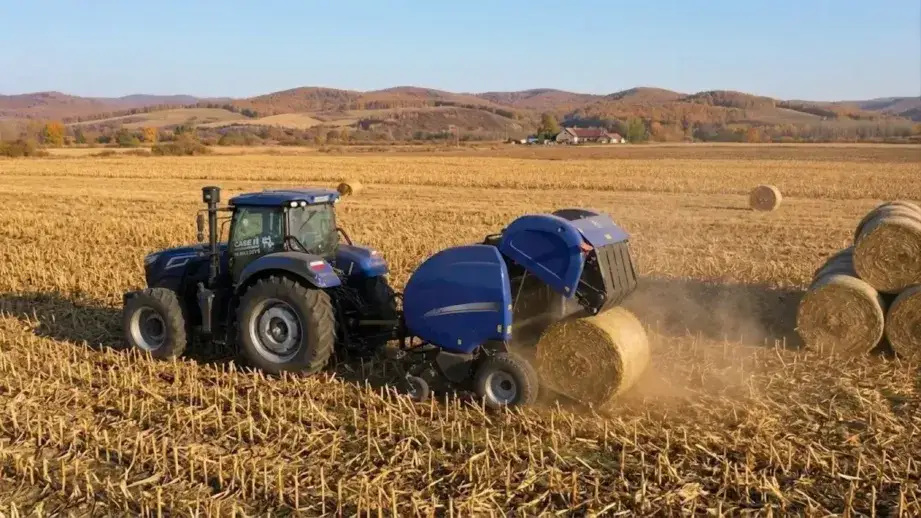
Belt glazing is a progressive loss of belt surface friction caused by fine crop dust, chaff and plant juice accumulating on the belt face during baling. The belt surface gradually becomes polished — unable to maintain the friction required to spin the forming bale core. Glazed belts typically allow the bale to reach 20–35cm diameter (just enough to begin forming) before the friction deficit causes the core to stall. The operator may notice a burning rubber smell as the belts slide against the stalled core.
Cleaning glazed belts: With PTO off and machine fully stopped, open the bale chamber door. Use a dry wire brush across the belt surface in the direction of belt travel — this removes the polished surface layer and restores some mechanical texture. Avoid solvents or water on belts — any liquid residue reduces friction further until evaporated.
Belt tension adjustment: If the belts are correctly clean but still slipping, verify belt tension against the specification in the operator manual. Belts stretch with use and a stretched belt at the minimum of its adjustment range may slip even when clean. Adjust the tensioner to the midpoint of the specified range.
Belt replacement threshold: When belts show cracking across the width, significant edge fraying or glazing that covers more than 40% of the face and does not clean off with brushing — replace the belt set. Running a partial belt set (one or two belts replaced out of the full set) produces uneven bale formation and accelerates wear on the new belts.
Causes 4, 5 and 6: Wet Crop Bridging, Feed Roller Jam and Loose Drive Chain
Cause 4: Wet Crop Bridging at the Bale Chamber Inlet
Crop baled at above 30% moisture (not suitable for dry hay baling) mats together into a cohesive mass that bridges across the inlet opening rather than flowing freely into the chamber. The bridge of wet material blocks incoming crop from reaching the belts even as the pickup continues to feed material against the back of the plug.
Field action: Disengage PTO immediately when the thumping or grinding at the inlet begins — do not continue driving. Use the jam-clearing function (reverse the pickup if available on your model) or manually clear the inlet plug with a stick or gloved hand (machine fully stopped and PTO disengaged). Wait until crop moisture at the windrow core drops below 25% before baling.
Cause 5: Feed Roller Jam
The feed roller compresses the incoming material and meters it into the bale chamber at a consistent rate. A foreign object — a stick, rock, piece of wire or compressed soil plug — jammed between the feed roller and the inlet housing stops all material flow to the chamber. The pickup continues running and may continue lifting crop, but nothing reaches the belts.
Field action: PTO off, confirm full stop. Open the feed access panel on the relevant side of the machine. Locate the jam — usually visible as a compressed plug or foreign object wedged at the roller gap. Remove by hand if the object is loose; use a bar for a firmly lodged plug. Inspect the feed roller for damage from the foreign object before resuming. Restart and confirm material feeds normally through one bale cycle before continuing at normal speed.
Cause 6: Loose or Stretched Drive Chain
The belt drive system is powered by a roller chain from the PTO input gearbox. As chains wear and stretch over a season, the chain tension decreases — a loose chain can skip teeth on the sprocket under high bale formation load, causing the belts to momentarily slow or stop. A severely loose chain makes an audible rattling sound at the drive area during light-load operation.
Field check and adjustment: PTO off and confirmed stationary. Locate the belt drive chain tensioner (typically an idler sprocket on a pivot arm). Press on the chain slack side — the maximum allowable deflection is specified in the manual, typically 10–15mm. If deflection exceeds this: turn the tensioner adjusting bolt clockwise until deflection is within specification. Recheck after 50 bales at the start of the next session — new chain stretch is highest in the first hours of use after adjustment.
PTO Speed and Bale Formation — The Connection
Belt slip is sometimes caused not by glazed belts but by PTO speed below the rated 540rpm. The bale chamber belts require a minimum surface speed to maintain the friction needed for core rotation — at low PTO speed, the belt surface velocity decreases and the effective grip on the forming bale core reduces. Before replacing belts for a slip fault, confirm the tractor is running at the correct throttle position and maintaining 540rpm at the PTO shaft. A worn CV joint in the driveshaft can also cause PTO speed oscillation that produces intermittent belt slip without any belt condition fault. Full shaft inspection guide: PTO driveshaft and CV joint inspection for round baler belt slip diagnosis.
Frequently Asked Questions — Round Baler Not Forming Bale
Why does the round baler start a bale but stop forming after 20–30cm?+
Partial formation to 20–30cm diameter followed by stalling almost always indicates belt slip — the core initiates because the initial crop volume is sufficient, but as the bale grows and requires more belt friction force, the glazed or slipping belts cannot maintain the required grip. The stall diameter corresponds to the point where the bale weight and required friction exceed what the belt surface can provide. Inspect the belts for glazing (smooth, shiny surface), check tension against the manual specification, and clean the belt surface with a dry wire brush. If glazing is severe and cleaning does not restore grip: belt replacement is required. Also verify PTO speed — running the tractor below full throttle (below 540rpm PTO) reduces belt surface speed and can produce the same stall symptom with perfectly clean, correctly tensioned belts.
How do I clear a wet crop jam at the round baler inlet without damaging the machine?+
Safe jam-clearing sequence: (1) Disengage the PTO immediately — do not continue driving when you hear thumping or feel the machine slow under jam load. (2) Move the tractor forward 3–5 metres to clear the windrow from under the pickup. (3) Shut off the engine and confirm all rotating components have stopped completely before approaching the machine. (4) Open the access panel at the feed area or the bale chamber door. (5) Use a wooden handled tool, stick or gloved hands to work the compressed material loose — never use your hands in any gap that could close. (6) Remove all loose material from the pickup area before restarting. (7) Restart and engage PTO at low throttle — confirm the pickup and feed roller run freely before returning to normal speed. For machines with a reverse-pickup function: engage reverse pickup for 5–10 seconds before manually clearing, which typically dislodges a soft plug without requiring manual access.
How many pickup tines can be missing before bale formation is affected?+
On a 9YQ pickup reel with 40–60 total tines (depending on model): loss of 1–2 individual tines scattered across the reel has minimal effect on bale formation — the adjacent tines compensate partially. Loss of 3–4 consecutive tines in a cluster creates a visible gap that reduces material lift by approximately 10–15% across that section of the pickup width. This reduces windrow capture efficiency and can cause thin bale formation in already-marginal windrow conditions. Loss of 6 or more consecutive tines (a full row section) causes a permanent crop strip and significantly affects bale formation rate. The rule of thumb: replace any missing tine as soon as it is discovered — carry spares in the cab, replacement takes under 5 minutes per tine, and the cost of a tine is far less than the productivity loss from reduced pickup efficiency.
Can I bale in the rain or in very wet conditions with a 9YQ round baler?+
Baling in rain or immediately after rain is not recommended — the increased crop moisture causes the bridging and belt contamination problems described in this guide, plus it produces bales that will not preserve correctly in storage. The practical guideline: do not bale if crop moisture at the windrow core exceeds 30% for dry hay bales. Wait for the windrow core to dry to below 25% (probe-test with a moisture meter) before resuming. Morning dew re-wetting after overnight condensation is the most common situation — windrowed hay at 18% the previous afternoon may test at 28–32% the following morning after dew. In most US regions: baling in the late afternoon (2:00pm–6:00pm) after a sunny drying day allows core moisture to reach the target range. After any actual rain event: allow a minimum of one full drying day before testing moisture and resuming baling.
How tight should the belt tension be on a 9YQ round baler?+
Belt tension specification varies by 9YQ model — always refer to the tension specification in the model-specific operator manual rather than using a general figure. The standard method for checking belt tension on the 9YQ series: with the bale chamber empty, place a straight edge across the top of the belt array parallel to the bale chamber axis. Press down at the midpoint between support rollers — the belt deflection should match the value specified in the manual (typically 20–35mm for standard hay baling conditions). Over-tightening belts beyond the specification does not improve bale formation and accelerates belt wear and bearing load at the drive rollers. Under-tensioned belts (below specification) produce the slip and glazing problems described in this guide. Re-tension belts at the start of each season and after any bale formation fault resolved by tension adjustment.
My bale forms but is consistently flat on one side. What causes this?+
A bale that is cylindrical on most of its circumference but flat on one section indicates that one belt or a pair of adjacent belts is not carrying its share of the bale-forming pressure. The flat section forms where a belt is missing, broken, severely loose or slipping without the adjacent belts compensating. Inspect the full belt array with the chamber door open and the machine stopped — each belt should be at the same tension as its neighbours and show the same surface condition. Replace any belt that shows cracking, significant edge damage or a shiny glazed face different from the other belts. Running a set of belts with one visibly weaker member produces consistently asymmetric bales and accelerates wear on the remaining belts as they compensate for the weaker one.
What is the minimum windrow weight per metre that will reliably form a bale in a 9YQ-1250?+
The minimum windrow density for reliable bale core initiation in the 9YQ-1250 is approximately 3–4 kg per linear metre of windrow for grass hay. At a baling speed of 5 km/h (83 metres per minute), this equates to 250–330 kg of material entering the machine per minute — the minimum required to reach core rotation within the first 10–15 seconds of bale initiation. A 20-acre field of grass hay yielding 2 tonnes per acre across two cuts produces windrows at approximately 4–5 kg per metre at standard raking width — sufficient for the 9YQ-1250 at normal forward speed. Fields with sparse stands below 1.5 tonnes per acre total yield may produce windrows below 2.5 kg per metre — in this range, reduce forward speed to 3–4 km/h to increase feed rate per second and enable core initiation, or combine windrows before baling.
Should I service the belts before or after each baling season?+
Belt inspection should occur both pre-season and post-season: pre-season inspection confirms the belts are in condition for the coming season and allows replacement before the first baling day rather than during it; post-season inspection gives a current assessment of belt condition and allows you to budget and order replacement belts during the off-season when lead time is not a constraint. The post-season inspection is typically more informative because the belts show the full season condition — cracks, glazing and edge damage are easiest to assess on belts that have been used recently rather than stored for 8 months. If the post-season inspection shows belts are past the replacement threshold: order replacements during winter for installation in early spring, before any time pressure from the approaching season.
Bale Formation Problem Not Resolved by This Guide?
Describe the exact symptom — at which point in the cycle the formation stops, any sounds you hear and the crop and field conditions — and our team will identify the cause for your 9YQ round baler.
America Ever-Power Forage Baler Equipment INC. · 1401 21st ST STE R, Sacramento, CA 95811
Redacteur: Cxm