
The Shear Bolt System: Designed Failure That Prevents Catastrophic Failure
A shear bolt is a fastener calibrated to fracture at a defined torque load — deliberately the weakest link in the driveline at each protection point. When a rock, wire, or slug of wet crop creates a torque spike that exceeds the shear bolt’s rated strength, the bolt fractures in shear at its reduced-diameter neck, absorbing the overload event and stopping power transmission to the protected component before that component can absorb the destructive force. The shear bolt is sacrificial by design; it is supposed to break.
The shear bolt system has two variants: the single-shear bolt that fractures cleanly and requires manual replacement, and the slip clutch that uses a spring-loaded friction plate to slip (rather than fracture) when overloaded, then re-engage automatically. Many round balers use both — shear bolts at individual drive points and a slip clutch on the main PTO input shaft. Understanding which protection type is at each location determines the correct service response when an overload event occurs.
Shear Bolt Specification: Why Grade and Diameter Both Matter
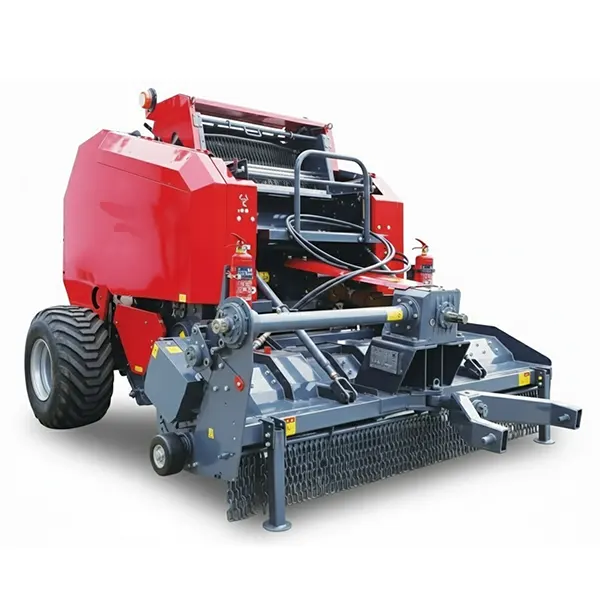
The shear bolt’s trip torque — the torque load at which it fractures — is determined by two specification variables: the bolt diameter and the steel grade. A larger diameter or higher grade (stronger steel) raises the trip torque. Both variables must match the manufacturer’s specification for the shear bolt to trip at the correct load. Substituting a bolt with the correct diameter but higher grade (e.g., replacing a Grade 2 with a Grade 5 of the same size) can raise the trip torque by 80–120%, defeating the protection system on that position entirely.
| Bolt specification | Relative shear strength | Effect of substituting up one grade |
|---|---|---|
| Grade 2, 5/16″ diameter | Baseline (low) | Substituting Grade 5 same diameter: trip torque rises ~80%. Gearbox no longer protected at design load. |
| Grade 2, 3/8″ diameter | Medium-low | Commonly used for medium-duty shear points on pickup drives and secondary shafts |
| Manufacturer OEM shear bolt | Precisely calibrated | OEM shear bolts are made from specific alloy at controlled hardness — not a standard SAE grade bolt. Always prefer OEM for critical protection points. |
Locating Every Shear Bolt Position on Your Baler
Every round baler has multiple shear bolt positions — typically 3–6 on a mid-range commercial baler. Each position protects a different downstream component, and each position has its own specified bolt. The operator manual lists every shear bolt position with the bolt specification for each. Before the season begins, walk every shear bolt position and confirm the correct bolt is installed, not a hardware store substitute from a prior emergency repair.
Protects the main gearbox from overload on the primary drive input. This is typically the largest and most precisely calibrated shear bolt on the baler — any overload large enough to reach the gearbox without being absorbed by a slip clutch must be handled here. On balers without a slip clutch, this bolt is the sole protection for the main gearbox.
Protects the pickup drum shaft and its drive from rock or wire ingestion. This is the highest-frequency shear bolt failure position on the baler because the pickup is the first component to contact field hazards. The pickup shear bolt is designed to trip at a lower torque than the main drive to ensure pickup hazards don’t transmit to the main driveline.
Protect the crop intake augers from slug loads — a dense, wet wad of crop entering the auger zone can stall the auger if it exceeds the shear bolt’s trip torque. Auger shear bolts are typically smaller diameter and lower grade than pickup bolts because the auger is a lower-torque component.
Slip Clutch Service: The Alternative to Shear Bolts

A slip clutch protects the driveline by allowing controlled slippage under overload rather than a fracture. When the load exceeds the spring-set friction force, the clutch plates slip against each other — the drive shaft continues rotating while the driven shaft momentarily stalls — then re-engage when the torque drops below the slip threshold. The slip clutch has two service requirements: maintaining the correct spring pre-load that sets the slip torque, and keeping the friction plates in a condition that provides consistent friction coefficient.
A slip clutch that never slips — even under severe overload conditions — has its spring pre-load set too tight or has friction plates that are stuck together from corrosion (a common problem after off-season storage). A stuck clutch provides no protection — it transfers every overload torque spike directly to the gearbox. Test pre-season by operating at idle PTO and briefly blocking the protected shaft by hand (safely) — a correctly set slip clutch should slip with modest hand force against the shaft.
A slip clutch with loose spring compression slips too easily — tripping during normal operation under crop load rather than only under overload events. This produces the characteristic symptom of intermittent slipping during heavy windrows: the baler slows or stops forwarding crop without a rock or wire cause. Tighten the compression spring to the torque specification in the operator manual. Check spring length against the new-spring specification — a spring that has taken a permanent set (shorter than nominal) produces lower than specified friction force regardless of adjustment position.
Field Stocking Strategy: How Many Shear Bolts to Carry

Running out of shear bolt spares in the middle of a cutting stops baling entirely until you can drive to a dealer or farm store — a delay that can cost 2–4 hours of prime drying window. The correct field stocking strategy is to carry more shear bolts than you expect to use, organized by position so you grab the right bolt for the right location without searching through a mixed assortment.
Store shear bolts in labeled zip-lock bags by position in the tractor cab — not loose in a toolbox where they mix. The five seconds it takes to grab the labeled bag prevents installing the wrong bolt at the wrong position under field-time pressure.
Pre-season consumables inventory — including shear bolts alongside tines, net wrap knives, and wear items — with full specification reference is in the Handleiding voor onderdelen en slijtagegevoelige items van ronde balenpersen. When shear bolt failures occur repeatedly at the same position, indicating a deeper mechanical issue rather than incidental rock contact, the diagnostic process is in the Handleiding voor het oplossen van problemen met ronde balenpersen. PTO driveline torque specifications and gearbox ratings that define the maximum torque the shear bolt must protect against are in Specificaties van componenten voor landbouwversnellingsbakken en aftakas-aandrijflijnen.
Repeated Shear Bolt Failures: When It’s More Than Bad Luck
One or two shear bolt failures per season at a given position is normal incidental overload — rocks, wire, dense crop slugs. Three or more failures at the same position in the same season, or failures that occur without apparent cause in normal crop conditions, indicate a mechanical problem that is creating chronic overload at that drive point. Continuing to replace bolts without investigating the root cause eventually damages the component the bolt is protecting.
Investigate: rock-heavy field (expected — no action needed beyond stocking more spares); pickup tines bent to angles that cause crop to jam at the tine-to-stripper gap rather than flow through (bent tines create repeated slug loads); stripper fingers worn so wide they allow crop to wrap the pickup drum; or the shear bolt has been replaced with a stronger-than-specified bolt at some prior repair that is only now failing because a normally manageable overload has become repetitive.
This is a more serious pattern — the main drive position should almost never fail except in severe overload events. Repeated main drive shear bolt failures indicate: a bearing failure somewhere in the drive path that creates chronic high resistance (listen for bearing noise before the next bolt is installed); a crop wrap around the main shaft that isn’t visible without inspection; or a significant mismatch between tractor PTO speed and baler specification (baling at 1000 RPM when the baler requires 540 RPM produces approximately 85% over-speed — dramatically increased torque spikes).
If bolts are failing regularly without rock contact or obvious mechanical cause, the most likely explanation is that the replacement bolts are not the correct specification — either they are understrength (failing too easily under normal crop loads) or there is a genuine mechanical issue that is not yet producing other symptoms. Confirm bolt specification against the operator manual. If specification is correct, inspect the protected component’s bearings, shaft straightness, and mounting hardware for developing problems before the next bolt is installed.
Shear Bolt Replacement Procedure: Getting Back in the Field Safely
Never replace a shear bolt with the tractor PTO engaged or the engine running. The bolt failed because a mechanical resistance still exists at that drive point — engaging the PTO with the new bolt installed before clearing the obstruction causes the new bolt to immediately fail or the operator to be injured by sudden rotation of the newly powered component. Always: disengage PTO, turn off engine, clear the obstruction (remove the rock, wire, or crop wrap from the protected drive component), then install the replacement bolt.
Disengage PTO and shut down the engine completely. Wait for all rotation to stop before approaching the failure point.
Identify and remove the obstruction. Look for the rock, wire, or crop wad that caused the failure. If nothing is visible, rotate the failed shaft by hand to feel for resistance — a bearing failure will produce roughness or catching even without an external obstruction.
Remove both shear bolt halves completely. A common mistake is leaving a remnant of the fractured bolt in the hole — the next bolt then seats on the remnant at a misaligned angle and fails at a lower torque than designed. Use a punch to drive out any remnant fragment before installing the new bolt.
Install the correct replacement bolt from your labeled spare bag. Thread hand-tight, then tighten to snug (not torqued to specification — shear bolts are intentionally installed without high preload so the reduced-neck section fractures cleanly in shear).
Rotate the shaft by hand through one full revolution before starting the tractor — confirms no remaining obstruction and that the shaft turns freely with the new bolt installed.
Shear Bolt and Slip Clutch FAQs
Get Shear Bolt Specifications for Every Position on Your Baler
Tell us your baler model and which position is experiencing repeated failures. We provide the correct bolt specification for each position and help identify whether the root cause is a mechanical problem rather than incidental field hazards.
Redacteur: Cxm


