Troubleshooting Guide · All 9YF Models · Drive Protection System
Square Baler Shear Bolt Keeps Shearing: Causes and Fixes
A shear bolt that fails once is doing its job — protecting the drive train from an overload event. A shear bolt that keeps failing on every third or fourth bale, or multiple times in the same session, is telling you something is wrong beyond a normal load spike. This guide covers the causes of repeated shearing, the critical importance of using the correct bolt specification, and how to protect the drive without losing sessions to repeated failures.
Covers: what the shear bolt protects · correct grade and size · field debris · PTO engagement under load · shredder model specs · field spare kit
What the Shear Bolt Is Protecting and Why Its Failure Specification Matters
The shear bolt on a square baler is a precision mechanical fuse, not simply a fastener. It is positioned in the drive path between the PTO input shaft and the main flywheel or gearbox to provide one specific protection: when the baler mechanism encounters an overload event — a stone, a severe blockage, a locked plunger — the shear bolt fails at a predetermined load before the load can damage the PTO shaft, gearbox housing, connecting rod or crankshaft.
This protection path matters because the components downstream of the shear bolt — the crankshaft, connecting rod, gearbox and PTO coupling — are far more expensive to repair or replace than a shear bolt. A crankshaft replacement in a square baler costs many times the annual shear bolt budget. The shear bolt is an intentionally weak point, and its failure specification — the load at which it must shear — is calculated to be below the failure load of every downstream component.
Critical Rule: Never Substitute a Stronger Bolt
Fitting a higher-grade bolt — for example, replacing the specified Grade 4.6 shear bolt with a Grade 8.8 structural bolt — eliminates the protection the shear bolt provides. A Grade 8.8 bolt will not shear at the load that would destroy the crankshaft. In the next overload event, the crankshaft will bend, the gearbox will crack or the PTO shaft will fail instead. The financial consequence of substituting a stronger bolt is not prevented downtime — it is transferred catastrophic component failure. Always use the exact grade, diameter and length specified in the operator manual for your model.
Correct Shear Bolt Specification by Model
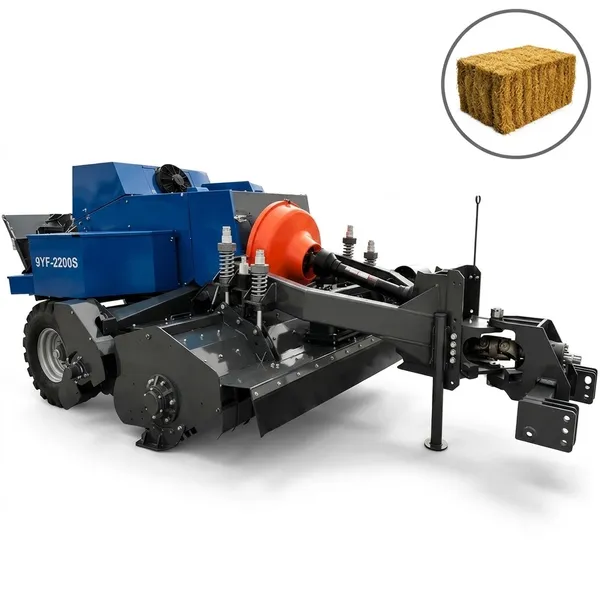
| Model Series |
Bolt Grade |
Diameter |
Key Note |
| 9YF-1700 / 1900 / 2200 (standard) |
4.6 or per manual |
Per model spec |
Spring-tooth pickup only. Standard plunger load profile. Use operator manual exact specification. |
| 9YF-2200S (single shredder) |
Higher rating |
Larger diameter |
Shredder adds torque peaks — different spec from standard models. Confirm with operator manual. |
| 9YFS-2.2 (dual shredder + fan) |
Highest rating |
Model-specific |
Dual shredder produces highest peak load profile. Do not use standard model bolt in shredder models. |
Always verify shear bolt specification from your model operator manual — never carry over specification from a different model. Mixing specifications is the most common source of both nuisance shearing and under-protection events.
The 7 Causes of Repeated Shear Bolt Failure
1
Wrong Bolt Grade — Too Soft for Normal Operating Load
Oorzaak: A replacement bolt of lower grade than specified will shear at normal operating loads — not just overload events. This produces repeated shearing after every few bales without any apparent cause in the field or crop conditions. The bolt has been correctly protecting against loads that exceed its (too-low) shear threshold, but the threshold is below the normal operating load of the mechanism.
Repareren: Replace with the exact specification bolt from the operator manual. If you no longer have the manual, contact us with your model number and serial number for the correct specification. Never use a general hardware store bolt — shear bolts are produced to precise shear-load tolerances that standard hardware fasteners do not meet.
2
Hard Field Debris — Stones, Wire, Metal Fragments
Oorzaak: The most common legitimate cause of shear bolt failure is hard debris ingestion — a stone, metal stake fragment, irrigation fitting piece or machine part end that was on the ground surface and was picked up by the tines. The debris enters the pickup and reaches the plunger or feeder mechanism, creating an instantaneous overload when it contacts a rigid surface. The shear bolt correctly protects the drive train in this event.
Prevention: Walk sections of the field you will bale and remove visible debris before the baling pass. In fields with known debris risk — areas near gates, water points, machinery storage — reduce forward speed and pickup height to the minimum needed to recover the windrow, reducing the energy with which debris is carried into the mechanism. Install a stone guard if available for your model. Carry a minimum of 10 spare shear bolts of the correct specification in the field kit.
3
Engaging PTO With the Baler Already Blocked or Under Load
Oorzaak: Engaging the PTO when the bale chamber is still partially filled or when a blockage has not been completely cleared creates an instant overload — the plunger attempts to compress the already-compressed material in the chamber. The startup torque spike shears the bolt immediately. This is particularly common when operators attempt to restart after a blockage without fully clearing the inlet and chamber before re-engaging.
Repareren: Always confirm the bale chamber and inlet are fully clear before engaging the PTO after any blockage. Back the tractor 1–2 metres after clearing to reduce any remaining compression load on the last-formed bale in the chamber. Engage PTO only at low tractor idle speed — not at operating speed — then advance to operating speed once the mechanism is rotating freely.
4
Blockage Not Fully Cleared — Residual Compression
Oorzaak: After clearing a blockage, material that was not fully removed remains in a compressed state inside the inlet or chamber. When the plunger restarts, it immediately encounters this residual compressed material and shears the bolt again. The operator then clears what appears to be a second blockage, replaces the shear bolt and has the same failure — because the partial clearance on the first attempt left compressed material in the mechanism that the second restart cannot push through.
Repareren: After clearing any blockage, physically look into the chamber from the inlet access point and confirm it is empty — not just mostly empty. A palm-sized mass of compressed material left at the back of the chamber is sufficient to shear the bolt on restart. Back the tractor before re-engaging to release any remaining spring-back pressure. Only engage PTO when the chamber is confirmed visually clear.
5
Shear Bolt Hole Worn Oval — Incorrect Shear Point Geometry
Oorzaak: Each time a shear bolt fails, the shear point — the bore in the drive hub and shaft — experiences some deformation. Over many shearing cycles, the bore can elongate from a round hole to an oval or irregular shape. A bolt in an oval bore does not shear at the designed load — it shears earlier because the bearing area is reduced and the stress concentration at the bore edge increases the effective shear stress on the bolt cross-section.
Repareren: Inspect the shear bolt bore in both the drive hub and shaft after every 3–5 shearing events. A bore that is visibly oval or has a step or shoulder inside it requires the hub or shaft component to be replaced — a worn bore cannot be corrected by fitting a larger bolt. Continuing with a worn bore produces repeated nuisance shearing even with the correct specification bolt, because the effective shear load decreases as the bore geometry degrades.
6
Drive Chain Tightness — Transmission of Torque Spikes
Oorzaak: An over-tight main drive chain transmits load spikes from the mechanism back to the PTO shaft with less damping than a correctly tensioned chain. The chain operates as a rigid drive member rather than with slight elasticity — every mechanism impact spike (plunger striking a dense bale layer or a debris piece) is transmitted at full magnitude to the shear bolt, rather than being partially absorbed by chain deflection.
Repareren: Verify drive chain tension against the operator manual specification — typically 10–15mm of deflection under moderate hand pressure at mid-span. A chain with less deflection than specified is over-tight. Loosen the chain tensioner to bring it within specification. Also check chain wear — a stretched chain may appear correctly tensioned at mid-span but has reduced engagement depth on sprocket teeth, which creates impact loading during each engagement cycle.
7
Using Standard Model Bolt in a Shredder Model
Oorzaak: The shredder mechanism on the 9YF-2200S and 9YFS-2.2 produces peak torque loads significantly higher than the standard plunger-only drive, because the hammer-claw and shredding elements strike crop material at high speed in addition to the plunger compression load. A shear bolt specified for the standard 9YF-2200 will shear under the normal operating loads of the shredder model — producing repeated failures that look like a persistent problem but are simply a bolt specification mismatch.
Repareren: Confirm you are using the shear bolt specified in the operator manual for your specific model number — not a bolt from a different model in the same range. If you have recently changed models or have multiple machines and mixed spare parts between them, verify each machine has the correct spare bolt set for its own model specification before the next baling session.
Slip Clutch as an Alternative to Shear Bolt Protection

A slip clutch — a torque-limiting friction clutch in the PTO drive path — provides overload protection that resets automatically rather than requiring a shear bolt replacement. When the drive train encounters an overload, the clutch slips momentarily and then re-engages when the overload passes. No field stop is needed, no replacement part is required.
Slip clutches are available as an aftermarket addition on many square baler models and are fitted as standard on some higher-specification machines. The trade-off: a slip clutch requires periodic adjustment and eventual friction disc replacement as the friction material wears. A clutch that is set too lightly — below the normal operating load — will slip on every bale cycle, slowing the mechanism and producing density inconsistency. A clutch set too tightly provides insufficient protection.
For operations that experience more than 3–4 legitimate shear bolt failures per season from field debris — common in rocky soils, post-harvest stover fields or fields adjacent to irrigation infrastructure — a slip clutch upgrade is worth the investment and significantly reduces session interruptions. For operations with minimal debris exposure, the standard shear bolt system is adequate and simpler to maintain.
Field Spare Kit: What to Carry

Shear Bolts (minimum 10)
Correct grade and size for your specific model. Store in a sealed bag or small tin to prevent corrosion — a corroded bolt may not shear at the specified load.
Correct Spanner
The nut securing the shear bolt may require a specific size that is not in a standard set. Identify and carry this size before the season starts — searching for the right tool mid-field wastes time.
Drive Chain Link
A debris event that shears the bolt can sometimes also break the drive chain. Carry one joining link of the correct chain pitch as insurance — a broken chain without a spare link ends the session.
Operator Manual Reference Page
Photograph the shear bolt specification page and store it on your phone. When a helper fits a bolt in the field, they can confirm the exact specification without returning to the workshop for the manual.
Drive Train and PTO Specifications
The PTO driveshaft specification — particularly the CV joint angle and slip clutch rating if fitted — must be matched to the shear bolt protection system. An incorrectly sized driveshaft can transmit torque spikes that exceed the protection level the shear bolt is designed to allow: Maattabel voor aftakas-aandrijfassen en homokinetische koppelingen.
Frequently Asked Questions — Square Baler Shear Bolt
How do I know if the shear bolt is shearing from normal crop loads or from a machine fault?+
Normal crop loads — even heavy alfalfa at maximum density — should not shear a correctly specified bolt. If the bolt is shearing without any apparent field debris event or blockage, the cause is almost always: (a) wrong bolt specification fitted, (b) worn bore hole that has reduced the effective shear load, (c) PTO engagement under load after a blockage, or (d) over-tight drive chain transmitting load spikes. The simplest diagnostic test: fit the correct specification bolt and bale 20 bales in a cleared, debris-free section of the field at normal operating speed and density. If no shearing occurs, the problem is debris or PTO engagement procedure. If shearing occurs on normal bales, the problem is bolt specification, bore wear or chain tension.
Can I use a regular bolt from the hardware store as a shear bolt replacement?+
No — a general hardware store bolt is not suitable as a shear bolt replacement for two reasons. First: hardware store bolts of a given grade have manufacturing tolerances that mean the actual shear load can vary significantly from the nominal value for that grade. Shear bolts are produced to tighter tolerances specifically to ensure the actual shear load closely matches the design specification. Second: a stronger-than-specified bolt will not protect the drive train — it will transmit overload events to the downstream components until something more expensive fails. Even if a hardware bolt is the same diameter and appears the same grade, the risk of a mismatch is too high to justify the minor cost saving. Order the correct specification shear bolt from the manufacturer or dealer and carry sufficient spares that you are never tempted to substitute in the field.
After a shear bolt failure, should I check anything before restarting?+
After replacing the shear bolt, check three things before engaging the PTO. First: the bale chamber — confirm it is fully clear of any blocked material that caused the overload event. Second: the drive chain — inspect for a broken link, since the load spike that sheared the bolt can also break a chain link in the same event. A broken chain will become apparent immediately on restart, but it is better to identify it before re-engaging. Third: where you stopped in the field — did you stop near a known debris area, a field edge, or a section with irrigation infrastructure? If the bolt shearing was debris-caused, consider whether the same debris may still be in the windrow ahead. Walk 10–20 metres ahead and check the windrow visually before restarting if a debris source is suspected.
How many shear bolts should I carry per baling session?+
For a standard hay baling session in a clean field with minimal debris risk, carry a minimum of 5 shear bolts. For sessions in post-harvest crop residue fields, rocky soils or fields with known debris sources, carry 10–15. The cost of carrying extra is minimal; the cost of ending a session early because you ran out of spare bolts — during a narrow weather window — is significant. Shear bolts are small, inexpensive and worth carrying in excess. Store them in a small sealed container with a label showing the model specification — this prevents accidentally mixing bolts of different specifications from different machines in the same workshop.
My shear bolt shears immediately when I engage the PTO after a stop. What is wrong?+
Immediate shear on PTO engagement — before the machine has processed a single bale — almost always means there is material remaining in the chamber under compression from the previous stop. The plunger is attempting to compress already-compressed material in its first stroke, which creates an overload that exceeds the shear bolt threshold immediately. The fix: after disengaging the PTO and waiting for complete stop, access the chamber from the inlet and physically remove all material — even material that appears minor. Back the tractor 1–2 metres to release any springback compression on the last bale end in the chamber. Only re-engage PTO once you can confirm visually that the chamber is completely empty. If shearing continues after confirmed clearing, inspect the bore hole in the drive hub for oval wear — a damaged bore shears the bolt at lower loads than specified, including the startup torque spike that is normal when engaging from rest.
Is there any way to reduce shear bolt events without compromising protection?+
Yes — several practices reduce the frequency of legitimate shear events without reducing protection. Walking the field before baling and removing visible debris is the highest-impact single action in debris-prone fields. Reducing forward speed in known debris areas (near field edges, water points and gates) reduces the kinetic energy with which debris is carried into the pickup mechanism. Maintaining correct drive chain tension — not over-tight — reduces the severity of load spikes transmitted from the mechanism. Engaging the PTO at low idle speed rather than at operating RPM reduces the startup torque spike. For operations with chronic debris exposure, fitting a slip clutch provides automatic resetting protection without field stops. These practices collectively reduce legitimate shear events by 60–80% for most operations — the remaining events represent genuine overloads that the protection system is correctly responding to.
How do I know what grade shear bolt my baler needs if I no longer have the operator manual?+
Contact the manufacturer or your dealer with the machine model number and serial number — both are on the machine identification plate, typically located on the main frame near the tongue hitch. The serial number identifies the exact production variant and the correct shear bolt specification. Do not attempt to determine the specification by testing different bolt grades in the field — the risk of under-protection from too-soft a bolt or over-protection from too-strong a bolt makes this approach unacceptable. The correct specification is a documented engineering calculation; it is not something to estimate. Requesting a replacement operator manual page for the drive protection specification is the correct approach when the original manual is unavailable. Contact us with your model and serial number and we will provide the shear bolt specification for your machine.
Does baling at higher density increase the risk of shear bolt failure?+
A correctly specified shear bolt for the 9YF model should not shear from maximum density baling in standard hay or straw crops — the bolt is specified to protect the drive train at the maximum load the mechanism produces in normal operation, which includes the peak compression load at maximum density setting. However, two situations can cause density-related shear events. First: baling an unusually dense windrow section at maximum density setting when the tractor is at the edge of its PTO output — the combined high-density compression load plus low-PTO-reserve can produce a momentary load spike above the shear threshold. Second: very dry, over-cured stems that resist compression more than green stems — these can briefly spike the plunger load higher than typical at the same density setting. In both cases the correct response is to reduce forward speed in the dense section or reduce the density setting slightly rather than replacing the shear bolt with a stronger grade.
Order the Correct Shear Bolt Specification for Your 9YF Model
For shear bolt specification confirmation, spare parts ordering or technical support on repeated shearing events — contact us with your model and serial number. All 9YF-serie shear bolt specifications and drive train technical data are available through our technical support service.
America Ever-Power Forage Baler Equipment INC. · 1401 21st ST STE R, Sacramento, CA 95811
Redacteur: Cxm