
Où se trouvent les boîtes de vitesses et à quoi elles servent
La transmission d'une faucheuse à disques comprend généralement trois ou quatre boîtes de vitesses distinctes, chacune supportant un type de charge différent et fonctionnant à un rapport de vitesse différent. Les utilisateurs qui considèrent la « boîte de vitesses de la faucheuse » comme une seule unité négligent souvent certaines de ces boîtes, car elles sont moins visibles ou moins intuitivement associées à l'usure. Chaque boîte de vitesses de la faucheuse mérite une inspection et un entretien individuels.
Reçoit le signal de la prise de force (généralement 540 tr/min) et le convertit en la vitesse de rotation plus élevée requise par l'arbre d'entraînement de la barre de coupe. Comporte le plus grand train d'engrenages coniques de la faucheuse. Couple maximal ; risque de surchauffe très élevé en cas de niveau d'huile bas.
Un réducteur par disque (généralement 3 à 6 sur une faucheuse de largeur standard). Chaque réducteur contient un petit train d'engrenages coniques qui entraîne un disque à partir de l'arbre transversal. Il tourne à la vitesse de rotation des lames (environ 3 000 tr/min au niveau de l'arbre du disque). Vitesse de rotation maximale ; sensibilité accrue à la contamination de l'huile par les débris végétaux pénétrant par les joints.
Sur les faucheuses-conditionneuses, une boîte de vitesses distincte entraîne les rouleaux de conditionnement ou le conditionneur à fléaux à un rapport de vitesse différent de celui de la barre de disques. Souvent négligée lors de l'entretien courant car située derrière la barre de disques, elle est moins accessible. Fonctionnant à vitesse intermédiaire, elle supporte une charge moindre que les boîtes de vitesses des disques, mais est tout aussi sensible à la lubrification.
Huile pour engrenages coniques : l’élément d’entretien le plus négligé des tondeuses à disques
Lors d'enquêtes sur les pannes de faucheuses à disques présentées aux réunions de service des concessionnaires agricoles, un niveau d'huile insuffisant ou une huile dégradée sont identifiés comme la cause principale de la défaillance de la boîte de vitesses dans 45 à 60 % des cas. Le mode de défaillance est toujours le même : une huile jamais changée ni contrôlée a entraîné une accumulation de contaminants ; l'huile contaminée a perdu son adhérence ; les surfaces des dents des engrenages coniques sont entrées en contact métal sur métal ; les dents se sont progressivement piquées puis ont fini par s'écailler ; la boîte de vitesses s'est grippée ou a perdu son intégrité structurelle. Le remplacement d'une boîte de vitesses coûte entre 1 TP6T150 et 1 TP6T400 par unité. Une vidange d'huile coûte entre 1 TP6T8 et 1 TP6T15 en matériaux.
| emplacement de la boîte de vitesses | Première vidange d'huile | Intervalle subséquent | Volume de remplissage typique | Procédure de vérification du niveau |
|---|---|---|---|---|
| Boîte de vitesses d'entrée principale | 50 heures (rodage de la machine neuve) | Toutes les 200 heures ou annuellement | 0,5 à 2 litres | Retirez le bouchon de niveau (généralement situé sur le côté) ; le niveau d’huile doit arriver au niveau du bouchon ou juste en dessous. |
| boîtes de vitesses à disque individuelles | 50 heures (rodage de la machine neuve) | Toutes les 200 heures ou annuellement | 50 à 150 mL par disque | Accès par le capuchon de montage du disque ; faible volume — même 20 ml en moins représentent une valeur significative par rapport à la capacité totale |
| boîte de vitesses de l'unité de conditionnement | 50 heures (rodage de la machine neuve) | Toutes les 200 heures ou annuellement | 0,3 à 0,8 litres | Bouchon de niveau sur le carter de boîte de vitesses du conditionneur (séparé des boîtes de vitesses des barres de disques) |
Embrayage à friction : inspection, grippage par la rouille et réglage de la tension du ressort
L'arbre d'entrée de la prise de force d'une faucheuse à disques comprend un embrayage à friction, un dispositif de limitation de couple qui patine (découple momentanément la transmission) lorsque le système de coupe rencontre une surcharge, par exemple une pierre, un fragment de poteau de clôture ou un andain dense. L'embrayage à friction remplit la même fonction de protection que le boulon de cisaillement d'une presse à balles rondes : il absorbe le choc de surcharge afin de protéger les réducteurs des disques et l'arbre de prise de force contre les dommages causés par les impacts.
Contrairement à un boulon de cisaillement, le limiteur de couple est réutilisable : il patine en cas de surcharge et se réenclenche lorsque la charge revient à la normale. C'est un avantage, mais son entretien est souvent superflu. Un limiteur de couple grippé par la corrosion n'offre aucune protection, ce qui équivaut à l'absence de dispositif de protection contre les surcharges. La cause la plus fréquente de défaillance d'un limiteur de couple n'est pas l'usure mécanique, mais le grippage par la rouille dû à un stockage saisonnier sans utilisation.
- Après avoir déconnecté l'arbre de prise de force, essayez de faire tourner manuellement la bride d'entrée de l'embrayage par rapport à la bride de sortie. Un embrayage à friction fonctionnant correctement patinera lorsque vous appliquerez un couple de 30 à 50 lb-pi (14 à 23 kg) à la main sur le diamètre extérieur de la bride.
- Si l'embrayage ne patine pas du tout lorsqu'on actionne la pédale à la main, il est grippé. N'accélérez pas tant qu'il n'est pas dégrippé ; un embrayage grippé transmet la totalité du choc de surcharge directement à la boîte de vitesses.
- Pour dégripper un embrayage grippé : appliquez de l’huile pénétrante sur toutes les surfaces de contact des disques de friction et laissez agir 4 heures. Actionnez manuellement en tapotant légèrement et alternativement sur les bords des disques d’embrayage avec un marteau tout en les faisant tourner. Cette méthode élimine la rouille superficielle sans endommager les surfaces de friction.
- Après le desserrage, vérifiez que le couple de glissement est conforme aux spécifications en appliquant une clé dynamométrique sur la bride d'entrée, la sortie étant verrouillée.
Le réglage des embrayages à friction agricoles s'effectue par précharge de ressorts – une série de ressorts à disque ou hélicoïdaux qui appliquent une force de serrage sur les disques de friction. Une précharge correcte produit le couple de glissement adéquat. Un réglage excessif (précharge trop importante) entraîne un couple de glissement supérieur à la normale avant le patinage, réduisant ainsi la protection contre les surcharges. À l'inverse, un réglage insuffisant provoque le patinage lors des opérations de coupe normales, diminuant le rendement de la transmission.
Comment vérifier : Mesurez l'écart entre les faces du logement du ressort d'embrayage. La valeur correcte de cet écart est indiquée dans le manuel d'utilisation (généralement de 0,5 à 2 mm selon le modèle d'embrayage). Cet écart correspond à la précharge spécifiée du ressort. Utilisez les écrous de réglage des boulons de fixation pour ajuster l'écart, puis vérifiez le comportement de l'embrayage en effectuant un léger essai manuel.
Couple de serrage des boulons de lame : un élément de maintenance critique pour la sécurité
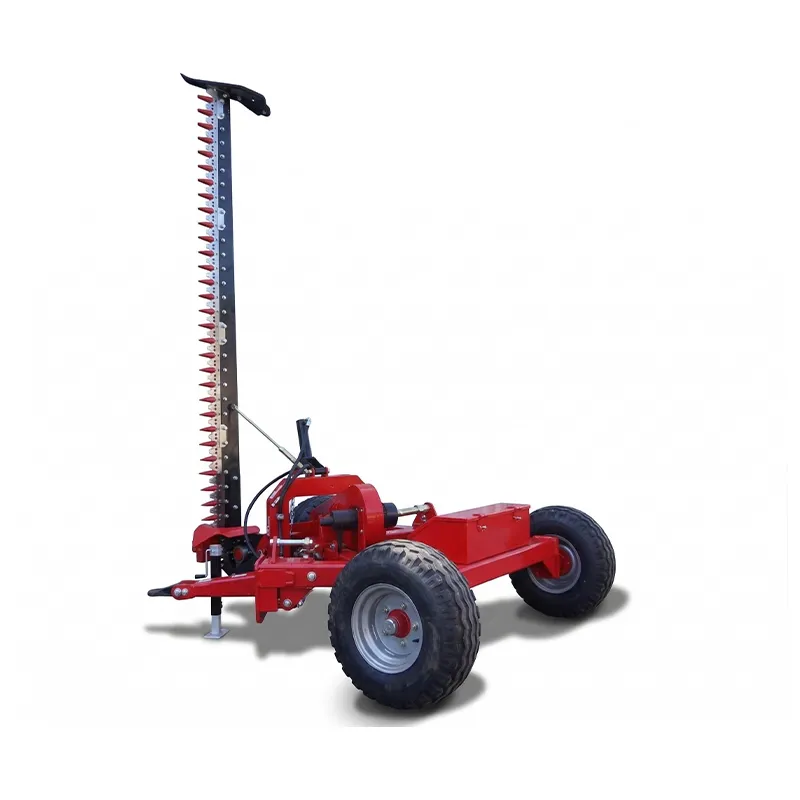
Une lame de faucheuse à disques qui se détache de son support devient un projectile incontrôlable : sa vitesse de pointe de 160 à 240 km/h lui confère une énergie cinétique suffisante pour traverser un mur de grange à 50 mètres. Aux États-Unis, les défaillances des boulons de lame dues à un serrage insuffisant, un resserrage inadéquat ou à des spécifications incorrectes sont une cause bien documentée d'accidents graves de faucheuses à disques. Il ne s'agit pas d'une simple recommandation : c'est l'opération d'entretien de la faucheuse à disques qui doit être absolument essentielle.
Inspection de la barre de disque : équilibrage, usure de la lame et dommages causés par les impacts
Chaque disque de la tondeuse doit être équilibré dynamiquement : les lames qui y sont montées doivent avoir un poids identique, à une tolérance très serrée près. L’usure des lames et les impacts de pierres déséquilibrent le disque en modifiant la répartition des masses d’une lame par rapport à l’autre. Un disque déséquilibré à 3 000 tr/min génère des vibrations qui accélèrent l’usure des roulements dans le réducteur du disque, desserrent les boulons des lames et créent une résonance audible qui nécessite une inspection immédiate.
Remplacez toujours les pales par paire sur chaque disque. Remplacer une seule pale d'une paire entraîne un déséquilibre de masse entre les pales. La différence de poids nécessaire pour provoquer des vibrations problématiques à la vitesse du disque est inférieure à 5 grammes, soit environ le poids d'une pièce de monnaie. Utilisez si possible des pales de remplacement provenant du même lot de production, ou pesez les deux pales avant l'installation et choisissez des paires dont l'écart de poids est inférieur à 3 grammes.
Les lames de faucheuse à disque standard sont remplaçables lorsque : une réduction de longueur visible de plus de 15 mm par rapport à la longueur d'origine (mesure prise du centre du trou de pivot à l'extrémité de la lame) ; une encoche dans le tranchant plus profonde que 5 mm qui ne peut pas être éliminée par affûtage ; des fissures de contrainte visibles au niveau du trou de pivot de la lame (retrait immédiat — une lame présentant une fissure au niveau du trou de pivot cassera sous la charge centrifuge en fonctionnement).
Après tout impact avec une pierre ou un objet métallique, arrêtez immédiatement la machine et inspectez toutes les lames du disque affecté ainsi que celles des disques adjacents. Un impact de pierre déforme la géométrie de la lame et peut fissurer la zone de pivot sans que cela soit visible à première vue. Passez votre doigt sur toute la surface de la lame : une fissure se présente comme une arête vive traversant la lame en biais par rapport à sa longueur. Toute lame fissurée est immédiatement inutilisable et représente un danger.
Protection de l'arbre de prise de force et de l'entrée : protections, joints de cardan et angles d'entraînement
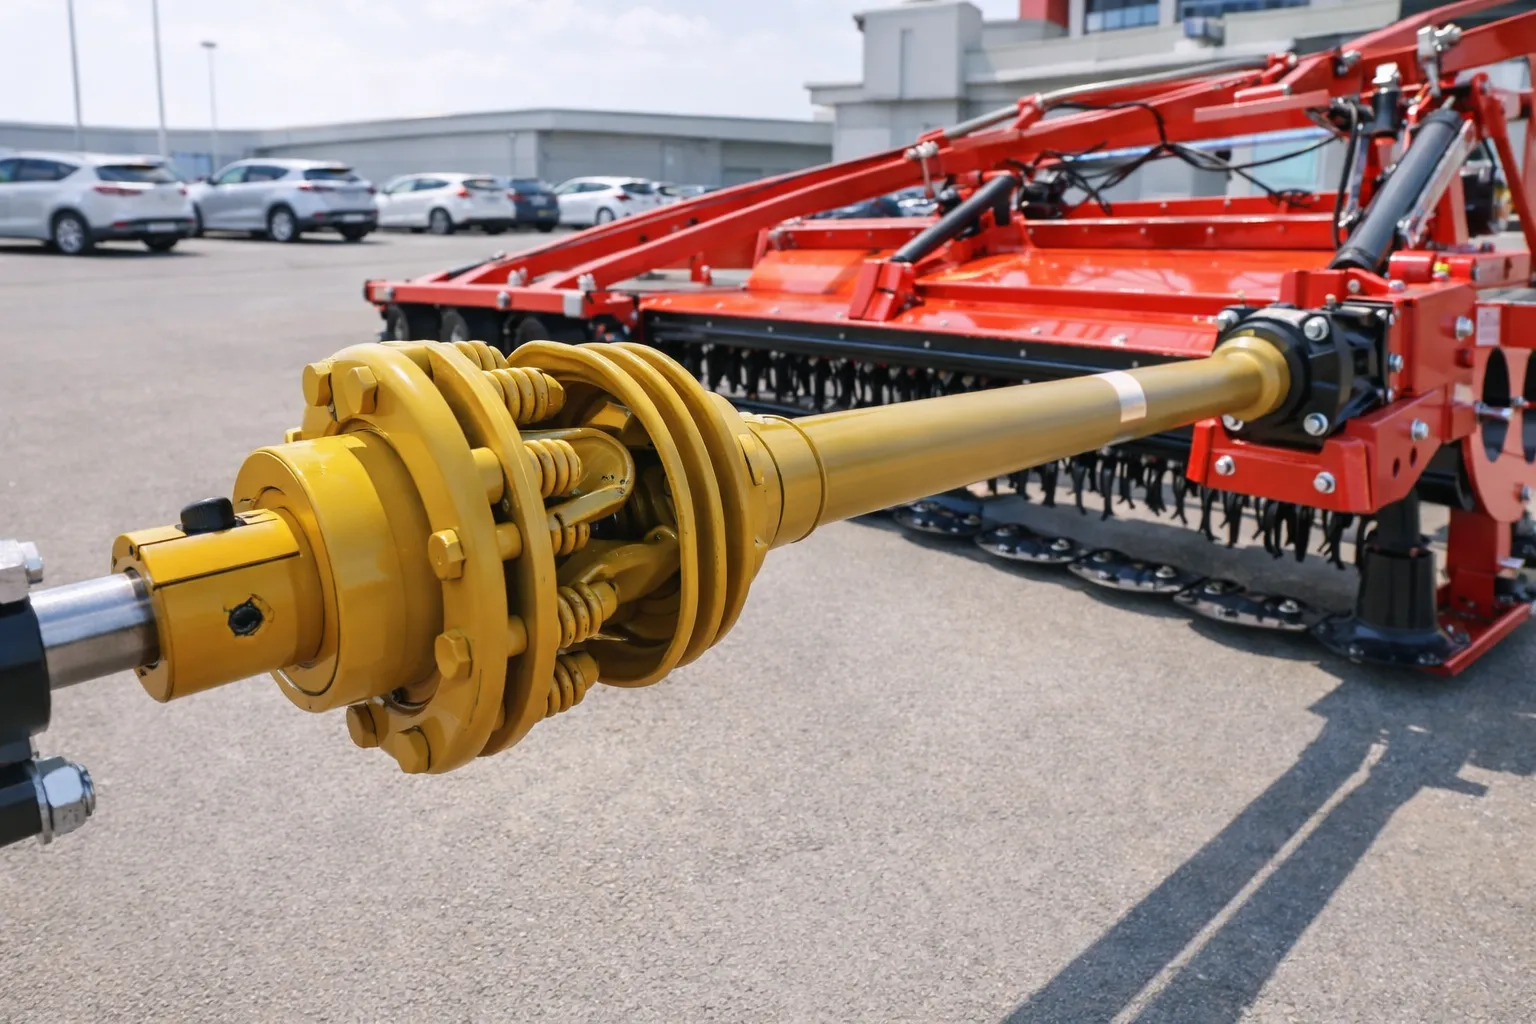
L'arbre de prise de force reliant le tracteur à la boîte de vitesses d'entrée de la faucheuse fonctionne à 540 tr/min et transmet la pleine charge de coupe par l'intermédiaire de deux joints de cardan. Les arbres de prise de force des faucheuses à disques sont exposés à un risque d'impact plus élevé que la plupart des arbres de prise de force des équipements agricoles : l'action de coupe et la vitesse de rotation élevée de la barre de disque génèrent de fortes vibrations qui fatiguent les roulements des joints de cardan et peuvent déloger les protections de l'arbre de prise de force. Pour connaître l'ensemble des spécifications relatives aux couples admissibles de l'arbre de prise de force et à la durée de vie des joints de cardan en fonction du diamètre de l'arbre, veuillez consulter le document suivant : spécifications des composants de la boîte de vitesses agricole et de la prise de force fournir les données techniques pertinentes.
Après avoir déconnecté l'arbre de prise de force, saisissez-le et essayez de le déplacer radialement au niveau des joints de cardan. Un jeu radial supérieur à 1 mm indique un roulement de joint de cardan usé. Des joints de cardan usés provoquent des vibrations qui se transmettent à la boîte de vitesses d'entrée de la tondeuse sous forme de pics de charge cycliques, accélérant ainsi l'usure des roulements de l'arbre d'entrée. Remplacez les cuvettes de roulement de joint de cardan dès les premiers signes de jeu ; les kits de traverse et de roulement d'arbre de prise de force sont des composants standardisés disponibles chez tout fournisseur de matériel agricole au prix de $15 à $35 par joint de cardan.
Les joints de cardan de la prise de force ont un angle de fonctionnement maximal : généralement 15° pour les joints standard et 25° pour les joints à grand angle. Un fonctionnement au-delà de cet angle entraîne une variation de vitesse à chaque tour (la vitesse de sortie de l'arbre accélère et ralentit cycliquement), ce qui génère des vibrations de torsion dans la boîte de vitesses. Pour les faucheuses à disques repliables pour le transport, assurez-vous que l'arbre de prise de force est déconnecté avant le repliage ; replier la machine avec la prise de force connectée peut amener le joint de cardan au-delà de sa limite d'angle de fonctionnement, endommageant ainsi irrémédiablement le joint.
Concernant les implications du choix entre une faucheuse à disques et une faucheuse à barre de coupe sur la qualité de tonte — notamment le système de coupe qui engendre le moins de frais d'entretien de la transmission —, Comparaison entre une faucheuse à disques et une faucheuse à barre de coupe Ce document couvre l'ensemble du processus de décision relatif à l'équipement. La vitesse de tonte, l'intensité du conditionnement et les facteurs liés à l'état du terrain qui déterminent la charge supportée par les réducteurs à disques par heure de fonctionnement sont analysés dans le document. guide de tonte et d'entretien.
Calendrier annuel d'entretien : Que faire et quand ?

| Article de service | Intervalle | Procédure | Conséquence du non-respect des règles |
|---|---|---|---|
| Vidange complète de l'huile de boîte de vitesses | 200 heures par an | Vidangez toutes les boîtes de vitesses à chaud ; rincez-les à l’huile propre avant de les remplir ; utilisez une huile pour engrenages de la qualité spécifiée par le constructeur. | Panne de boîte de vitesses en 1 à 3 saisons |
| test d'activation de l'embrayage à glissement | Pré-saison annuelle | Test de glissement manuel ; libérer si grippé ; vérifier l’écartement du ressort | Absence de protection contre les surcharges ; dommages catastrophiques à la boîte de vitesses dès le premier impact avec une pierre. |
| Remplacement de tous les boulons de lame | Chaque changement de lame | Utiliser des boulons neufs conformes aux spécifications du fabricant d'origine ; appliquer une clé dynamométrique au couple prescrit ; resserrer après 2 heures. | Séparation des lames — grave danger pour la sécurité |
| Inspection des joints de cardan | Pré-saison annuelle | Test de jeu radial ; remplacer les cuvettes de roulement si le jeu est supérieur à 1 mm. | Usure accélérée des roulements de boîte de vitesses par les vibrations ; défaillance éventuelle du joint de cardan |
| Tous les graisseurs | Tonte toutes les 8 heures | Graissez tous les pivots des disques, les pivots des patins et les points d'articulation de la barre de coupe. | Usure des pivots ; fréquence d’entretien accrue |
| Inspection et rotation des lames | Toutes les 50 heures / après un impact de roche | Inspection visuelle pour détecter les fissures, le raccourcissement et l'état des lames ; rotation des lames usées si elles sont réversibles. | Baisse de la qualité de coupe ; vibrations déséquilibrées du disque |
FAQ sur l'entretien des faucheuses à disques
Obtenez les spécifications de l'huile de boîte de vitesses et la documentation d'entretien pour votre tondeuse.
Les spécifications de l'huile, les couples de serrage des boulons de lame et les jeux de réglage de l'embrayage à friction sont consignés pour chaque tondeuse avant la livraison. Notre équipe assure un suivi pour toute question relative à l'entretien, et ce, pendant toute la durée de vie de la machine.
Éditeur : Cxm


