
What the Pre-Cut System Does — and What It Costs You to Run It Wrong
The pre-cut knife system (also called the chopper, pre-cutter, or knife bank) consists of a bank of fixed blades positioned at the pickup outlet that the crop stream passes through before entering the bale chamber. As crop flows over the knives, stems are cut to shorter lengths — typically 2 to 6 inches depending on the number of knives engaged and the knife geometry. This particle size reduction has several measurable effects: it increases bale density by allowing finer material to pack more tightly; it improves silage fermentation by exposing more cut stem surfaces to lactic acid bacteria; and it improves fiber digestibility for ruminants by reducing the physical length of the indigestible cell wall fraction.
The cost of operating the system incorrectly comes from two directions. Running all knives on dry hay for an elevator market reduces the hay’s physical length — and many elevator buyers pay a premium specifically for long-stemmed hay. Running no knives on silage that will be fed to a high-producing dairy herd denies those animals the fiber length reduction that improves total mixed ration digestibility. The correct knife engagement is crop-specific, end-use-specific, and sometimes field-specific.
When to Engage and When to Disengage: The Decision Table
The engagement decision has four inputs: crop type, end-use market, field contamination risk, and current knife condition. When any one of these inputs changes, the engagement decision should be revisited. The following table gives the baseline recommendation for the most common combinations:
| Crop / end use | Knives engaged? | How many | Reason |
|---|---|---|---|
| Alfalfa → silage / haylage | Yes | Full bank or 50–75% | Shorter particles improve fermentation surface area, packing density, and ruminant fiber digestibility |
| Alfalfa → dairy elevator premium | No | Fully disengaged | Premium elevator and Japan export buyers require long-stem physical structure; cutting reduces acceptance grade |
| Alfalfa → beef hay, on-farm | Optional | 25–50% | Modest cutting improves density and ring feeding efficiency without sacrificing market value; full cutting not needed |
| Grass hay → horse market | No | Fully disengaged | Horse buyers specifically reject cut hay; dust and short particles reduce palatability and can contribute to respiratory issues |
| Wheat / barley straw → biomass | Yes | Full bank | Maximum density; shorter straw packs tighter, improving bulk density in transport and combustion efficiency in boilers |
| Straw → livestock bedding | Optional | 25–50% | Short straw bedding absorbs moisture more efficiently than long; excessive cutting creates dust that affects animal respiratory health |
| Cover crop → silage | Partial (4–6 knives) | 50% of bank | Full bank creates ultra-short particles that pass through net wrap mesh before film can seal; partial engagement balances fermentation benefit vs. wrap integrity |
| Any crop — rocky / stony field | No | Fully disengaged | Rock impacts on engaged knives shatter blade edges immediately and cause shear bolt cascade failures; disengage before entering known stony sections |
How Pre-Cut Knives Work Mechanically — and What That Means for Depth Setting
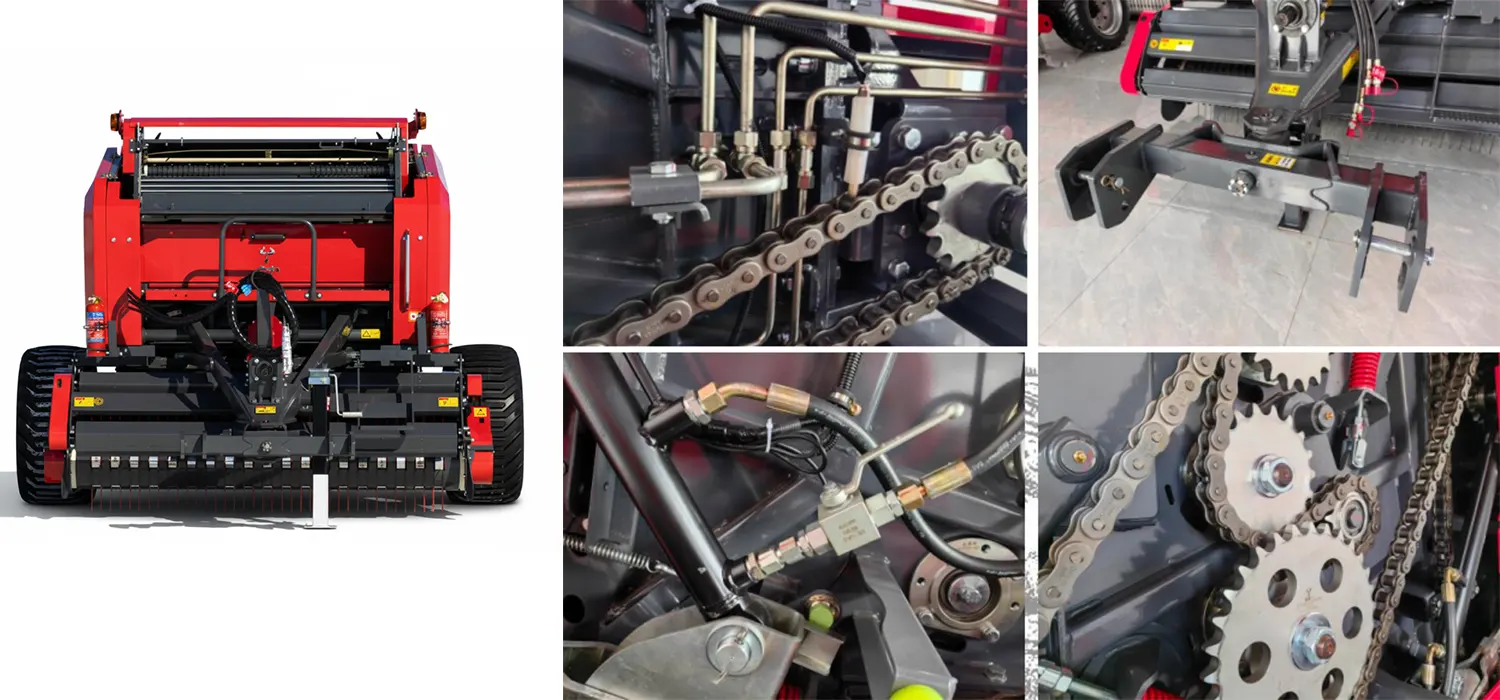
Pre-cut knives are stationary blades mounted in a bank beneath the crop flow path. A rotor with counter-blades or ridges passes above the knife bank, creating a shearing action as crop is drawn through. The depth to which each knife extends into the crop stream — knife depth or knife protrusion — determines both cutting efficiency and shear bolt load. Knives set too shallow contact insufficient crop to cut cleanly; knives set too deep create excessive resistance that fires shear bolts unnecessarily.
Disengage the PTO and remove power completely before any knife system access. Pre-cut knives are adjacent to the rotor, which spins at high velocity — this is a severe stored-energy hazard if PTO is inadvertently engaged during adjustment.
Locate the knife depth adjustment on each individual knife position. Most designs use a slotted or threaded holder that allows the knife to be raised or lowered relative to the rotor. The operator’s manual specifies the nominal protrusion distance (typically 5–15mm above the rotor surface for standard hay crops).
Set all engaged knives to the same protrusion depth. Uneven knife depths create uneven loading — the deepest-set knife fires its shear bolt first while shallower knives are still functional. The goal is simultaneous load distribution across all active knives.
Run a test pass on 5–10 bales and assess particle length. Sample the bale by pulling a handful of material from the bale face after ejection. Desired length depends on use: 3–4 inches for silage or high-density hay; 5–6 inches for on-farm beef feeding. Adjust knife depth up (more protrusion) to cut shorter; down (less protrusion) to cut longer.
Knife Wear: Four Indicators That Mean Replacement Is Due
Pre-cut knives are consumable items — they wear predictably and should be replaced on a schedule based on material processed, not just when they stop cutting entirely. A worn knife that still appears to cut is cutting less efficiently: higher shear bolt consumption, higher power draw, and longer particles than the same knife when new. The four indicators that replacement is approaching:
Run your thumbnail along the knife edge. A sharp knife has a distinct edge that catches the thumbnail. A worn knife feels smooth and rounded — the cutting edge has been abraded away. Any knife where the edge feels uniformly smooth should be replaced or resharpened before the next baling session.
A dull knife does not shear crop cleanly — it pushes and compresses rather than cutting, requiring more force to process the same crop volume. If your shear bolt consumption increases noticeably from one season to the next at the same settings, dull knives are the most common cause. Compare bale count per shear bolt across seasons to detect the trend before it becomes acute.
If the bale sample shows particles consistently longer than the knife depth setting should produce — particles 6–8 inches when knife depth targets 3–4 inches — the knives are deflecting under load rather than cutting. This indicates wear beyond the point where additional protrusion depth can compensate. Replace the knife set.
Any knife with a chipped cutting edge — caused by rock contact or metal object impact — should be replaced immediately regardless of overall wear level. A chipped edge creates an irregular shearing geometry that both reduces cut quality and creates a stress concentration point that can fracture further under normal cutting loads.
Shear Bolt Management: Understanding Cascade Failures
Shear bolts in the pre-cut knife system are the overload protection mechanism — they break before the knife mounting hardware, rotor, or gearbox is damaged by a rock or dense object impact. A single shear bolt event is normal and expected in any field with modest debris. A cascade failure — multiple shear bolts firing in rapid succession on the same day — indicates a systematic problem rather than isolated impacts.
1–3 shear bolt events per 100 bales in clean, established hay fields without unusual debris. At this rate, keep 15–20 pre-cut shear bolts in the tractor cab at all times. Each event is an isolated rock or dense stem cluster — replace and continue without adjusting knife depth.
Check: are you in a rocky field section? Is knife depth set too aggressively for this crop density? Are the knives dull (see Indicator 2 above)? Reduce knife depth by 3–5mm and retest. If the rate drops, knife depth was the cause. If rate stays elevated, field debris is the cause — consider partial knife disengagement in that field section.
Stop and inspect. Cascade failures are almost always caused by: a dense object lodged in the crop path that is being recycled; a wrong-spec shear bolt installed (lower grade than OEM specification fires at lower force); or a knife that has cracked and is now catching the rotor on each revolution. Each repeated firing increases the risk of rotor or mounting hardware damage.
Partial Knife Engagement: Why Half the Bank Often Outperforms All or Nothing
The option to engage only a subset of the knife bank — 25%, 50%, or 75% of available knives rather than all or none — is underused by most operators. Partial engagement allows precise control over particle length, power draw, and shear bolt consumption that binary all-or-nothing switching cannot achieve. The spacing of the active knives determines the cutting frequency — with every other knife active, you produce approximately twice the particle length as with all knives active at the same depth setting.
The partial engagement approach is particularly effective for: on-farm beef hay where some density improvement is valuable but full-length fiber is still preferred; first-cut alfalfa with heavy windrows where full knife engagement at maximum depth creates excessive HP demand; and any field transitioning between rocky and clean sections where a quick partial disengage on the headland avoids the rock exposure while maintaining cutting in the clean center sections. For the interaction between pre-cut knife engagement and pickup system performance — specifically how knife particle size affects crop flow through the pickup transition zone — the pickup system guide covers the crop flow path upstream of the knife bank. For diagnosing knife system symptoms that appear as operational problems during baling, see the baler troubleshooting guide. The rotor drive shaft specifications and gearbox torque ratings that determine the maximum knife loading the drive system can sustain are covered in agricultural gearbox and PTO driveline component specifications.
Pre-Season Knife System Checklist

Pre-Cut Knife System FAQs
Get Knife System Specifications and Setup Support
Knife bank configuration, individual knife depth specification, and OEM shear bolt grade documented with every baler that includes the pre-cut system. Tell us your primary crop and end-use market — we confirm the right engagement setting before delivery.
Editor: Cxm


