لماذا تتعطل المحامل - ولماذا تُصدر إنذاراً أولاً
تتعرض محامل الأسطوانات للتلف عبر آليتين رئيسيتين: التقشر الناتج عن الإجهاد (حيث تتشقق أسطح عناصر التدحرج ومجاريها تشققاً دقيقاً بفعل الإجهاد الدوري، مما يؤدي في النهاية إلى تقشرها وتكوين أسطح تدحرج خشنة)، وفشل التشحيم (حيث تصبح طبقة التشحيم بين عناصر التدحرج ومجاريها رقيقة جداً بحيث لا تمنع احتكاك المعادن، مما يولد حرارة احتكاكية تسرع من تلف السطح). وتولد كلتا الآليتين حرارة أعلى من درجة حرارة التشغيل العادية للمحمل، ويمكن اكتشاف هذه الحرارة قبل أيام أو أسابيع من وصول المحمل إلى مرحلة التلف الكارثي.
تكمن الفكرة الأساسية في أن المحمل الذي يعمل عند درجة حرارة أعلى من درجة حرارة المحيط بمقدار 30 درجة فهرنهايت يكون في مرحلة الإنذار المبكر. أما المحمل الذي يعمل عند درجة حرارة أعلى من درجة حرارة المحيط بمقدار 60 درجة فهرنهايت، فيكون على وشك الاستبدال الفوري. بينما المحمل الذي يعمل عند درجة حرارة أعلى من درجة حرارة المحيط بمقدار 90 درجة فهرنهايت أو أكثر، يكون في ساعاته الأخيرة قبل أن يتعطل أو ينكسر قفصه. توفر لك هذه العتبات الحرارية نافذة زمنية للاستبدال التنبؤي، وهو ما يغفله تمامًا أسلوب الصيانة التفاعلي - الذي يعتمد على انتظار سماع صوت طحن المحمل أو اهتزاز الآلة.
+30 درجة فهرنهايت
الإنذار المبكر
خطط للاستبدال خلال الموسم الحالي؛ وراقب كل فترة زمنية.
+60 درجة فهرنهايت
عاجل
استبدل قبل يوم التعبئة التالي؛ عمر المحمل يُقاس بالساعات
+90 درجة فهرنهايت
شديد الأهمية
توقف فوراً؛ عطل كارثي وشيك؛ لا تستمر في التشغيل
أين توجد كل المحامل - وأيها يتآكل أسرع
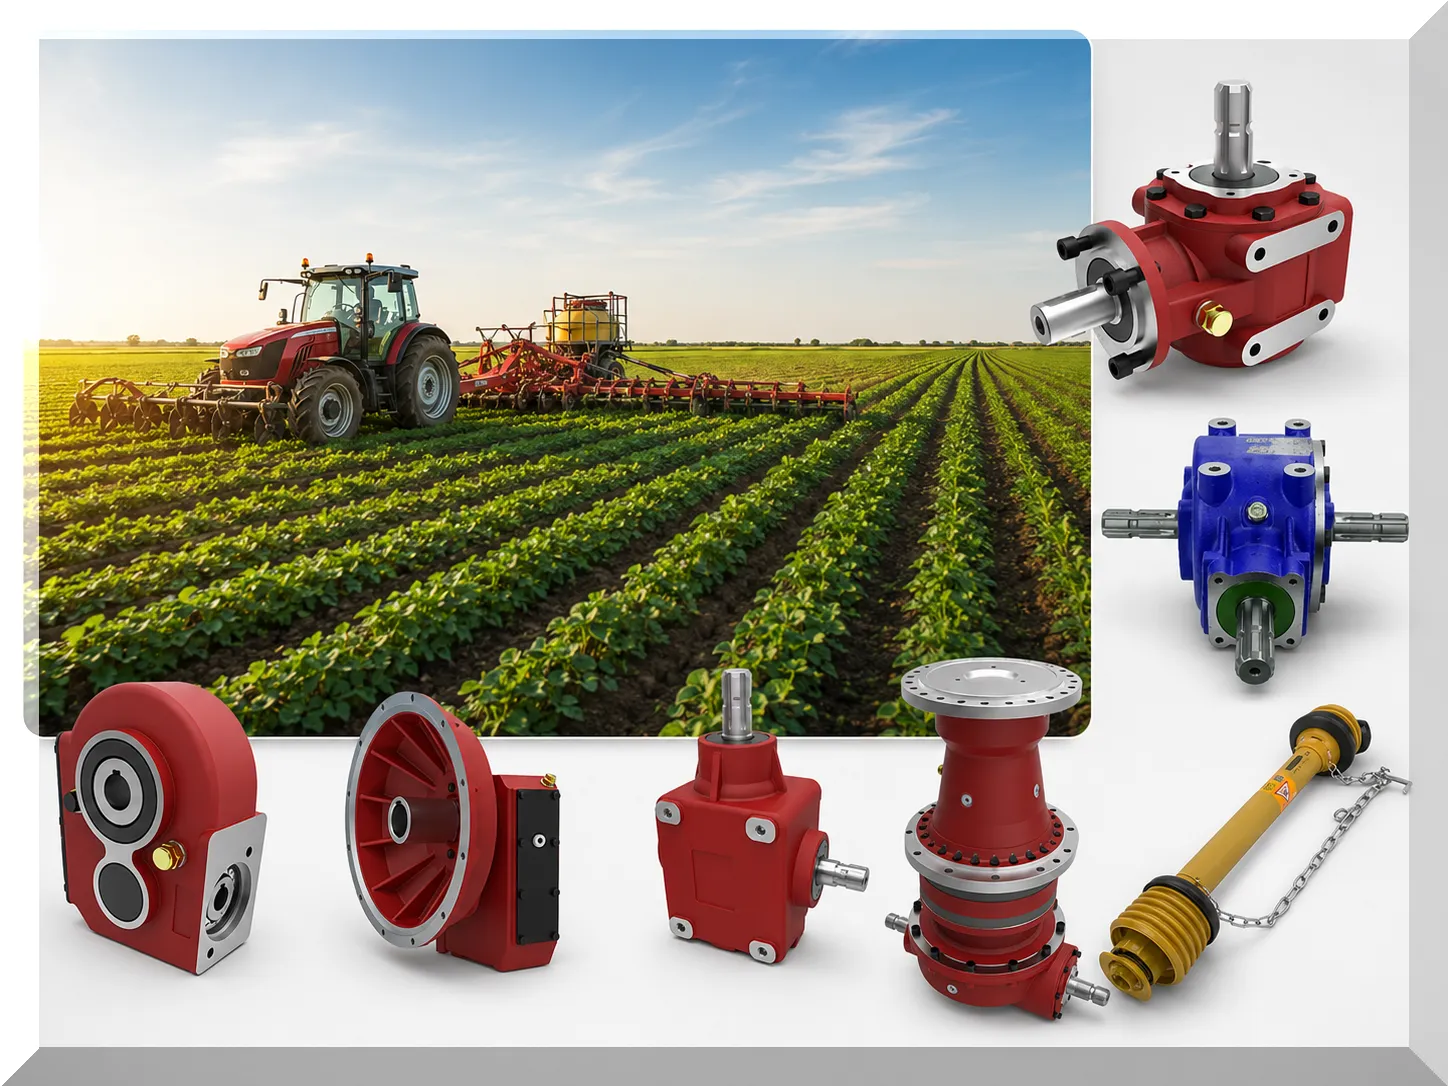
إن فهم أي المحامل موجودة وأيها تتعطل أولاً يسمح لك بتحديد أولويات وقت الفحص وتركيز ميزانيتك قبل الموسم على المواضع الأكثر عرضة للتسبب في أعطال خلال الموسم.
أعلى معدل تآكل - يُستبدل كل 2-4 مواسم
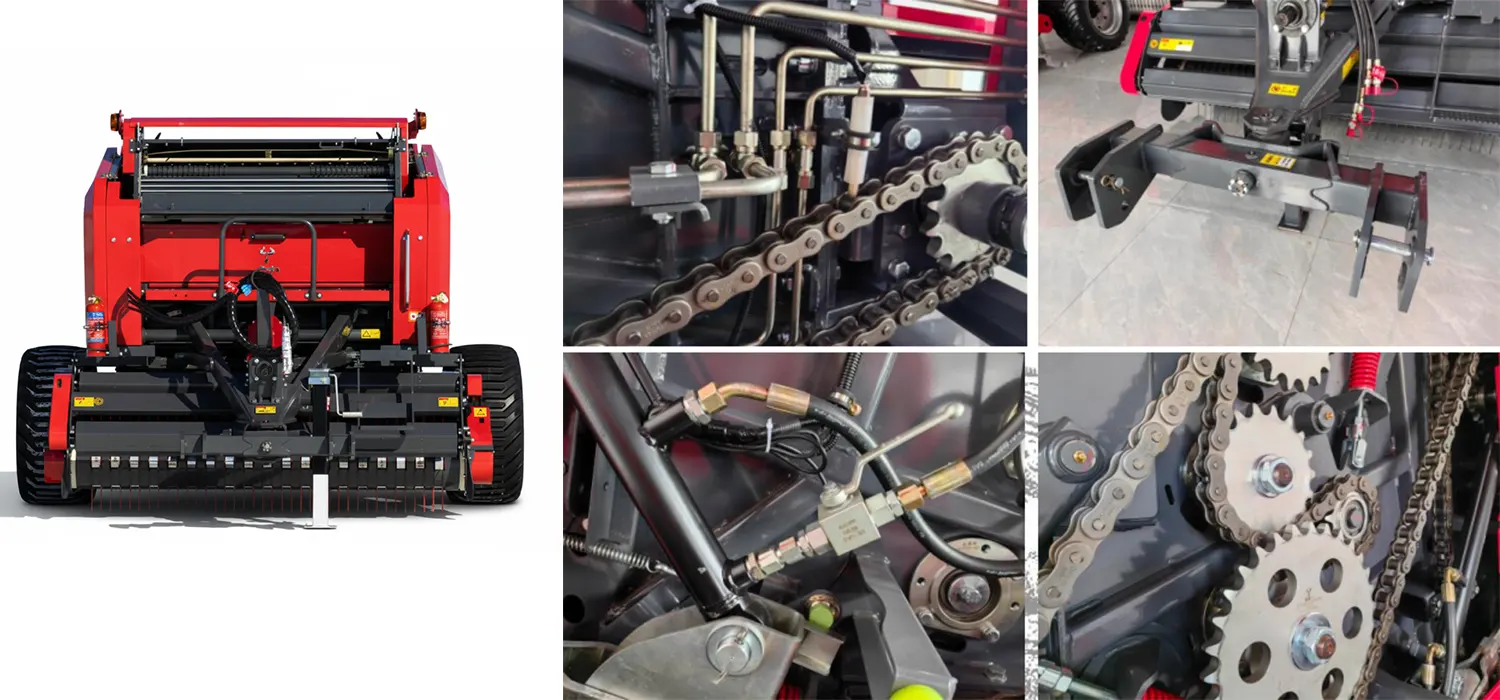
محامل عمود الأسطوانة الرئيسية لتشكيل البالات — تدور البكرات الكبيرة، التي يتراوح عددها بين 3 و6 بكرات، والتي تُشكّل حجرة التجميع، باستمرار تحت ضغط عالٍ للحزام. يتحمل كل محمل حملاً شعاعياً ناتجاً عن شد الحزام، بالإضافة إلى حمل دفع ناتج عن تغيرات ضغط المحصول. تُعدّ هذه المحامل من أهم محامل الفحص في الآلة.
محامل أسطوانية للقيادة — تتحمل البكرات المُدارة التي تستقبل طاقة عمود إدارة الطاقة (PTO) عزم الدوران الإضافي لنظام القيادة بالإضافة إلى شد الحزام. وغالبًا ما تكون هذه البكرات أول ما تظهر عليه أعراض ارتفاع درجة الحرارة في ظروف التجميع عالية الكثافة.
حالة متوسطة التآكل — افحصها سنوياً
محامل عمود بكرة الالتقاط تؤدي سرعة الدوران العالية، بالإضافة إلى التعرض لمخلفات المحاصيل والغبار، إلى تسريع تآكل الأختام. تتسرب المخلفات عبر الأختام المتآكلة وتعمل كمادة كاشطة في مادة التشحيم. يُنصح بالفحص كل 50 ساعة تشغيل.
محامل البكرة الوسيطة ومحامل الشد - تتميز بكرات التوجيه بحمل مستمر أقل من بكرات التوجيه الرئيسية، ولكنها تتعرض لاهتزازات عالية التردد ناتجة عن تقلبات شد الحزام. كما أن موانع التسرب في بكرات التوجيه غالبًا ما تكون أصغر حجمًا وأقل متانة من موانع التسرب في بكرات التوجيه الرئيسية.
تقليل التآكل - راقب واستبدل عند الحاجة
محامل مفصلات الباب الخلفي — عدد دورات مرتفع (فتح وإغلاق كامل لكل بالة) ولكن حمل منخفض لكل دورة. يُعدّ الحفاظ على الشحم شرط الصيانة الأساسي. غالبًا ما يظهر العطل على شكل صرير أثناء حركة الباب الخلفي بدلًا من الحرارة.
محامل محور ذراع لف الشبكة — حمل متقطع، سرعة منخفضة. أطول عمر خدمة نموذجي للآلة. راقب صلابتها؛ استبدلها عندما يتسبب التصلب في عدم اكتمال حركة الذراع.
اختبار الحرارة: طريقتان، قرار واحد
يُعدّ اختبار الحرارة الأداة الأساسية لتقييم حالة المحامل، لأنه يقيس ما يهمّ فعلاً، وهو ما إذا كان المحمل يُولّد حرارة أكثر من اللازم في ظروف التشغيل العادية. يتوفر نوعان من الاختبارات بحسب إمكانية الوصول إلى المعدات.
الطريقة أ - المفضلة
مقياس حرارة بالأشعة تحت الحمراء
المعدات المطلوبة: مقياس حرارة بالأشعة تحت الحمراء بدون تلامس (متوفر في أي متجر للأدوات المنزلية، من طراز $25 إلى $60). سهل الاستخدام، ويمكن استخدامه بأمان أثناء تشغيل مكبس التبن.
إجراء: بعد مرور 30 دقيقة من التشغيل العادي لآلة التجميع، أوقفها (افصل عمود نقل الحركة وانتظر حتى يتوقف الدوران). وجّه مقياس الحرارة نحو كل غلاف محمل وسجّل درجة الحرارة. خذ القراءات في غضون 60 ثانية من التوقف، حيث تتبدد الحرارة بسرعة بمجرد توقف الدوران.
درجة الحرارة المرجعية: قم أيضاً بقياس درجة حرارة الهواء المحيط ودرجة حرارة محمل سليم معروف (لم تظهر عليه أي أعراض). استخدم أعلى حمولة لمحمل سليم معروف كخط أساس للمقارنة، وليس درجة حرارة الهواء المحيط، لأن جميع المحامل تعمل بدرجة حرارة أعلى من درجة حرارة الهواء المحيط عند التشغيل.
النتيجة: أي محمل تزيد درجة حرارته عن 30 درجة فهرنهايت عن المحمل السليم المعروف = إنذار مبكر؛ 60 درجة فهرنهايت أعلى = استبدال عاجل.
الطريقة ب - النسخ الاحتياطي الميداني
اختبار اللمس بظهر اليد
المعدات المطلوبة: لا شيء. استخدم ظهر يدك (وليس راحة يدك)، فهو قادر على قياس درجة الحرارة بدقة أكبر من راحة اليد.
إجراء: بعد مرور 30 دقيقة من عملية التجميع، أوقف آلة التجميع وانتظر 60 ثانية. المس ظهر يدك كل غلاف محمل لمدة ثانيتين. قارن الملمس بالمحامل المجاورة. استخدم دائمًا ظهر اليد - حساسية راحة اليد أقل.
دليل المعايرة: تكون المحامل دافئة عند درجة حرارة تتراوح بين 90 و100 درجة فهرنهايت، ولكنها مريحة عند الإمساك بها (درجة حرارة ماء الاستحمام). عند 120 درجة فهرنهايت، تصبح ساخنة بشكل ملحوظ، ويجب سحبها في غضون ثانيتين. عند 140 درجة فهرنهايت فأكثر، لا يمكن الحفاظ على التلامس - وهذا هو الحد الأدنى للاستبدال الفوري.
ملاحظة: لا يمكن التمييز بين "الدفء" (المقبول) و"الإنذار المبكر" (30 درجة فهرنهايت أعلى من المعدل الطبيعي). استخدم مقياس الحرارة بالأشعة تحت الحمراء عند الشك.
متى يتم إجراء الاختبار؟
الموسم التحضيري: شغّل مكبس القش فارغًا بأقصى سرعة لعمود إدارة الطاقة لمدة 10 دقائق، ثم اختبر جميع مواضع المحامل التي يمكن الوصول إليها باستخدام مقياس حرارة بالأشعة تحت الحمراء. هذا يحدد درجة الحرارة الأساسية لكل محمل في بداية الموسم.
فاصل زمني مدته 50 ساعة: أعد اختبار الحرارة على جميع محامل الأسطوانات الرئيسية ومحامل عمود الالتقاط كجزء من الصيانة الدورية خلال الموسم. قارن النتائج بالقيم المرجعية قبل الموسم؛ أي محمل ارتفعت درجة حرارته بأكثر من 15 درجة فهرنهايت عن قراءته المرجعية منذ الاختبار الأخير يُشير إلى وجود مشكلة.
بعد أحداث غير عادية: في كل مرة تتعرض فيها آلة التجميع لحدث تحميل زائد (كتلة ثقيلة، فشل مسمار القص، توقف مفاجئ)، اختبر المحامل على جانبي مسار التحميل خلال الخمسين بالة التالية - أحمال الصدمات تخلق إجهادًا أقصى في مسارات المحامل مما قد يؤدي إلى التقشر.
مواصفات الشحم وفترات تغييره: الحصول على كليهما بشكل صحيح
الشحم هو الحاجز الوحيد بين عناصر التدحرج وأسطح مسار الكرات. استخدام شحم غير مناسب - غير متوافق مع الشحم الأصلي، أو ذو لزوجة خاطئة، أو يحتوي على إضافات خاطئة - يُعدّ ضارًا تمامًا كعدم استخدام أي شحم. كما أن الإفراط في التشحيم (دفع كمية زائدة من الشحم عبر سطح مانع التسرب) يُعدّ من الأسباب الرئيسية لتلف مانع تسرب المحمل، مما يسمح بدخول بقايا المحاصيل إلى المحمل من الخارج بينما يكون مانع التسرب المزاح غير مثبت في مكانه.
| موضع المحمل |
نوع الشحم |
تصنيف NLGI |
فاصلة |
الكمية لكل زيركة |
| محامل عمود الأسطوانة الرئيسية |
مركب الليثيوم EP |
NLGI #2 |
كل 25 ساعة |
2-3 مضخات |
| محامل عمود التقاط الإشارة |
مركب الليثيوم EP |
NLGI #2 |
كل 8 ساعات |
2-3 مضخات |
| دبابيس مفصلات الباب الخلفي |
مركب الليثيوم أو الموليبدينوم EP |
NLGI #2 |
كل 25 ساعة |
2-4 مضخات |
| وصلات عمود نقل الحركة وحواملها |
مركب الليثيوم EP (انخفاض معدل غسل الماء) |
NLGI #2 |
كل 8 ساعات |
3-4 مضخات |
| محامل عمود التوجيه وعمود الشد |
مركب الليثيوم EP |
NLGI #2 |
كل 50 ساعة |
1-2 مضخة |
تحذير بشأن الإفراط في التشحيم: يدخل الشحم إلى المحمل، ويجب أن يخرج عبر مانع التسرب إذا تم ضخ كمية كبيرة منه. عندما يندفع الشحم من الداخل متجاوزًا مانع التسرب، فإنه يدفع حافته للخارج ويُخرجه جزئيًا من مكانه. والنتيجة: لا يعود مانع التسرب مُلامسًا تمامًا للعمود أو تجويف الغلاف، مما يسمح بدخول غبار المحاصيل والشوائب من الخارج. توقف عن التشحيم عندما تشعر بزيادة ملحوظة في مقاومة المضخة - عندها يكون غلاف المحمل ممتلئًا ويبدأ الشحم بالضغط على مانع التسرب. يكفي ضخ الشحم مرتين أو ثلاث مرات لمعظم محامل آلات التعبئة؛ لا تضخ أكثر من خمس مرات في المحمل الصغير دون التوقف والتحقق من وجود شحم مرئي على سطح مانع التسرب.
اختبار التآكل الشعاعي: تأكيد تآكل المحامل يدويًا
يُعد اختبار الخلوص القطري طريقةً مكمّلةً لاختبار الحرارة، ويُستخدم تحديدًا عندما يكون المحمل باردًا أو عندما يكون الوصول إليه محدودًا لقياس الحرارة. يقيس هذا الاختبار مدى التفكك المادي الذي يتطور مع تآكل عناصر التدحرج ومجاري الكرات، وهو الطريقة الأكثر موثوقيةً للكشف عن المحامل التي وصلت إلى مرحلة متقدمة من التآكل ولكنها لم تبدأ بعد في توليد حرارة كبيرة.
إجراء اختبار اللعب الشعاعي
1
أوقف آلة التجميع وافصل نظام نقل الحركة بالكامل. انتظر حتى يتوقف الدوران تمامًا. يتم إجراء الاختبار والجهاز ثابت.
2
قم بالوصول إلى طرف العمود عند كل موضع من مواضع المحامل. أمسك العمود بالقرب من غلاف المحمل قدر الإمكان. بالنسبة للأعمدة الأسطوانية، يعني هذا الوصول إلى داخل الآلة بعد إزالة الأغطية الواقية - تأكد دائمًا من توقف الآلة تمامًا قبل الوصول إلى المكونات الداخلية.
3
قم بتطبيق قوة شعاعية (عموديًا على محور العمود) وتحسس أي حركة. حاول تحريك العمود لأعلى ولأسفل ومن جانب إلى آخر. في المحمل الجديد أو السليم، يجب أن يكون العمود ثابتًا تمامًا دون أي حركة ملحوظة. تُعتبر حركة 0.5 مم (حوالي 1/64 بوصة) بداية التآكل. أما حركة 1 مم (1/32 بوصة) أو أكثر فتُعتبر تآكلًا يستدعي الاستبدال.
4
تحقق أيضًا من الخلوص المحوري (حركة دفع وسحب على طول محور العمود). يُعدّ وجود بعض الخلوص المحوري أمرًا طبيعيًا ومتوقعًا في معظم المحامل الزراعية (عادةً حتى 0.5 مم). يشير الخلوص المحوري الذي يتجاوز 1 مم في محمل مزود بحلقة تثبيت أو حلقة ضغط إلى تلف حلقة التثبيت أو تآكل المحمل لدرجة تسمح لعنصر التدحرج بالتحرك جانبيًا في مساره.
تحديد وطلب المحمل البديل الصحيح
تُستخدم محامل بكرات مكابس التبن الزراعية الدائرية بشكل شبه حصري مع محامل سلسلة الأبعاد القياسية AFBMA/ISO، وهي نفس الأنواع الأساسية المستخدمة في جميع الآلات الصناعية. يشير رقم القطعة الأصلي (OEM) في قائمة قطع غيار المكبس إلى رقم محمل قياسي يمكن الحصول عليه من أي موزع محامل، غالبًا بتكلفة أقل بنسبة 30-50% من طلبه من خلال وكيل المعدات بنفس مستوى الجودة.
قراءة رقم المحمل
تحمل معظم المحامل الزراعية رقمًا مطبوعًا على الحلقة الخارجية. التنسيقات الشائعة: 6205 (محمل كروي ذو أخدود عميق، قطر داخلي 25 مم، قطر خارجي 52 مم، عرض 15 مم)؛ 6305 (نفس القطر الداخلي، مقطع عرضي أثقل)؛ 30205 (محمل أسطواني مدبب). يشير الرقم الأول أو الأرقام الأولى إلى نوع المحمل؛ ويشير الرقمان الأخيران إلى قطر التجويف بالمليمتر (اضرب في 5 لقطر تجويف أكبر من رمز التجويف 04).
اكتب أرقام المحامل على ملصق داخل لوحة الوصول الخاصة بآلة التجميع. ستحتاج إليها عند الطلب في الساعة السابعة صباحًا قبل بدء عملية التجميع.
المحامل المغلقة مقابل المحامل المفتوحة
تُصنّف محامل أسطوانات مكابس القش إلى نوعين: مفتوحة (تتطلب إعادة تشحيم عبر فتحات التشحيم) ومغلقة (مشحمة مسبقًا، بدون فتحات تشحيم). تدوم المحامل المفتوحة لفترة أطول عند تشحيمها بشكل صحيح، ولكنها تتطلب صيانة دورية؛ أما المحامل المغلقة فلا تتطلب صيانة، ولكن عمر مادة التشحيم فيها محدود. عند استبدال محمل مفتوح، يجب دائمًا تركيب محمل مفتوح، لأن المحامل المغلقة البديلة في موضع مُصمم للتشحيم عبر فتحات التشحيم لن تسمح بحقن الشحم، وستتعطل قبل الأوان عند نفاد مادة التشحيم الأصلية.
يُغطى جدول استبدال الأجزاء المستهلكة بالكامل - الذي يشمل المحامل في سياق العناصر المستهلكة الأخرى في آلة التجميع، بما في ذلك الأحزمة والسلاسل والأسنان - وإطار اتخاذ القرار بشأن متى يكون استبدال المحامل مقابل استبدال مجموعة العمود بالكامل أكثر فعالية من حيث التكلفة في دليل قطع غيار مكبس القشعندما يتسبب عطل المحمل في ظهور أعراض تشغيلية أثناء عملية التجميع - مثل ضوضاء العمود، أو مشاكل في التتبع، أو تكوين غير عادي للبالات - فإن عملية تحديد السبب الجذري لتحديد المحمل المعطل تحديداً تكمن في دليل استكشاف أعطال مكبس القش وإصلاحهاللاطلاع على مواصفات المحامل في مواضع عمود الإدخال والإخراج لعلبة التروس المتصلة بخط نقل الحركة PTO، انظر مواصفات مكونات علبة التروس الزراعية ومجموعة نقل الحركة PTO.
تركيب محمل بديل: الأخطاء الأربعة التي تقصر عمره
سيؤدي تركيب محمل بديل بشكل خاطئ إلى تلفه خلال فترة قصيرة من عمره الافتراضي. وتُعدّ هذه الأخطاء الأربعة في التركيب مسؤولة عن غالبية حالات التلف المبكر للمحامل البديلة.
الخطأ 1: الطرق على الحلقة الخارجية
يؤدي دفع المحمل داخل غلافه عن طريق ضرب الحلقة الخارجية إلى نقل القوة عبر عناصر التدحرج، مما يُحدث علامات برينل (انبعاجات) في مجرى الكرات. اضغط دائمًا على الحلقة الخارجية لتثبيت المحمل داخل الغلاف، وعلى الحلقة الداخلية لتثبيته على العمود بشكل منفصل - لا تدفع المحمل أبدًا عبر عناصر التدحرج.
الخطأ 2: تثبيت ملوث
أي غبار أو بقايا محاصيل أو رقائق معدنية تدخل إلى المحمل أثناء التركيب تعمل كمادة كاشطة فورية. نظّف مقعد العمود وتجويف الغلاف بمذيب وقطعة قماش خالية من الوبر قبل التركيب. احتفظ بالمحمل الجديد في عبوته حتى لحظة تركيبه.
الخطأ 3: لا توجد شحنة شحم أولية
حتى المحامل المفتوحة الجديدة لا تحتوي إلا على كمية ضئيلة من زيت الحماية من التآكل، وليس على زيت التشحيم اللازم للتشغيل. قبل التركيب، قم بضخ 2-3 ضغطات من الشحم المناسب عبر صمام التشحيم، أو قم بتعبئة تجويف المحمل يدويًا إذا كان من النوع المفتوح بدون صمام تشحيم. تكون طبقة التشحيم في غاية الأهمية خلال الدقائق الأولى من التشغيل.
الخطأ 4: عدم إعادة الفحص بعد العملية الأولى
قد يتحرك المحمل الجديد على عمود به انحناء طفيف أو نتوء ناتج عن أخدود التآكل للمحمل السابق قليلاً خلال أول 50 بالة من التشغيل. لذا، يُنصح باختبار المحمل الجديد حرارياً بعد أول 50 بالة، وإعادة ربط مثبت المحمل (طوق القفل، أو حلقة التثبيت، أو برغي الضبط) بعزم الدوران المطلوب قبل عودة الآلة إلى التشغيل الكامل.
الأسئلة الشائعة حول محامل الأسطوانات
تُصدر آلة تجميع التبن الخاصة بي صوت دقات إيقاعي يزداد ارتفاعاً مع تكوّن البالات. ما نوع مشكلة المحامل التي تُسبب هذا الصوت؟+
يُعدّ صوت دقات منتظمة متزامنة مع دوران البالة (دقّة واحدة لكل دورة، وتزداد حدّة الصوت مع ازدياد وزن البالة) السمة المميزة لتلف التقشر في محمل الأسطوانة الرئيسي. تُحدث المنطقة المتقشرة على مسار الدوران صدمة خفيفة في كل مرة يمرّ فوقها عنصر دحرجة. مع ازدياد وزن البالة، يزداد شدّ الحزام للحفاظ على قوة الضغط نفسها، مما يزيد من حمل المحمل، وبالتالي تزداد حدّة الصدمة بشكل متناسب. يُشير تردد صوت الدقات إلى سرعة دوران الأسطوانة المتضررة، مما يُساعد في تحديد الأسطوانة المُسببة للمشكلة. إذا تمكنت من مطابقة تردد صوت الدقات مع معدل دوران عمود أسطوانة مُحددة، فقد تم تحديد المحمل. تجد تسلسل تشخيص الأعطال لتحديد المحامل بناءً على الصوت في دليل استكشاف أعطال آلة التجميع.
هل يمكنني استخدام شحم محامل عجلات السيارات في محامل مكبس القش الخاص بي؟+
تُستخدم عادةً شحوم محامل عجلات السيارات من نوع NLGI #2 الليثيوم أو شحوم الليثيوم المركبة، وهي متوافقة عمومًا مع مواصفات EP لشحوم الليثيوم المركبة المستخدمة في معظم محامل الآلات الزراعية. يعتمد التوافق على لزوجة الزيت الأساسي ومجموعة الإضافات. قد يؤدي خلط أنواع الشحوم غير المتوافقة - على سبيل المثال، شحم سيارات مُكثّف بالبولي يوريا مع شحم زراعي من نوع الليثيوم المركب - إلى تفاعل أنظمة التكثيف وتقليل قوة طبقة التشحيم. إذا كنت تعلم أن مكبس التبن الخاص بك مملوء بشحم الليثيوم المركب وأن شحم السيارات الذي لديك هو أيضًا من نوع الليثيوم المركب (راجع ورقة بيانات المنتج)، فمن الآمن استخدامه لفترة صيانة واحدة. في الصيانة التالية، قم بشطف المكبس وإعادة تعبئته بمنتج واحد متجانس لتجنب آثار الخلط على المدى الطويل. تجنب خلط أي منتجات شحوم ما لم تتمكن من التأكد من توافق المُكثّف من خلال أوراق بيانات المنتج.
مكبس القش الخاص بي مخزن منذ ثلاث سنوات. هل يجب استبدال جميع المحامل قبل استخدامه؟+
بعد ثلاث سنوات من التخزين، لا ينبغي استبدال جميع المحامل كإجراء وقائي دون فحص، فهذا يُعدّ تكلفة غير ضرورية. ما يجب فعله هو إجراء فحص شامل قبل بدء الموسم، مع التركيز على مشكلتين خاصتين بالتخزين: التآكل وتدهور الشحم. افحص كل محمل بتدوير العمود يدويًا؛ فالمحمل المتآكل سيكون خشنًا وقد يُصدر صوت مقاومة خشنة. اغسل نقاط التشحيم بضخ عدة ضغطات من الشحم الجديد لإزاحة أي شحم متدهور أو ملوث بالرطوبة قد يكون تراكم. ثم شغّل الآلة فارغةً بأقصى سرعة لعمود إدارة الطاقة لمدة 15 دقيقة، وأجرِ اختبار الحرارة على جميع المحامل الرئيسية. أي محمل يسخن أثناء هذا الاختبار يجب استبداله فورًا. المحمل الذي يجتاز اختبار الحرارة عند الحد القياسي من غير المرجح أن يتعطل في الموسم القادم، إلا إذا كان به تآكل سابق قبل فترة التخزين.
كيف أعرف على أي جانب من عمود الأسطوانة يوجد المحمل التالف؟+
اختبر حرارة كلا موضعَي المحمل على نفس العمود وقارن درجات الحرارة. سيكون المحمل التالف أكثر سخونة بشكل ملحوظ من نظيره على الطرف الآخر من العمود - غالبًا بفارق يتراوح بين 30 و50 درجة فهرنهايت. إذا كان كلا المحملين على نفس العمود ساخنين (بفارق لا يتجاوز 10 درجات فهرنهايت)، فكلاهما تالف، على الأرجح بسبب انحناء طفيف في العمود نتيجة حمل زائد سابق، مما يُحمّل كلا المحملين بشكل غير متماثل. في هذه الحالة، استبدل كلا المحملين وافحص استقامة العمود عن طريق دحرجته على سطح مستوٍ قبل إعادة تركيبه. العمود الذي يهتز عند دحرجته يكون منحنيًا وسيستمر في إتلاف المحامل البديلة حتى يتم إصلاحه.
هل يستحق الأمر شراء محامل من علامات تجارية ممتازة مقابل البدائل الاقتصادية؟+
بالنسبة لمحامل الأسطوانات الرئيسية لتشكيل البالات - تلك التي تتحمل أعلى الأحمال وتكون عواقب تعطلها في الحقل بالغة الخطورة - فإن محامل العلامات التجارية المتميزة (SKF، FAG، NSK، أو ما يعادلها من مصنعي المستوى الأول) تستحق سعرها المرتفع. تتميز هذه المحامل بدقة داخلية أعلى، وفولاذ عالي الجودة، ومعالجة حرارية أكثر اتساقًا من المحامل المستوردة منخفضة التكلفة، مما يُترجم مباشرةً إلى عمر أطول في ظل الأحمال الدورية لتشكيل البالات. أما بالنسبة للمواضع ذات الأحمال المنخفضة (البكرات الوسيطة، ومفصلات الباب الخلفي، ومحاور لف الشبكة)، فإن المحامل منخفضة التكلفة من الموزعين الموثوقين تؤدي وظيفتها بشكل كافٍ، ويكون فرق السعر فرصةً واضحةً للتوفير. القاعدة العامة: استثمر في الجودة للموضعين أو الثلاثة مواضع ذات أعلى أحمال لكل عمود؛ واقبل بالمحامل منخفضة التكلفة لبقية المواضع.
كم يدوم محمل أسطوانة مكبس التبن الدائري عادةً قبل الحاجة إلى استبداله؟+
تدوم محامل البكرات الرئيسية في مكبس التبن الدائري الذي تتم صيانته بشكل صحيح في الخدمة التجارية النموذجية من 5000 إلى 12000 بالة قبل ظهور أعراض الاحتراق التي تشير إلى اقتراب موعد استبدالها. في ظروف الصيانة الممتازة (التشحيم في المواعيد المحددة، واستخدام نوع الشحم المناسب، والحماية من التلوث)، قد تصل بعض المحامل إلى أكثر من 15000 بالة. أما في الظروف السيئة (إهمال فترات التشحيم، واستخدام شحم غير مناسب، والتلوث الناتج عن تلف مانع التسرب)، فقد يحتاج المحمل نفسه إلى الاستبدال عند 2000 إلى 3000 بالة. يُعد تتبع عدد البالات وتخصيص "ميزانية استبدال المحامل" لمحمل أو محملين رئيسيين لكل 5000 بالة إطارًا عمليًا للتخطيط للعمليات التجارية كثيفة الصيانة. عادةً ما تدوم محامل المواضع ذات الحمل المنخفض (البكرات الوسيطة، وعمود الالتقاط) لفترة أطول من محامل البكرات الرئيسية بمقدار 50 إلى 100 طن في ظروف الصيانة المكافئة.
المحرر: Cxm