लुब्रिकेशन गाइड · सभी 9YF मॉडल · ग्रीस फिटिंग, चेन ऑयल और गियरबॉक्स
स्क्वायर बेलर लुब्रिकेशन गाइड और ग्रीस पॉइंट्स
बेलिंग मशीन के पुर्जों की जीवन अवधि को निर्धारित करने वाला सबसे महत्वपूर्ण कारक सही लुब्रिकेशन है। हर बार ग्रीस लगाने पर पिकअप हब बेयरिंग 25,000 से 35,000 बेल तक चलती है; वहीं, सीज़न की शुरुआत में एक बार ग्रीस लगाने पर वही बेयरिंग 8,000 से 12,000 बेल के बाद खराब हो जाती है। यह गाइड 9YF सीरीज़ के लुब्रिकेशन से संबंधित हर पहलू को कवर करती है — प्रत्येक के लिए सही ग्रीस का प्रकार, अंतराल, ग्रीस न लगाने पर क्या होता है, और वे सामान्य गलतियाँ जो मशीन के जीवनकाल को कम कर देती हैं, भले ही ऑपरेटर को लगता हो कि मशीन सही ढंग से लुब्रिकेट की गई है।
इसमें शामिल हैं: ग्रीस के प्रकार का चयन · ज़ोन के अनुसार फिटिंग स्थान · दैनिक, साप्ताहिक और वार्षिक अंतराल · चेन ऑइलिंग · गियरबॉक्स ऑइल · लुब्रिकेशन संबंधी गलतियाँ
ग्रीस का प्रकार चुनना: गलत ग्रीस का इस्तेमाल करना लगभग ग्रीस न लगाने जितना ही बुरा क्यों है?
सभी ग्रीस एक दूसरे के बदले इस्तेमाल नहीं किए जा सकते। किसी फिटिंग में गलत प्रकार के ग्रीस का उपयोग करने से ग्रीस खराब हो सकता है, सील क्षतिग्रस्त हो सकती है, या भार पड़ने पर फिल्म की मजबूती अपर्याप्त हो सकती है - जिससे निर्दिष्ट ग्रीस की अपेक्षा अधिक तेजी से घिसाव हो सकता है। 9YF श्रृंखला दो मुख्य प्रकार के स्नेहन का उपयोग करती है:
ईपी लिथियम कॉम्प्लेक्स ग्रीस — एनएलजीआई ग्रेड 2
बेलर पर लगे सभी बेयरिंग और पिवट फिटिंग के लिए
ईपी = एक्सट्रीम प्रेशर एडिटिव। यह अनिवार्य है — पिकअप हब बेयरिंग और प्लंजर गाइड रेल सामान्य संचालन के दौरान काफी झटके झेलते हैं। ईपी एडिटिव के बिना, अधिकतम भार के दौरान ग्रीस की परत टूट जाती है और सतहें आपस में धातु से धातु के संपर्क में आ जाती हैं। मानक ऑटोमोटिव लिथियम ग्रीस में ईपी एडिटिव नहीं होता है और यह इन भार बिंदुओं पर पर्याप्त परत मजबूती प्रदान नहीं करेगा।
ग्रेड 2 मध्यम गाढ़ापन। कार्यशाला के तापमान पर ग्रीस निप्पल से आसानी से बहने के लिए पर्याप्त पतला; बियरिंग में स्थिर रहने और संचालन के दौरान रिसाव न होने के लिए पर्याप्त गाढ़ा। विशिष्ट बिंदुओं के लिए कभी-कभी ग्रेड 1 या 3 निर्दिष्ट किए जाते हैं - यदि किसी भिन्न ग्रेड की आवश्यकता हो तो ऑपरेटर मैनुअल का ठीक से पालन करें।
हल्का मशीन तेल या चेन तेल
केवल खुली चेन के लिए — बेयरिंग फिटिंग के लिए नहीं
खुली ड्राइव चेनों को ग्रीस के बजाय तेल से चिकनाई की आवश्यकता होती है। खुली चेन पर लगाया गया ग्रीस फसल के भूसे और मिट्टी के कणों को आकर्षित करता है - ये कण ग्रीस में धंस जाते हैं और एक घर्षणकारी पेस्ट बनाते हैं जो चेन रोलर्स और स्प्रोकेट के दांतों को बिना चिकनाई के मुकाबले कहीं अधिक तेजी से घिसता है। हल्का मशीन तेल, इस्तेमाल किया हुआ मोटर तेल या विशेष चेन तेल चेन रोलर-पिन इंटरफ़ेस में प्रवेश करता है और अंदर से चिकनाई प्रदान करता है। इसे रोलर की सतह पर लगाएं, बाहरी प्लेटों पर नहीं।
बंद ऑयल-बाथ चेन सिस्टम के लिए: प्रत्येक प्री-सीज़न सर्विस के दौरान तेल का स्तर जांचें और निर्दिष्ट प्रकार का तेल डालें। ऑयल-बाथ सिस्टम को दैनिक रखरखाव की आवश्यकता नहीं होती है, लेकिन तेल का स्तर वार्षिक रूप से सुनिश्चित करना आवश्यक है।
ग्रीस अनुकूलता चेतावनी
विभिन्न प्रकार के ग्रीस अक्सर एक-दूसरे के अनुकूल नहीं होते हैं - इन्हें मिलाने से ग्रीस मिश्रण नरम हो सकता है और इसकी भार वहन क्षमता कम हो सकती है। पुराने ग्रीस को पूरी तरह से निकाले बिना कभी भी किसी फिटिंग में दूसरे प्रकार का ग्रीस न डालें। ग्रीस निकालने के लिए: नया ग्रीस तब तक डालें जब तक कि फिटिंग के आसपास या सील से पुराना ग्रीस निकलता हुआ दिखाई न दे। असंगत संयोजनों में शामिल हैं: लिथियम बनाम कैल्शियम सोप ग्रीस, और मानक लिथियम बनाम लिथियम कॉम्प्लेक्स। यदि आपको संदेह है, तो मशीन के पूरे जीवनकाल में एक ही ब्रांड और प्रकार के ईपी लिथियम कॉम्प्लेक्स ग्रेड 2 ग्रीस का उपयोग करें।
ज़ोन के अनुसार स्नेहन फिटिंग के स्थान
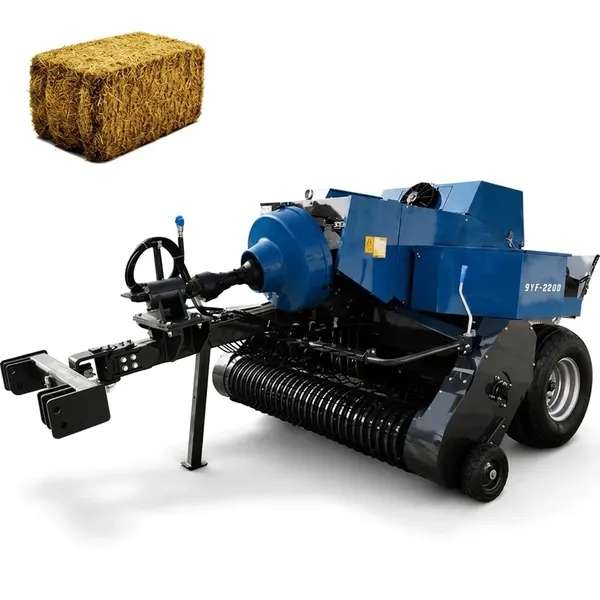
9YF सीरीज़ के बेलर में ग्रीस फिटिंग की कुल संख्या मॉडल के आधार पर 22 से 36 तक होती है। अपने विशिष्ट मॉडल के लिए सटीक संख्या और स्थान आरेख के लिए अपने ऑपरेटर मैनुअल से परामर्श लें। नीचे दिए गए ज़ोन सभी मानक फिटिंग स्थानों को कवर करते हैं:
ज़ोन 1 — नॉटर मैकेनिज़्मप्रत्येक सत्र में 4-6 फिटिंग
कैम फॉलोवर आर्म पिवट (×2): प्रत्येक नॉटर साइड पर एक, आमतौर पर गार्ड के बाहरी हिस्से पर।प्रत्येक सत्र
बिल हुक शाफ्ट एंड बेयरिंग (×2): प्रत्येक तरफ एक, गांठ लगाने वाले फ्रेम में धंसा हुआ।प्रत्येक सत्र
सुई भुजा धुरी (×2): सुई की भुजा के आधार पर, जहाँ यह ड्राइव लिंकेज से जुड़ती है।हर 8 घंटे में
जोन 2 — पिकअप रील4-6 फिटिंग · हब के लिए प्रत्येक सत्र
पिकअप हब बेयरिंग (×2): पिकअप रील ट्यूब के प्रत्येक सिरे पर एक-एक। पूरी मशीन में यह सबसे महत्वपूर्ण फिटिंग है — इन्हें कभी न भूलें।प्रत्येक सत्र
कैम फॉलोअर पिवट (पिकअप कैम, ×1–2): यह टाइन रिट्रैक्शन टाइमिंग को नियंत्रित करता है। आमतौर पर यह दाहिनी ओर की पिकअप साइड प्लेट के अंदरूनी हिस्से में स्थित होता है।हर 8 घंटे में
गेज व्हील एक्सल पिवट (×2): पिकअप हाइट एडजस्टमेंट गेज व्हील एक्सल ब्रैकेट पर।साप्ताहिक
जोन 3 — फोर्क फीडर और पैकर4-8 फिटिंग · हर 8 घंटे में
फोर्क फीडर मुख्य धुरी (×1–2): फोर्क आर्म का प्राथमिक असर बिंदु जो फसल को पिकअप से चैम्बर इनलेट में धकेलता है।हर 8 घंटे में
पैकर आर्म पिवट (×2–4): जिन मॉडलों में अलग पैकर तंत्र होता है, उनमें आमतौर पर प्रत्येक तरफ 2 भुजा धुरी होती हैं।हर 8 घंटे में
फोर्क फीडर ड्राइव सनकी बियरिंग (×1): जहां ड्राइव लिंकेज फोर्क आर्म से जुड़ता है।हर 8 घंटे में
जोन 4 — प्लंजर और मेन ड्राइव4-8 बार की फिटिंग · सप्ताह में एक बार से लेकर 8 घंटे तक
कनेक्टिंग रॉड बेयरिंग (प्रति रॉड 2, कुछ मॉडलों में 2 रॉड): कनेक्टिंग रॉड के क्रैंकशाफ्ट सिरे और प्लंजर सिरे पर। उच्च भार सहन करने वाले फिटिंग।हर 8 घंटे में
प्लंजर गाइड रेल: अधिकांश मॉडलों में, रेल की सतहों पर ग्रीस लगाएं, न कि निप्पल के माध्यम से - ग्रीस लगाने के लिए ब्रश या कपड़े का उपयोग करें।साप्ताहिक
मुख्य ड्राइव शाफ्ट बेयरिंग (×2): जहां मुख्य ड्राइव शाफ्ट फ्रेम की साइड प्लेटों से होकर गुजरता है। यह एक महत्वपूर्ण भार वहन बिंदु है।हर 8 घंटे में
ज़ोन 5 — फ्रेम पिवट और स्टार व्हील4-6 फिटिंग · साप्ताहिक
स्टार व्हील बेयरिंग (×1): गठ्ठे की लंबाई मापने वाले पहिये का धुरीदार बेयरिंग। एक कठोर तारा पहिया फिसलन और गठ्ठे की लंबाई में असमानता का कारण बनता है।साप्ताहिक
चेन टेंशनर पिवट (×1): यह स्प्रिंग-लोडेड टेंशनर को संचालन के दौरान चेन के विक्षेपण में परिवर्तन होने पर हिलने की अनुमति देता है।साप्ताहिक
जीभ हिच धुरी (×1): क्षैतिज धुरी जो बेलर को ट्रैक्टर के सापेक्ष खेत की ऊबड़-खाबड़ सतहों का अनुसरण करने की अनुमति देती है।साप्ताहिक
बेल शूट पिवट (×2): जहां गठ्ठा निकालने वाला चूट मुख्य फ्रेम से जुड़ता है और जहां गठ्ठा निकालने के भार के तहत चूट आर्म घूमता है।साप्ताहिक
मास्टर लुब्रिकेशन शेड्यूल — त्वरित संदर्भ
| अंतराल |
फिटिंग |
चिकनाई |
असफलता कैसी दिखती है |
| प्रत्येक सत्र |
पिकअप हब बेयरिंग (×2), नॉटर कैम फॉलोअर पिवट (×2), बिल हुक शाफ्ट बेयरिंग (×2), ओपन ड्राइव चेन |
ईपी लिथियम 1टीपी7टी2 + चेन ऑयल |
1-2 सीज़न के भीतर बेयरिंग का खराब होना; ड्राई कैम फॉलोवर से गलत तरीके से जुड़ना |
| प्रत्येक 8 कार्य घंटों में |
नीडल आर्म पिवट, फोर्क फीडर पिवट, पैकर आर्म पिवट, कनेक्टिंग रॉड बेयरिंग, मेन ड्राइव शाफ्ट बेयरिंग |
ईपी लिथियम 1टीपी7टी2 |
सुई की भुजा में जकड़न के कारण समय में बदलाव; फीडर तंत्र में घिसाव; कनेक्टिंग रॉड में खटखटाहट |
| साप्ताहिक या हर 5 सत्रों के बाद |
स्टार व्हील बेयरिंग, चेन टेंशनर पिवट, गेज व्हील पिवट, टंग हिच पिवट, बेल शूट पिवट, प्लंजर गाइड रेल |
ईपी लिथियम 1टीपी7टी2 |
कठोर स्टार व्हील के कारण गठ्ठे की लंबाई में असमानता; बिना चिकनाई वाले फ्रेम पिवट के कारण घिसाव में वृद्धि |
| वार्षिक (प्री-सीज़न सेवा) |
सभी फिटिंग की पूरी तरह से जांच करें और गियरबॉक्स के तेल के स्तर की जांच करें और आवश्यकतानुसार तेल बदलें। |
ईपी लिथियम 1टीपी7टी2 + गियर तेल |
सीज़न के दौरान छूटी हुई फिटिंग से होने वाली संचयी टूट-फूट |
चेन लुब्रिकेशन: सही विधि
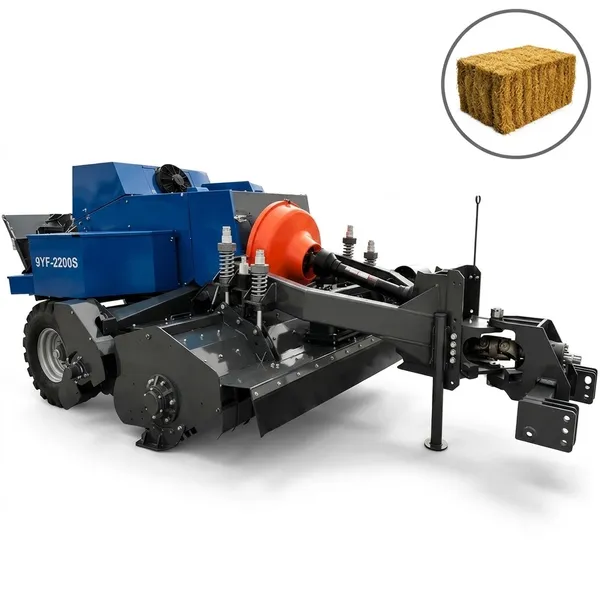
खुली चेनों को तेल लगाना चाहिए, ग्रीस नहीं। इस बात को अक्सर गलत समझा जाता है - खेत में ग्रीस गन लेकर जाने वाले ऑपरेटर कभी-कभी चेन के सूखे दिखने पर भी उस पर ग्रीस लगा देते हैं, यह जाने बिना कि धूल भरे कृषि वातावरण में चेन पर ग्रीस लगाना उल्टा असर डालता है।
गलत: खुली चेन पर ग्रीस
ग्रीस इतनी गाढ़ी होती है कि वह चेन रोलर-पिन इंटरफ़ेस में प्रवेश नहीं कर पाती। यह बाहरी सतहों पर जमा हो जाती है और तुरंत ही छोटे-छोटे कणों को आकर्षित करती है। परिणामस्वरूप बनने वाला घर्षणकारी पेस्ट रोलर्स और स्प्रोकेट को घिस देता है। साथ ही, इससे चेन में घिसावट और खिंचाव की जांच करना भी असंभव हो जाता है।
सही: खुली चेन पर हल्का तेल
प्रत्येक लिंक के रोलर वाले हिस्से पर हल्का तेल लगाएं। तेल रोलर-पिन के जोड़ में समा जाता है और उस जगह पर घिसावट को कम करता है जहां वास्तव में घिसावट होती है। अतिरिक्त तेल आसानी से बह जाता है। तेल से चिपकी हुई कोई भी भूसी गाढ़े ग्रीस में नहीं फंसती।
प्रयोग विधि: पीटीओ को निष्क्रिय रखते हुए और मैकेनिज़्म को स्थिर रखते हुए, चेन को धीरे-धीरे हाथ से घुमाते हुए, तेल के डिब्बे या ब्रश का उपयोग करके चेन पर तेल लगाएं। वैकल्पिक रूप से, एयरोसोल रूप में चेन ल्यूब स्प्रे लिंक के बीच प्रभावी ढंग से प्रवेश करते हैं और फील्ड में उपयोग के लिए व्यावहारिक हैं। प्रत्येक सत्र की शुरुआत में, एंगेजमेंट से पहले इसे लगाएं।
गियरबॉक्स ऑयल: विनिर्देश, स्तर और परिवर्तन अंतराल
सही तेल विनिर्देश
प्रत्येक 9YF मॉडल के लिए गियरबॉक्स तेल की विशिष्टता ऑपरेटर मैनुअल में दी गई है — आमतौर पर SAE 90 GL-4 या GL-5 गियर तेल, या कोई विशिष्ट औद्योगिक गियर स्नेहक। इंजन तेल को गियर तेल के स्थान पर प्रयोग न करें। इंजन तेल में बेलर तंत्र के चरम भार के दौरान गियर के दांतों की सुरक्षा के लिए आवश्यक उच्च-दबाव योजक नहीं होते हैं। स्वचालित ट्रांसमिशन द्रव का उपयोग तब तक न करें जब तक कि मैनुअल द्वारा विशेष रूप से अनुमति न दी गई हो।
स्तर जांच
गियरबॉक्स में तेल का स्तर जांचने के लिए एक प्लग (आमतौर पर सही भरने के स्तर पर केसिंग के किनारे पर) या मॉडल के आधार पर एक डिपस्टिक होता है। वार्षिक प्री-सीज़न सर्विस के दौरान मशीन को समतल ज़मीन पर रखकर तेल का स्तर जांचें। यदि तेल का स्तर लेवल मार्क से नीचे है, तो इसका मतलब है कि गियरबॉक्स में तेल कम भरा है - फिल प्लग के माध्यम से सही प्रकार का तेल तब तक डालें जब तक कि तेल लेवल प्लग से बाहर न निकलने लगे। तेल ज़्यादा भरने से गियरबॉक्स में झाग बनने लगता है और तेल की चिकनाई कम हो जाती है।
परिवर्तन अंतराल और स्थिति जाँच
ऑपरेटर मैनुअल के अनुसार तेल बदलने का अंतराल — आमतौर पर हर 100-200 ऑपरेटिंग घंटे या हर 3-5 सीज़न, जो भी पहले हो। सीज़न शुरू होने से पहले तेल की थोड़ी मात्रा सफेद कपड़े पर निकालें। सुनहरा से गहरा एम्बर रंग, बिना कणों के: स्वीकार्य। दूधिया या पानी जैसा दिखना: सील खराब होने से पानी का रिसाव — तुरंत तेल बदलें और स्रोत की जांच करें। कपड़े पर धातु के कण दिखना: आंतरिक घिसाव — सीज़न शुरू होने से पहले गियरबॉक्स की जांच करें। तेज गंध वाला गहरा काला तेल: ज़्यादा गरम होने से ऑक्सीकृत — तेल बदलें और पता लगाएं कि गियरबॉक्स इतना गर्म क्यों हो रहा था।
बेलर की आयु कम करने वाली सामान्य स्नेहन संबंधी गलतियाँ
गलती 1
ईपी लिथियम कॉम्प्लेक्स के स्थान पर ऑटोमोटिव व्हील बेयरिंग ग्रीस का उपयोग करना। मानक व्हील बेयरिंग ग्रीस NLGI ग्रेड 2 लिथियम साबुन है, लेकिन इसमें अत्यधिक दबाव योजक नहीं होता है। यह दिखने और महसूस करने में EP ग्रीस के समान ही होता है। अंतर केवल भार पड़ने पर ही दिखाई देता है — उच्च भार वाले फिटिंग पर इसकी परत टूट जाती है और धातु से धातु का संपर्क होता है। उच्च भार वाले बेलर फिटिंग पर किसी भी ग्रीस का उपयोग करने से पहले हमेशा लेबल पर "EP" अवश्य देखें।
गलती2
चेन पर तेल लगाने के बजाय ग्रीस लगाना। ऊपर विस्तार से बताया गया है कि खुली चेन पर ग्रीस लगाने से फसल के अवशेषों से घर्षणकारी पेस्ट बन जाता है। यदि आपने पहले किसी खुली चेन पर ग्रीस लगाया है, तो तेल लगाने से पहले उसे सॉल्वेंट से साफ कर लें ताकि ताज़ी तेल लगी सतह पर ग्रीस और भूसे का घर्षणकारी मिश्रण न बने।
गलती 3
बियरिंग में अत्यधिक ग्रीस लगाना। बेयरिंग कैविटी में इतनी अधिक ग्रीस भरना कि सील से ग्रीस रिसने लगे, "अधिक चिकनाई" नहीं है - बल्कि यह सील को नुकसान पहुंचाता है। अत्यधिक ग्रीस दबाव से सील का किनारा विकृत हो जाता है, जिससे ग्रीस बाहर निकल जाता है और पानी और गंदगी अंदर चली जाती है। पिछले सत्र में ग्रीस लगाई गई फिटिंग के लिए ग्रीस गन के एक से दो स्ट्रोक सही हैं; कई सत्रों में ग्रीस न लगाई गई फिटिंग के लिए तीन से चार स्ट्रोक सही हैं।
गलती4
दैनिक सूची में शामिल न होने वाले "मामूली" फिटिंग को छोड़ देना। फोर्क फीडर पिवट और फ्रेम पिवट को साप्ताहिक अंतराल पर ग्रीस करने का एक कारण है - उन्हें चिकनाई की आवश्यकता होती है, बस कम बार। जो कंपनियां केवल दैनिक फिटिंग को ही ग्रीस करती हैं, उनमें ये पुर्जे समय से पहले घिस जाते हैं क्योंकि साप्ताहिक फिटिंग को अक्सर भूल जाया जाता है। यदि साप्ताहिक शेड्यूल को भूलना आसान है, तो परिचालन सत्र के मध्य में साप्ताहिक ग्रीसिंग के लिए कैलेंडर रिमाइंडर सेट करें।
गलती 5
विभिन्न प्रकार के ग्रीस को मिलाना। पुराने ग्रीस को निकाले बिना किसी फिटिंग में अलग ब्रांड या प्रकार का ग्रीस डालने से असंगत मिश्रण बन सकता है। यह समस्या तब और भी बढ़ जाती है जब मशीन पुरानी खरीदी गई हो और उसके पहले के लुब्रिकेशन का इतिहास अज्ञात हो। यदि आप पहले इस्तेमाल किए गए ग्रीस के प्रकार की पुष्टि नहीं कर सकते, तो सही लुब्रिकेशन प्रोग्राम शुरू करने से पहले सभी सुलभ फिटिंग को नए ग्रीस से अच्छी तरह साफ कर लें।
गलती6
ग्रीस गन को मशीन पर रखने के बजाय वर्कशॉप में रखना। यदि ग्रीस गन वर्कशॉप में है और बेलर खेत में है, तो दैनिक ग्रीसिंग का चरण छूट जाता है। ग्रीस गन को मशीन पर ही रखें—या तो ड्रॉबार पर लगे टूल बॉक्स में या मशीन फ्रेम से जुड़े एक विशेष होल्डर में। इस एक छोटे से बदलाव से वह बाधा दूर हो जाती है जो व्यवहार में दैनिक ग्रीसिंग में होने वाली अधिकांश चूकों का कारण बनती है।
पीटीओ ड्राइवशाफ्ट स्नेहन
पीटीओ ड्राइवशाफ्ट के सीवी जॉइंट योक पर समर्पित ग्रीस निप्पल होते हैं — शाफ्ट कॉन्फ़िगरेशन के आधार पर आमतौर पर 2-4 निप्पल होते हैं। इन्हें प्री-सीज़न सर्विस के दौरान सालाना ग्रीस करना आवश्यक है। ये ट्रैक्टर पीटीओ लुब्रिकेशन और बेलर मैकेनिज़्म लुब्रिकेशन दोनों से अलग होते हैं। पूर्ण विनिर्देश: पीटीओ ड्राइवशाफ्ट और सीवी जॉइंट साइजिंग गाइड.
अक्सर पूछे जाने वाले प्रश्न — स्क्वायर बेलर का स्नेहन
मुझे कैसे पता चलेगा कि ग्रीस फिटिंग ग्रीस को अंदर जाने दे रही है या अवरुद्ध है?+
ग्रीस को सही ढंग से ग्रहण करने वाले फिटिंग में, पंप के कुछ स्ट्रोक के बाद कंपोनेंट सील के आसपास या चलने वाली सतहों के जोड़ पर ग्रीस दिखाई देने लगता है। ग्रीस को ग्रहण न करने वाला फिटिंग — ग्रीस गन का प्लंजर स्थिर है या लीवर को घुमाने के लिए बहुत अधिक बल लगाना पड़ता है — या तो पोर्ट में जमे हुए पुराने ग्रीस के कारण अवरुद्ध है, या निप्पल बॉल चेक जंग लगने के कारण खुल गया है जिससे ग्रीस कहीं नहीं जा पा रहा है। अवरुद्ध फिटिंग के लिए: दबाव डालने से पहले गन हेड को निप्पल पर मजबूती से दबाने का प्रयास करें — कभी-कभी आंशिक सीलिंग ही समस्या होती है। यदि फिर भी अवरुद्ध हो, तो उपयुक्त स्पैनर से निप्पल को निकालें, पोर्ट को प्रोब या संपीड़ित हवा से साफ करें और निप्पल को दोबारा लगा दें। जंग लगे या क्षतिग्रस्त निप्पलों को मरम्मत करने के बजाय बदल दें — इनकी कीमत बहुत कम होती है और अवरुद्ध निप्पल का मतलब है कि इसके पीछे का कंपोनेंट चिकनाई रहित है।
क्या मैं अपने बेलर की चेन पर तेल के बजाय स्प्रे-टाइप चेन ल्यूब का इस्तेमाल कर सकता हूँ?+
जी हां, स्प्रे चेन लुब्रिकेंट ओपन बेलर चेन के लिए उपयुक्त होते हैं और फील्ड में इस्तेमाल के दौरान पोर-ऑन ऑयल की तुलना में इनके कई व्यावहारिक फायदे हैं। ये रोलर-पिन इंटरफ़ेस में प्रभावी ढंग से प्रवेश करते हैं, अतिरिक्त स्प्रे आसानी से टपक जाता है, और एयरोसोल एप्लीकेशन ऑयल कैन एप्लीकेशन की तुलना में तेज़ और साफ होता है। ऐसा स्प्रे चेन लुब्रिकेंट चुनें जो गीली, टपकने वाली परत के बजाय एक पतली, थोड़ी चिपचिपी परत छोड़े - चिपचिपी परत चेन के घूमने के दौरान फिसलने से बेहतर तरीके से बचाती है। ऐसे स्प्रे लुब्रिकेंट से बचें जिनमें सॉल्वेंट होते हैं और जो सूखी परत छोड़ते हैं (पीटीएफई ड्राई लुब्रिकेंट) - ये उन अनुप्रयोगों के लिए डिज़ाइन किए गए हैं जहां कणों से वायुमंडलीय संदूषण की उम्मीद नहीं होती है, जो कि हे बेलिंग के मामले में नहीं होता है। कृषि चेन के लिए विशेष रूप से विपणन किया गया स्प्रे लुब्रिकेंट सबसे अच्छा विकल्प है; सामान्य प्रयोजन वाला WD-40 प्रकार का स्प्रे चेन लुब्रिकेंट नहीं है - यह मुख्य रूप से एक जल फैलाने वाला पदार्थ है जो लोड के तहत निरंतर चेन लुब्रिकेशन के लिए पर्याप्त फिल्म मजबूती प्रदान नहीं करता है।
मेरी बेलर मशीन नई है। क्या मुझे इसे हर बार इस्तेमाल करने के बाद ग्रीस करना होगा?+
जी हां—नई मशीन को पहले ही सत्र से सही लुब्रिकेशन की आवश्यकता होती है। नए बेयरिंग और स्लाइडिंग सतहें शुरुआती 500-1000 बेल्स के दौरान सेट हो जाती हैं: मशीनिंग के कारण संपर्क सतहें सूक्ष्म रूप से खुरदरी होती हैं और प्रारंभिक संचालन के दौरान घिसकर चिकनी हो जाती हैं। इस शुरुआती घिसावट से स्थिर संचालन की तुलना में अधिक गर्मी और धातु के कण उत्पन्न होते हैं—इसलिए शुरुआती घिसावट के दौरान पर्याप्त लुब्रिकेशन विशेष रूप से महत्वपूर्ण है ताकि बेयरिंग सतहों से इन कणों को हटाया जा सके और अधिक गर्मी वाले शुरुआती घिसावट के दौरान तेल की परत बनी रहे। नई मशीन के पहले सीज़न में लुब्रिकेशन की अनदेखी करने से घिसावट का स्तर सामान्य से अधिक हो जाता है और पहले पुर्जे बदलने का अंतराल कम हो जाता है। पहले सीज़न के बाद नई मशीन की पहली प्री-सीज़न सर्विस में गियरबॉक्स का तेल बदलना भी शामिल होना चाहिए—शुरुआती तेल में शुरुआती घिसावट के दौरान उत्पन्न धातु के कण होंगे, चाहे शुरुआती घिसावट की अवधि कितनी भी कम क्यों न हो।
मुझे प्रत्येक फिटिंग पर ग्रीस गन के कितने स्ट्रोक लगाने चाहिए?+
प्रत्येक सेशन में लुब्रिकेट किए जाने वाले फिटिंग्स (पिकअप हब बेयरिंग, कैम फॉलोअर) के लिए: प्रति सेशन एक स्टैंडर्ड लीवर-टाइप ग्रीस गन के 1-2 स्ट्रोक पर्याप्त हैं। इससे पिछले सेशन में खोई या कम हुई थोड़ी मात्रा में ग्रीस की भरपाई हो जाती है, बिना कैविटी को ओवरफिल किए। कई सेशन में अनसुनी फिटिंग्स के लिए: कम हुई ग्रीस की भरपाई के लिए 3-4 स्ट्रोक, फिर उसके बाद प्रति सेशन 1-2 स्ट्रोक। वार्षिक फुल सर्विस के लिए, जिसमें सभी फिटिंग्स पर ध्यान दिया जाता है: प्रति फिटिंग 2-3 स्ट्रोक, फिर आगे बढ़ें। जब आपको गन से प्रतिरोध में थोड़ी वृद्धि महसूस हो, तो पंप करना बंद कर दें - यह दर्शाता है कि कैविटी भर गई है और आगे के स्ट्रोक ग्रीस को सील से बाहर धकेलना शुरू कर देते हैं। ग्रीस गन की क्षमता प्रकार के अनुसार काफी भिन्न होती है: एक लीवर गन आमतौर पर प्रति स्ट्रोक 1.4 ग्राम ग्रीस देती है; एक पिस्टल-ग्रिप गन 0.7 ग्राम दे सकती है। ग्राम में दिए गए निर्माता के विनिर्देशों का पालन करते समय यह अंतर महत्वपूर्ण है - यदि मात्रा-आधारित विनिर्देश का उपयोग कर रहे हैं तो अपनी गन की क्षमता की जांच करें।
क्या मुझे सर्दियों में मशीन को स्टोर करते समय उसमें ग्रीस लगाना चाहिए या केवल सीजन शुरू होने से पहले की सर्विसिंग के दौरान?+
सीज़न के अंत में भंडारण से पहले और फिर प्री-सीज़न सर्विस के दौरान ग्रीस लगाना आवश्यक है। सीज़न के अंत में ग्रीस लगाने का उद्देश्य सर्विस के दौरान ग्रीस लगाने से भिन्न होता है: इसका मुख्य कार्य भंडारण अवधि के दौरान जंग से सुरक्षा प्रदान करना है, न कि संचालन के लिए चिकनाई प्रदान करना। ताज़ा ग्रीस सीज़न के दौरान बियरिंग कैविटी में प्रवेश कर चुकी नमी को हटा देता है और धातु की सतहों पर एक सुरक्षात्मक परत बना देता है जो गीले-ठंडे सर्दियों के भंडारण के दौरान जंग लगने से रोकता है। सीज़न के अंत में ग्रीस लगाए बिना, अंतिम बेलिंग सत्र में कार्यशील प्रतीत होने वाले बियरिंग भंडारण के दौरान आंतरिक सतह पर जंग का शिकार हो सकते हैं - जो प्री-सीज़न सर्विस के दौरान निरीक्षण करने पर बियरिंग रेस पर गड्ढों के रूप में दिखाई देते हैं। प्री-सीज़न सर्विस ग्रीसिंग पहले बेलिंग सत्र से पहले ताज़ा लुब्रिकेंट की आवश्यक मात्रा प्रदान करता है। ये दो अलग-अलग और दोनों आवश्यक ग्रीसिंग प्रक्रियाएं हैं जिनके उद्देश्य भिन्न-भिन्न हैं।
ऐसे कौन से संकेत हैं जो अपर्याप्त स्नेहन के कारण बेयरिंग के खराब होने का संकेत देते हैं?+
अपर्याप्त लुब्रिकेशन के कारण बेयरिंग के खराब होने की प्रक्रिया एक निश्चित क्रम में होती है: चरण 1 — स्थिर अवस्था में शाफ्ट को हाथ से घुमाने पर घर्षण या खुरदुराहट जैसी आवाज़ आना। धातु की सतहें एक-दूसरे के संपर्क में होती हैं और प्रत्येक घुमाव के साथ महीन धातु के कण उत्पन्न करती हैं। चरण 2 — परिचालन गति पर सुनाई देने वाला शोर। बेयरिंग के स्थान से घर्षण या गड़गड़ाहट की आवाज़ आती है जो आसपास के घटकों में नहीं होती। चरण 3 — गर्मी उत्पन्न होना। संचालन के 15-20 मिनट के भीतर बेयरिंग छूने पर काफी गर्म हो जाती है। अत्यधिक गर्मी यह दर्शाती है कि धातु-से-धातु संपर्क उस बिंदु तक पहुँच गया है जहाँ घर्षण ऊर्जा महत्वपूर्ण है। चरण 4 — प्ले का विकास। जैसे-जैसे बेयरिंग का भीतरी या बाहरी आवरण घिसता है, रेडियल प्ले बढ़ता है — शाफ्ट डगमगाने लगती है। चरण 5 — अचानक खराबी। आवरण या आवरण टूट जाता है और शाफ्ट जाम हो जाती है या अत्यधिक प्ले के साथ चलती है। समस्या को चरण 1 या 2 पर ही पहचानें — चरण 1 पर पहचानी गई बेयरिंग को अक्सर तुरंत गहन ग्रीसिंग और अगली नियोजित सर्विस में बदलने से लंबे समय तक चलाया जा सकता है। स्टेज 4 या 5 पर मौजूद बेयरिंग को अगली बेलिंग प्रक्रिया से पहले तुरंत बदलना आवश्यक है।
क्या गर्म और ठंडे मौसमों के लिए स्नेहन की आवश्यकताओं में कोई अंतर होता है?+
जलवायु के अनुसार लुब्रिकेशन की आवृत्ति एक समान रहती है – लुब्रिकेशन का अंतराल तापमान से नहीं, बल्कि प्रति सत्र बेलिंग चक्रों की संख्या से निर्धारित होता है। हालांकि, ग्रीस के प्रकार का चयन जलवायु से थोड़ा प्रभावित होता है। अत्यधिक गर्म परिचालन स्थितियों में (रेगिस्तानी या शुष्क क्षेत्रों में गर्मियों में बेलिंग के चरम समय में 45°C से अधिक परिवेश तापमान पर), उच्च तापमान पर बेहतर प्रदर्शन के लिए उपयुक्त उच्च-तापमान ईपी लिथियम कॉम्प्लेक्स ग्रीस, मानक ग्रेड 2 ईपी ग्रीस की तुलना में बेहतर सुरक्षा प्रदान करता है, जो लगातार उच्च तापमान पर नरम होकर बेयरिंग कैविटी से बाहर निकल सकता है। अत्यधिक ठंडी जलवायु में, जहां मशीन -10°C से कम तापमान पर चालू की जाती है: मानक ग्रेड 2 ईपी ग्रीस कम तापमान पर सख्त हो जाता है और ठंडे परिचालन के पहले कुछ मिनटों के दौरान बेयरिंग सतहों को पर्याप्त रूप से लुब्रिकेट नहीं कर पाता है। सबसे महत्वपूर्ण फिटिंग (हब बेयरिंग) में ग्रेड 1 या ग्रेड 0 ईपी ग्रीस, शून्य से नीचे के भंडारण स्थितियों में बेहतर कोल्ड-स्टार्ट लुब्रिकेशन प्रदान करता है। जलवायु-विशिष्ट ये चयन मूलभूत परिवर्तनों के बजाय परिष्करण हैं — मानक ईपी ग्रेड 2 अमेरिका भर में अधिकांश बेलिंग स्थितियों के लिए उपयुक्त है।
क्या मुझे पहली बार इस्तेमाल करने से पहले नए बेलर पर कुछ चिकनाई लगाने की आवश्यकता है?+
जी हां — नई मशीन की डिलीवरी से पहले लुब्रिकेशन संबंधी आवश्यकताओं के लिए ऑपरेटर मैनुअल देखें। 9YF सीरीज़ के अधिकांश मॉडल फैक्ट्री से कुछ कंपोनेंट्स पर ऑपरेटिंग ग्रीस के बजाय सुरक्षात्मक तेल की कोटिंग के साथ भेजे जाते हैं, और परिवहन के दौरान इस्तेमाल किए गए प्रिजर्वेशन ऑयल के कारण कुछ चेन लिंक्स में वर्किंग लुब्रिकेंट नहीं हो सकता है। नई मशीन पर पहले सेशन से पहले: सभी फिटिंग्स को दैनिक और साप्ताहिक शेड्यूल के अनुसार ग्रीस करें, भले ही मशीन को अभी-अभी अनपैक किया गया हो। खुली ड्राइव चेन पर तेल लगाएं। गियरबॉक्स ऑयल लेवल की जांच करें — शिपिंग के दौरान मशीन को एक कोण पर रखने के बाद फैक्ट्री फिल ऑपरेटिंग लेवल से थोड़ा नीचे हो सकता है। पहले PTO-एंगेज्ड टेस्ट से पहले मशीन को एक मैनुअल रोटेशन साइकिल (PTO डिस्कनेक्टेड) चलाकर देखें और किसी भी तरह की सूखी यांत्रिक आवाज़ पर ध्यान दें। पहले सेशन से पहले की यह 15 मिनट की जांच उस स्थिति को रोकती है जहां पहला सेशन शिपिंग अवधि के सूखे बेयरिंग के साथ चलता है।
अपने 9YF मॉडल के लिए सही ग्रीस स्पेसिफिकेशन प्राप्त करें
हमसे संपर्क करें वर्गाकार बेलर कृपया सीरियल नंबर बताएं और हम आपकी मशीन के लिए सही ग्रीस प्रकार, गियरबॉक्स तेल विनिर्देश और अंतराल अनुसूची की पुष्टि करेंगे, और आपकी परिचालन स्थितियों से संबंधित किसी भी स्नेहन प्रश्न का उत्तर देंगे।
संपादक: सीएक्सएम