Baler Technical Maintenance Guide

丸型ベーラー用ベルト:メンテナンス、摩耗診断、および交換

Round baler belts are the single most critical wear item in the bale chamber system. They determine whether bales form correctly, whether density targets are met, whether the bale ejects cleanly, and whether the baler operates season-to-season without unexpected failures. Understanding how belts wear, when to replace them, and how to extend their service life is the highest-leverage maintenance knowledge for any round baler operator.

Belt System Overview

The Belt System’s Role: Why Belts Are the Single Most Important Component

In a variable-chamber round baler, the belts form the walls of the bale chamber itself — they are simultaneously the structural element that contains the forming bale, the drive element that rotates the bale, and the compression element that builds density. Every function of the bale chamber depends on the belts performing correctly. In a fixed-chamber design, the belts drive the rollers that rotate the bale, and their condition determines how efficiently the chamber’s mechanical energy is transferred to the forming bale. In both designs, belt deterioration directly and immediately affects bale quality and baler reliability.

2,000–4,000
Typical belt service life in bales on a mid-range variable-chamber baler at correct operating tension
2.0%
Maximum acceptable belt elongation from new length before replacement is required — the definitive wear standard
Off-season
Optimal replacement timing — planned off-season replacement eliminates mid-harvest emergency cost multiplier

Belt Types and Construction: What Your Baler’s Belts Are Made Of

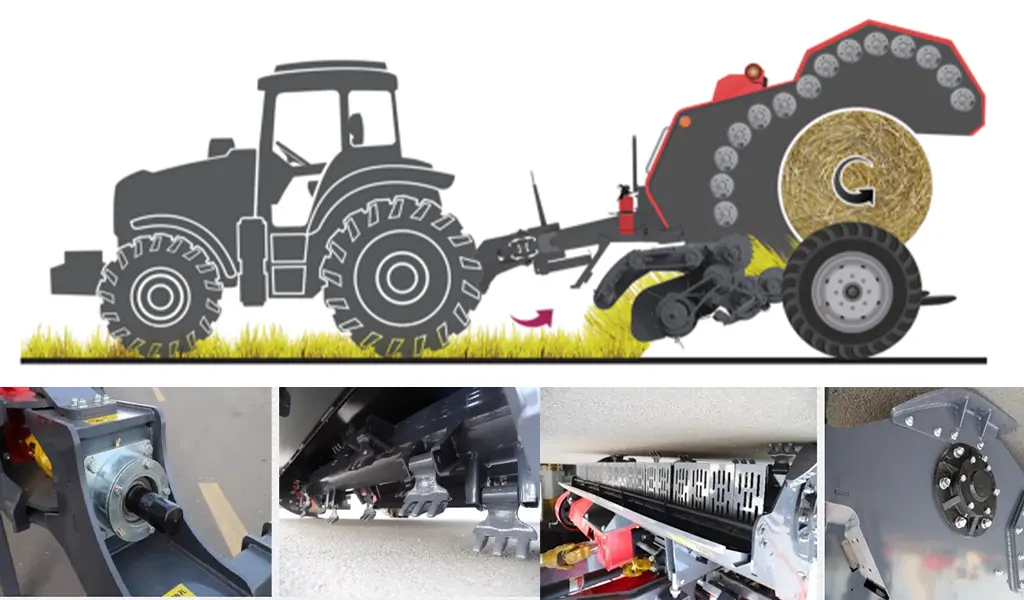
round baler working principle showing belt chamber — the belt system forms the rotating bale chamber; belt material and construction determine how the tension load is distributed across the belt width during bale formation, and how the belt responds to the high-moisture crop environment

Round baler belts are multi-layer constructions designed to flex repeatedly through small-radius roller paths while maintaining the tensile strength to compress crop material at high pressure. The critical construction layers are the tensile member (which resists elongation and determines belt life), the rubber cover (which provides grip on the crop and wear resistance against rollers), and the carcass (which provides structural body and flexibility).

Steel cord tensile member

Steel cord belts have a tensile member made from high-tensile steel cables embedded in rubber. They are stiffer than textile-cord belts, elongate very little over their service life, and maintain more consistent tension. Most OEM round baler belts in commercial balers are steel-cord construction. They do not “creep” (gradually elongate under sustained tension) the way textile belts do, making elongation measurement more accurate over a service season.

Textile/polyester cord tensile member

Textile-cord belts use polyester or nylon cords as the tensile member. They are more flexible and lighter than steel-cord belts, and they elongate more over their service life — requiring more frequent tension adjustment and more careful elongation monitoring. They are more forgiving of minor tension misalignment and are common in lighter-duty balers. Elongation measurement is essential for textile-cord belt management because they stretch more predictably (and faster) than steel-cord belts.

Rubber cover compound

The outer rubber cover provides grip on the crop material. Different compound formulations are used for different crops — smooth or fine-textured covers for grass hay; cleated or textured covers for heavy or wet silage material. Cover wear (where the surface compound wears thin exposing the carcass fabric) reduces grip efficiency and accelerates wear at the exposed zones. Inspect cover thickness at all roller contact points annually.

Belt Elongation Measurement: The Definitive Wear Standard

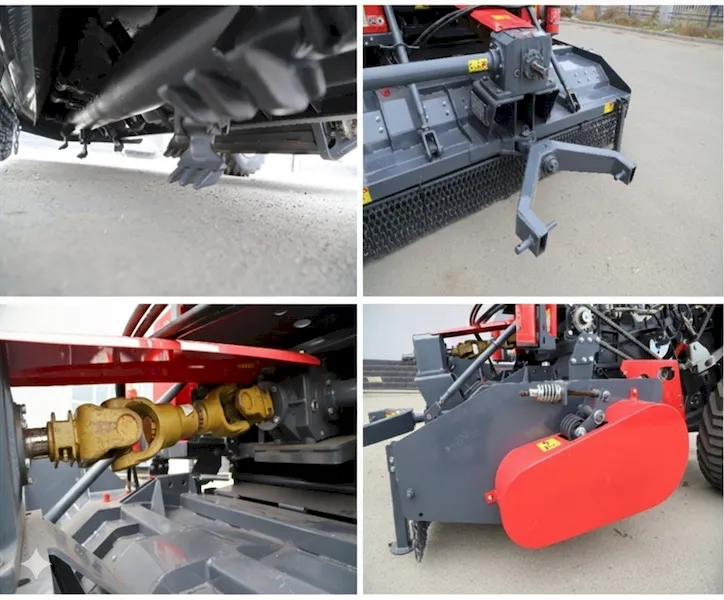
round baler structure showing belt routing — belt elongation is measured by comparing the 12-link length of the belt to the new-belt specification for that model; elongation above 2% indicates the belt can no longer maintain proper tension at any spring adjustment setting and must be replaced

Elongation is measured as the percentage increase in belt length relative to the new-belt specification. A belt that was 3,000mm when new and measures 3,060mm after one season has elongated 2.0% — the replacement threshold. This measurement is objective, repeatable, and unaffected by the appearance of the belt surface, making it the most reliable wear indicator regardless of the belt’s visual condition.

Belt Elongation Measurement Procedure — Step by Step
1

Access the measurement zone. Open the tailgate fully and rotate the belt by hand until a belt lace (splice joint) is accessible at a point where the belt runs flat — typically at the lower belt guide rollers or on the flat run between two rollers. Mark the belt at the lace point with chalk for reference.

2

Mark a measurement section. From the lace, count forward 20 belt links (or use a tape to mark a specific reference distance per your baler’s manual — some specify measuring across 10, 12, or 20 links). Mark the endpoint with chalk.

3

Measure the section length. Use a rigid steel tape (not a flexible cloth tape, which produces inconsistent readings). Measure between the chalk marks and record the measurement to the nearest millimeter.

4

Compare to new-belt specification. Find the new-belt measurement for the same section length in the baler’s operator manual. Calculate: (measured length − new length) ÷ new length × 100 = elongation percentage. If elongation exceeds 2.0%, the belt is past the replacement threshold.

5

Measure all belts. Repeat on every belt in the baler. If any single belt exceeds 2.0%, replace the full belt set — not just the one belt. Mixed-elongation belt sets produce uneven tension distribution that causes the same density and tracking problems as uniformly worn belts.

Visual Inspection: What to Look for at Each Service Check

foragebaler.com quality commitment — belt inspection at defined intervals identifies developing problems before they become belt failures; the inspection protocol covers cover wear, edge fraying, lace condition, and rubber cracking that precede belt failure

Inspection point What to check Action threshold
Belt surface cover Rubber compound thickness at roller contact zones — presses finger into cover; if fabric feel is detectable, cover is thin Replace when cover fabric visible at any contact point
Belt edges Look for fraying, rubber crumbling, or carcass cord exposure at belt edges — caused by belt tracking against guide flanges Significant fraying: investigate tracking before replacement
Splice / lace condition Check mechanical lace clips for bent or missing clips; check vulcanized splices for separation or cracking at the joint perimeter Any lace clip damage: replace or repair before harvest
Belt tracking Run the baler empty at idle PTO and observe belt path — each belt should track centered on all rollers without lateral drift Visible lateral drift: adjust tracking before baling
Rubber cracking (surface) Fine surface cracks (crazing) are normal aging; deep cracks that penetrate the carcass indicate UV degradation or chemical exposure Deep cracks to carcass: replace proactively

Belt Tension and Tracking: The Setup Parameters That Control Wear Rate

Correct belt tension is the most important operational variable for belt service life. Over-tension causes accelerated tensile member fatigue — the belt works harder to flex through the roller path and fatigues faster. Under-tension causes belt slippage on drive rollers, which generates heat, wears the surface cover, and in extreme cases causes splice failure from the repetitive impact as the belt slips and catches.

Tension spring setting

Most variable-chamber balers have a tension spring adjustment that sets the compression force on the forming bale. The spring is typically set at the manufacturer’s standard position for most hay and adjusted tighter for maximum density. As belts elongate over the season, the effective spring position changes — the same spring setting that was correct at the start of the season may be effectively looser as the belt stretches. This is why density gradually declines through the season even without any deliberate adjustment change. When density decline is noted, measure elongation before adjusting tension — adjusting tension on over-worn belts is a temporary fix that masks the replacement need.

Tracking adjustment

Belt tracking is adjusted by changing the angle of one or more guide rollers relative to the belt path. A belt that tracks to the left is corrected by angling the adjustment roller to move the belt path rightward. The procedure: run the baler unloaded at idle, observe which direction each belt drifts, and make small incremental adjustments (1/4 turn of the adjustment bolt) — large single adjustments typically overcorrect. Allow 30–60 seconds for the belt to respond to each adjustment before evaluating the result. Never operate the baler with visibly mis-tracked belts — sustained edge contact against flanges destroys belt edges within hours.

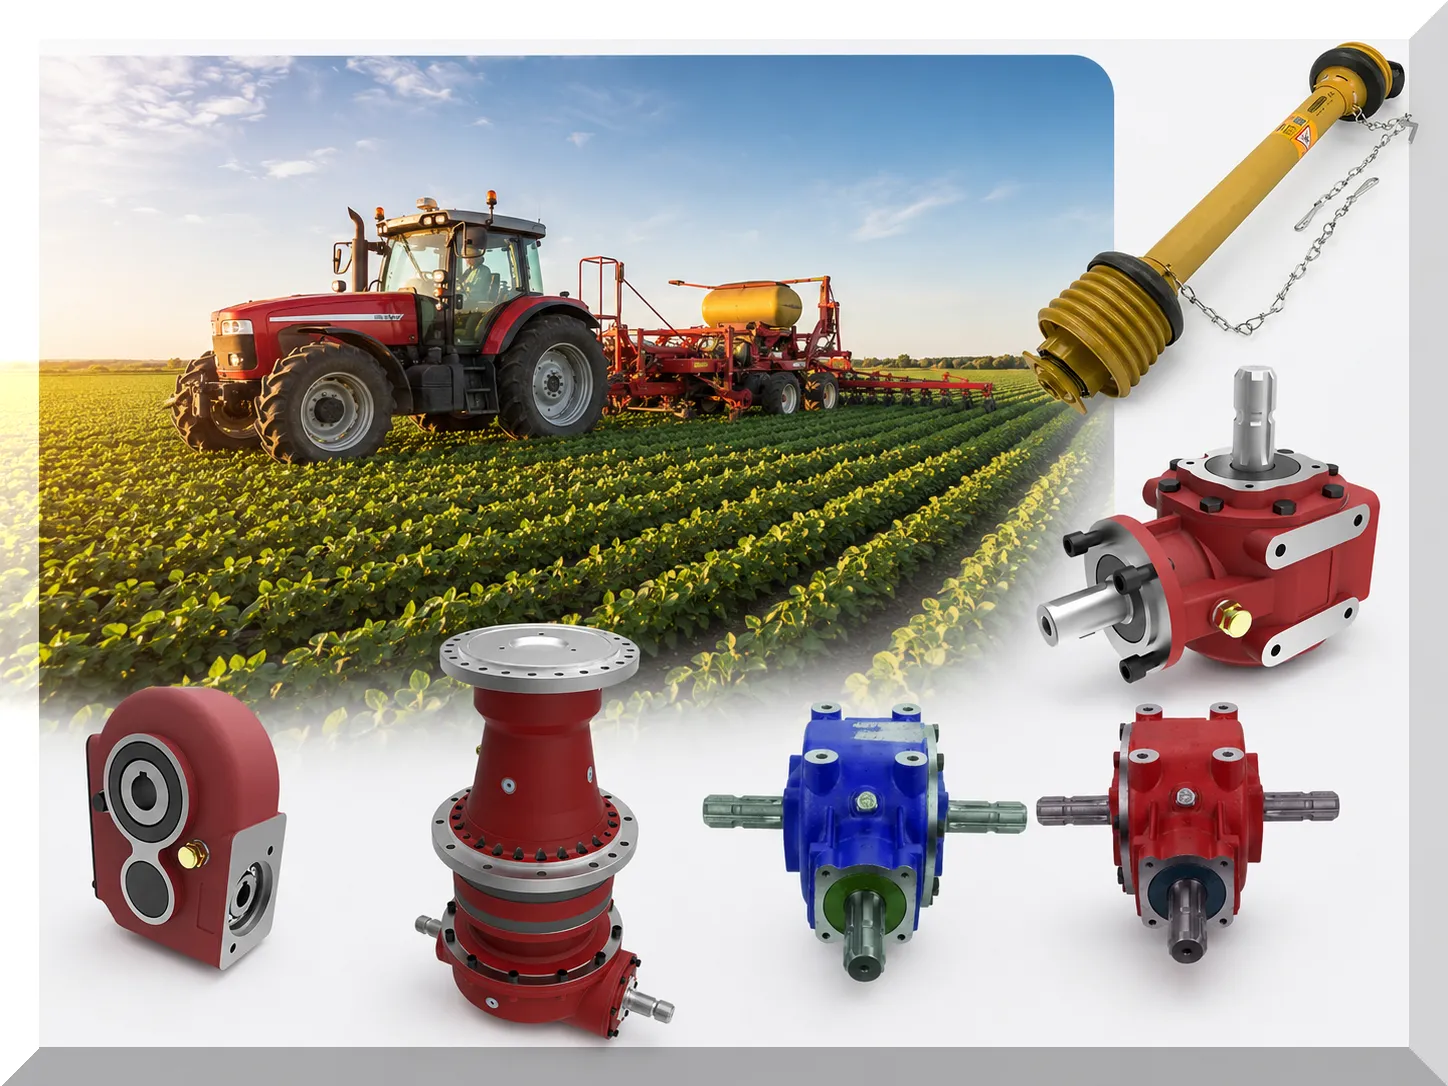
The complete seasonal maintenance checklist covering all belt, chain, and bearing service intervals is in the round baler seasonal maintenance checklist. Belt-related causes of bale density problems, bale shape irregularity, and wrapping failures are in the round baler troubleshooting guide. The gearbox and PTO driveline components that drive the belt system are in 農業用ギアボックスおよびPTO駆動系部品の仕様.

農業用ギアボックスとPTOシャフト

Replacement Timing and Procedure: Getting the Decision and the Work Right

Replace before harvest season begins

The ideal belt replacement event is in March or April — before the first cutting begins. Measuring elongation in February and ordering replacement belts immediately ensures they are on hand before the season opens. The cost of planned off-season replacement: parts + 4–6 hours labor in a warm, unhurried shop environment. The cost of emergency mid-harvest replacement: emergency parts markup + lost production + possible custom baling cost for the delayed window. The financial difference routinely exceeds $3,000–$5,000 per emergency event.

Replace as a complete set

When replacing belts, replace every belt in the baler as a complete matched set — even if some belts are within the acceptable elongation range. Mixed-elongation belt sets cause uneven tension distribution across the bale width, producing density variation, tracking problems, and accelerated wear on the new belts (which take more load than the old elongated belts alongside them). The cost savings from replacing “only the bad ones” is consistently outweighed by the problems that mixed-condition sets create.

Inspection after the first 100 bales on new belts

New belts undergo a “break-in” elongation period — typically 0.3–0.5% elongation in the first 200–400 bales as the rubber compound and tensile member settle under tension. Re-check elongation after the first 200 bales and confirm tracking is stable. Tension adjustment after break-in is normal and expected. Beyond the break-in period, elongation should slow substantially for the remainder of the belt’s service life.

Extending Belt Service Life: Operating Practices That Matter

Avoid over-baling at max density
Running the maximum density setting continuously puts the tensile member under maximum stress on every bale. Use maximum density only when your market requires it (commercial export, bale weight requirements). For livestock hay where moderate density is acceptable, reducing density 15–20% below maximum extends belt service life by 20–30% without affecting most buyers.
Bale at correct moisture
Crop at 8–10% moisture is harder and less compressible than crop at 15–18% moisture, requiring significantly more belt force to achieve the same density. Baling very dry crop (below 10%) at maximum density settings creates the highest belt stress events. If you must bale in dry conditions, reduce density setting to compensate rather than over-stressing the belts.
Keep rollers clean
Crop material that builds up on guide rollers and drive rollers creates an irregular surface that causes localized belt stress spikes on every revolution. Inspect drive rollers and guide rollers for buildup daily during silage baling (high-moisture material builds up fastest). Clean buildup with a scraper — do not use solvents or water jet that can penetrate belt structure.
Store correctly in off-season
Belts left at full tension in storage continue to creep (slowly elongate under sustained load). Release belt tension at the end of each season — most balers have a tension spring lockout or transport setting that reduces spring load. Store the baler in a covered, cool environment — UV and ozone exposure accelerates rubber compound degradation even in non-operating conditions.

Belt Maintenance FAQs

My bales are getting softer through the season without any setting changes. What is happening?+
Progressive density decline through the season without setting changes is the clearest symptom of belt elongation. As belts stretch, the tension spring — which is set at a fixed compression — exerts progressively less force on the forming bale because the belt has more length and the spring operates at a different point in its compression curve. The belt is covering the same path but with less tension. The correct diagnostic: measure elongation. If it confirms the belts are past or approaching 2%, that is the root cause. Increasing the tension spring setting will temporarily restore density, but this is treating the symptom rather than the cause — the belts are still elongating and the spring range will eventually run out. Replace the belts.
One of my belts broke mid-harvest. Can I continue baling with the remaining belts until the season ends?+
Operating with a missing belt in a variable-chamber baler significantly changes the chamber geometry and causes two problems: the crop contacts the remaining belts unevenly, producing bales that are oval (D-shaped or egg-shaped) rather than round; and the remaining belts take more load per belt (the missing belt’s share of the bale is now absorbed by the adjacent belts), accelerating their wear and increasing the risk of a second failure. In an emergency with no replacement belt available, operating at significantly reduced density and reduced forward speed (to lower per-bale compression force) can allow 50–100 bales before replacing, if harvest timing absolutely demands it. The correct action is to stop, order the belt, and resume when the replacement arrives. A shaped bale from operating with a missing belt is a quality and storage problem that affects the entire field’s output.
Should I use OEM belts or quality aftermarket belts?+
Quality aftermarket belts from established agricultural belt suppliers — companies that manufacture to documented specifications with confirmed circumference tolerance and tensile rating — perform equivalently to OEM belts in most applications at 50–70% of OEM price. The critical specification to verify before purchasing aftermarket belts: the circumference of the belt must match the OEM circumference to within 5mm for variable-chamber balers (belt length determines the chamber operating geometry) and the tensile strength must meet or exceed the OEM rating. Reject any aftermarket belt that cannot provide a circumference specification with tolerance and a tensile rating in writing. Generic “universal” belts from non-agricultural suppliers with no specifications are not appropriate for commercial baling — the risk of premature failure from under-specified construction exceeds any purchase price savings.
How do I know if my belt problem is elongation vs tracking vs tension?+
The diagnosis sequence: (1) check elongation first — measure with a tape as described. If any belt exceeds 2%, that is the primary issue and replacement is the solution regardless of any other symptom. (2) If elongation is within spec but bales are asymmetric (heavier on one side), look for tracking issues — run the baler empty and observe whether any belt drifts laterally. A tracking problem produces asymmetric bales but not uniform density decline. (3) If elongation is within spec and tracking is correct but density is below target, check tension spring setting against the specification in the operator manual — the spring may have been adjusted off-standard at some point. Tension issues produce uniform density decline across the full bale width, whereas tracking issues produce density variation from side to side.
How long should belt replacement take, and what skills does it require?+
A full belt set replacement on a mid-range variable-chamber baler takes 4–8 hours for a capable farm mechanic doing it the first time with the operator manual open; 2–4 hours for someone who has done it once or twice before. The skills required: basic mechanical aptitude, ability to work safely around heavy springs (tailgate springs must be properly restrained before disassembly), and the patience to correctly route the new belts through the roller path in the correct sequence. Belt routing errors — installing a belt on the wrong side of a guide roller or routing in the wrong sequence — are the most common mistakes on first installations and require disassembly and re-routing to correct. Film the belt routing before disassembly on the first replacement so you have a reference for re-installation. Most producers who do their own belt replacement the first time with the operator manual report it is easier than expected once the tailgate is opened and the routing becomes visible.
My belts look good but the baler has been sitting unused for 3 years. Do I need to replace them anyway?+
Measure elongation first — if the belts are within the 2% threshold, the question becomes age-related degradation rather than use-related wear. Rubber compounds have a finite service life regardless of use — typically 7–12 years depending on storage conditions. Belts stored outdoors or in UV-exposed, temperature-cycling environments age faster than belts stored indoors. A 3-year-idle baler stored in a covered building with belts under released tension: inspect the rubber surface carefully for deep cracking (beyond surface crazing), check the lace clips for corrosion, and measure elongation. If all check out, the belts may be suitable for another season. Flex each belt segment by hand — rubber that has hardened significantly (no longer feels pliable and resilient under hand pressure) has lost its dynamic properties and is at increased failure risk under production loads regardless of visual appearance.

foragebaler.com round baler belt specifications — circumference tolerance and tensile ratings documented for all current models

Get Belt Specifications and Replacement Timing for Your Baler Model

Tell us your baler model, current belt elongation measurement, and annual bale count. We confirm whether your belts need immediate replacement and provide the correct belt specification for your model so you are prepared before harvest begins.

Check My Belt Specification

Ediror: Cxm