
시즌 전 점검 논리: 시스템보다 구역 우선
대부분의 시즌 전 점검 목록은 "벨트", "체인", "베어링"과 같이 구성 요소 범주별로 정리되어 있습니다. 이는 베일러를 속속들이 아는 사람에게는 효과적입니다. 하지만 모든 것을 빠짐없이 점검하고 신뢰할 수 있는 체계적인 점검을 위해서는 물리적 구역별로 정리하는 것이 더 효과적입니다. 베일러를 앞쪽에서 뒤쪽으로, 그리고 바닥에서 위쪽으로 이동하면서 각 구역의 모든 구성 요소를 점검한 후 다음 구역으로 넘어가는 방식입니다. 이렇게 하면 시스템을 전환하는 것을 잊어버리는 바람에 누락되는 부분이 생기지 않습니다.
원형 베일러의 시즌 전 점검은 다음 10개 구역으로 구성됩니다. (1) PTO 및 구동축, (2) 픽업 시스템, (3) 작물 투입구 및 공급 장치, (4) 벨트 시스템, (5) 구동 체인 및 스프로킷, (6) 베일 챔버 롤러 및 베어링, (7) 테일게이트 및 힌지 시스템, (8) 네트 랩 또는 트와인 시스템, (9) 전기 및 유압 시스템, (10) 첫 번째 베일 현장 테스트. 각 구역에는 특정 측정값, 육안 검사 및 합격/불합격 기준이 있습니다. 각 구역의 점검 결과는 기록되어 전년 대비 마모율 추세를 확인할 수 있습니다.
PTO/구동계
찾다
섭취량/사료
벨트 시스템
쇠사슬
롤러/베어링
뒷문
랩 시스템
전기/유압
현장 테스트
구역 1: PTO 샤프트 및 구동계 — 안전 및 기능 점검
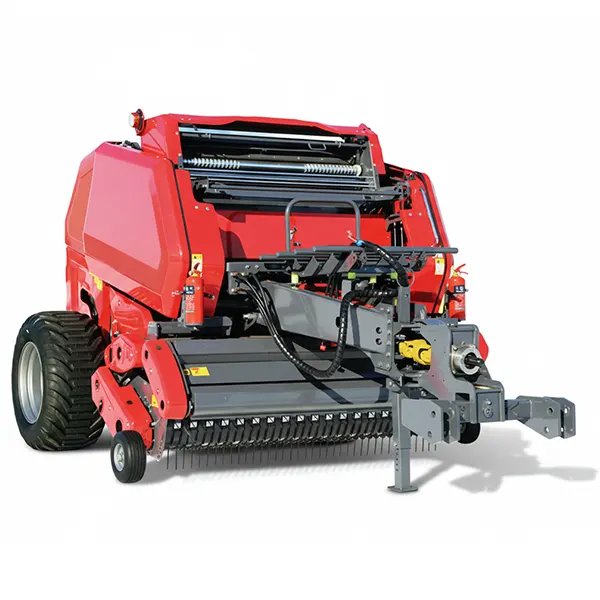
모든 PTO 및 구동계 점검은 트랙터 엔진을 끄고 PTO를 완전히 분리한 상태에서 수행해야 합니다. 회전하는 PTO 부품 근처에서는 절대로 점검, 조정 또는 청소를 하지 마십시오. 구동계 부품을 만지기 전에 PTO가 분리되었는지, 엔진이 꺼져 있는지 확인하십시오.
2~3구역: 수확 및 작물 투입 - 갈퀴 및 탈피기 점검
수확기는 베일러에서 먼지가 가장 많이 발생하고 충격이 가장 심한 부분입니다. 갈퀴가 작물과 흙에 직접 닿기 때문에 마모가 가장 빠른 부품입니다. 수확 전 수확기 점검은 10~15분이면 충분하지만, 갈퀴가 짧아지거나 휘어져서 수확철 내내 눈에 띄지 않게 누적되는 손실을 방지할 수 있습니다.
각 갈퀴를 동일한 부품 번호의 새 갈퀴와 비교하여 새 갈퀴 길이보다 20% 이상 짧은 갈퀴는 교체하십시오. 배열된 모든 갈퀴에 설계 각도에서 10° 이상 휘어진 부분이 있는지 검사하십시오. 갈퀴 길이가 교체 길이보다 짧은 갈퀴가 2개 이상 있는 행의 모든 갈퀴를 교체하십시오. 한 행의 갈퀴만 교체하면 수확 높이가 고르지 않게 됩니다. 매년 마모율을 비교할 수 있도록 각 행의 갈퀴 상태 등급(양호/곧 교체 필요/즉시 교체 필요)을 기록하십시오.
수확기를 정지시킨 상태에서 각 수확기 날과 인접한 갈퀴 사이 간격에 자를 넣어보십시오. 가장 가까운 지점의 간격은 3~8mm여야 합니다. 마모되어 원래 길이인 60%보다 짧아진 수확기 날은 간격이 12mm 이상 벌어져 작물이 휘감길 수 있습니다. 수확철이 시작되기 전에 원래 길이인 60%보다 짧아진 수확기 날은 모두 교체하십시오. 수확기 날 전체를 교체하는 작업은 작업장에서는 30분이면 완료되지만, 진흙탕이 된 밭에서 수확물이 쌓여 있는 상태로 작업할 경우 90분이 소요됩니다.
스키드 슈 두께를 측정하고 원래 두께(작업자 매뉴얼 치수표 참조)와 비교하십시오. 마모된 슈가 원래 두께보다 3mm 이상 얇아진 경우, 조정 범위의 최상단으로 재조정하고 첫 번째 절삭 시 면밀히 관찰해야 합니다. 마모된 슈가 원래 두께의 60%에 도달하면 교체해야 합니다. 시즌 전 점검 시 교체하지 않으면 남은 조정 범위가 시즌 중반에 소진될 수 있습니다. 현재 슈 높이 조정 설정을 시즌 중 비교를 위한 기준선으로 기록하십시오.
구역 4: 벨트 시스템 — 신장 기준선 및 육안 조사
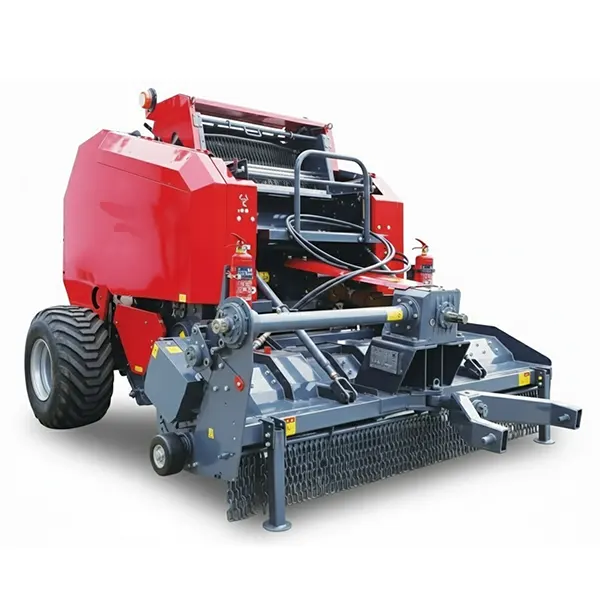
시즌 전 벨트 측정은 베일러 가동 준비 상태를 점검하는 데 있어 가장 효과적인 20분 투자입니다. 3월에 측정한 벨트 세트의 신장률이 1.6%라면, 해당 벨트는 규격 범위 내에 있으며, 생산량 기준으로 시즌당 약 0.4~0.6% 정도 늘어나므로 다음 비시즌에 교체가 필요하다는 것을 의미합니다. 이러한 정보는 측정을 통해서만 얻을 수 있으며, 외관만으로는 정확하게 추정할 수 없습니다.
| 벨트 # | 새로운 길이 (수동에서 확인) | 이번 시즌 측정 | 연장 % | 상태 |
|---|---|---|---|---|
| 벨트 1 | _____ mm | _____ mm | _____% | □ 확인 □ 교체 |
| 벨트 2 | _____ mm | _____ mm | _____% | □ 확인 □ 교체 |
| 벨트 3 | _____ mm | _____ mm | _____% | □ 확인 □ 교체 |
| 벨트 4 | _____ mm | _____ mm | _____% | □ 확인 □ 교체 |
| 벨트 5 | _____ mm | _____ mm | _____% | □ 확인 □ 교체 |
벨트 하나라도 늘어나는 정도가 2.0%를 초과하면 벨트 세트 전체를 교체하십시오. 벨트 하나라도 늘어나는 정도가 1.6% 이상이면 즉시 교체용 벨트를 주문하십시오. 주문부터 배송까지 일반적으로 5~14 영업일이 소요됩니다.
5구역: 구동 체인, 스프로킷 및 기어박스
구동 체인은 PTO 회전을 챔버 롤러와 픽업 드럼의 회전으로 변환합니다. 체인 늘어짐은 두 가지 문제를 동시에 발생시킵니다. 첫째, 체인이 스프로킷 톱니와 정확하게 맞물리지 못하게 되어 체인 헛돌림과 소음이 발생합니다. 둘째, 체인 접촉면의 형상이 변형되어 체인과 스프로킷의 마모가 가속화됩니다. 시즌 시작 전 체인 길이를 측정하면 시즌 중에 이러한 두 가지 문제가 발생하는 것을 방지할 수 있습니다.
체인의 가장 평평한 부분에서 12개 링크의 길이를 측정하십시오. 해당 체인 크기의 새 체인 12개 링크 길이(사용 설명서 참조)와 비교하십시오. 2%의 신장률이 발생하면 교체하십시오. 새 체인 규격이 12인치인데 12.24인치로 측정된 체인은 2.0%의 신장률을 보이므로 교체해야 합니다. 대부분의 베일러 체인은 표준 ANSI 롤러 체인 크기(#40, #50, #60)를 사용하며, 모든 농업 또는 산업용 체인 공급업체에서 구입할 수 있습니다. 매년 측정값을 기록하고 비교하여 마모율을 파악하고 다음 교체 시기를 예측하십시오.
각 구동 스프로킷의 톱니 모양이 갈고리 모양이나 상어 지느러미 모양인지 육안으로 검사하십시오. 이는 늘어난 체인과 함께 사용된 스프로킷의 특징적인 마모 패턴입니다. 톱니 모양이 대칭적으로 둥근 모양이 아닌 날카롭고 뒤쪽으로 휘어진 형태라면 스프로킷을 교체해야 합니다. 갈고리 모양으로 마모된 스프로킷에 새 체인을 장착하는 것은 잘못된 절약입니다. 새 체인도 마모된 스프로킷에서 예상되는 수명의 절반 만에 늘어남 한계까지 마모되기 때문입니다.
점검창이나 주입구를 통해 기어박스 오일 레벨을 확인하십시오. 사용 설명서에 명시된 규격의 오일을 보충하십시오. 모든 기어박스 씰 표면에서 오일 누출 여부를 점검하십시오. 약간의 누출은 종종 허용되지만, 오일이 심하게 떨어지거나 씰 주변에 오일 고리가 보이면 시즌 전에 씰을 교체해야 합니다. 3월에 발견된 기어박스 씰 누출은 1시간이면 수리할 수 있지만, 수확 도중에 발견되면 예상치 못한 하루 종일 걸리는 현장 수리 작업이 될 수 있습니다.
6~7구역: 롤러, 베어링 및 트렁크 경첩

8번 구역: 네트 랩 시스템 — 경로, 칼날 및 공급 검증
네트 랩 시스템은 각 베일에 네트 랩을 공급하고, 적용하고, 절단합니다. 시즌 시작 전에 전체 랩핑 경로를 확인하여 시즌 중반에 흔히 발생하는 문제들을 방지합니다. 이러한 문제에는 마모되거나 정렬이 잘못된 가이드로 인한 네트 공급의 불규칙성, 무딘 칼날로 인한 네트 절단 불량, 계수 센서 문제로 인한 네트 회전 횟수 부족 등이 포함됩니다.
네트 랩 롤을 장착하고 챔버에 베일이 없는 상태에서 랩 시스템을 작동시키십시오(모델에 따른 절차는 사용 설명서를 참조하십시오). 네트는 롤에서 부드럽게 공급되어 모든 가이드 롤러를 뭉침 없이 통과하고, 올바른 각도로 챔버에 들어가 카운터가 작동하면 깔끔하게 절단되어야 합니다. 공급이 원활하지 않거나, 가이드에서 뭉치거나, 깔끔하게 절단되지 않으면 시즌 전에 어떤 하위 구성 요소를 점검해야 하는지 알 수 있습니다.
네트 랩 나이프는 외관 상태와 관계없이 매 시즌 시작 전에 교체해야 합니다. 나이프 하나당 $10~$25 정도의 비용이 들기 때문에, 수확 도중 절단 불량으로 랩 시스템이 막히는 사고에 비하면 훨씬 저렴합니다. 지난 시즌 말에 깔끔하게 절단했던 나이프라도 한 시즌을 더 사용한 것이므로 고장 발생 가능성이 높아집니다. 3월에 나이프를 교체하는 데 드는 5분은 베일러 전체에 있어 가장 비용 효율적인 예방 조치입니다.
베일 챔버에 표시를 하고 수동으로 회전수를 세어 드라이런 중에 디스플레이에 표시되는 값과 비교하여 베일 회전수 카운터가 정확하게 작동하는지 확인하십시오. 센서가 0을 읽거나 일관성이 없는 값을 읽으면 랩핑이 예측 불가능하게 적용될 수 있습니다. 즉, 베일러가 너무 적거나 너무 많은 회전 후에 절단을 시작할 수 있습니다. 센서 표면을 청소하고 제조업체 사양에 따라 트리거 목표 지점과의 간격을 확인하십시오.
계절별 정비 체크리스트 전체에는 서비스 주기, 윤활 사양, 그리고 시즌 전 기본 점검 후 이어지는 시즌 중 점검 지점이 포함되어 있습니다. 원형 베일러 계절별 유지보수 점검표시즌 전 점검에서 근본 원인이 불분명한 문제가 발견될 경우, 증상에서 원인으로 이어지는 진단 가이드가 있습니다. 원형 베일러 문제 해결 가이드PTO 샤프트 및 기어박스 구성 요소 검사 사양은 다음과 같습니다. 농업용 변속기 및 PTO 구동계 부품 사양.
10구역: 첫 번째 베일 현장 테스트 및 교정 프로토콜
시즌 첫 번째 베일은 생산용 베일이 아니라 보정 작업입니다. 최고의 수확일에 최고의 건초를 수확하는 것이 아니라, 작고 가치가 낮은 윈드로우 구역에서 만들어야 합니다. 첫 번째 베일은 설정을 확인하고, 베일 모양과 밀도를 예상과 비교하여 점검하고, 랩핑이 제대로 되었는지 확인하고, 본격적인 작업에 들어가기 전에 최종 조정을 하는 데 사용됩니다.
첫 번째 베일을 배출한 후, 주먹으로 베일 표면을 눌러 물리적으로 확인하십시오. 베일이 눈에 띄게 저항하는 느낌이 들어야 합니다. 최대 밀도 설정에서 첫 번째 베일이 푹신하다면 벨트가 마모된 것이므로 계속 작업하기 전에 신장률을 측정해야 합니다. 모니터에서 측정한 밀도 값을 기록하여 시즌 동안 비교할 기준선으로 사용하십시오.
베일을 뒤쪽과 측면에서 살펴보십시오. 제대로 만들어진 베일은 양 끝의 지름이 같고 측면이 수직인 진정한 원통형입니다. 계란 모양이나 D자 모양의 베일은 벨트 폭 전체에 걸쳐 작물이 고르게 분포되지 않았음을 나타내며, 이는 대부분 픽업 장치의 정렬 불량이나 윈드로우 트래킹의 중심 이탈로 인해 발생합니다. 동일한 문제가 발생하는 베일을 하나 이상 추가로 만들기 전에 문제를 진단하고 수정하십시오.
첫 번째 베일의 랩핑 상태를 점검하여 베일 둘레 전체에 고르게 감싸져 있는지, 랩핑 과정 사이의 겹침이 적절한지, 그리고 끝부분이 평평하게 잘려 깔끔하게 절단되었는지 확인하십시오. 랩핑에 틈이 있거나, 겹침이 불규칙하거나, 끝부분이 거칠다면 생산을 시작하기 전에 랩핑 시스템을 조정해야 합니다.
시즌 시작 전 준비 관련 자주 묻는 질문(FAQ)
보유 중인 베일러 모델의 시즌 전 점검 사양을 확인하세요.
사용하시는 베일러 모델, 지난 시즌 베일 생산량, 그리고 지난 시즌에 발생했던 성능 문제들을 알려주세요. 저희는 고객님의 모델에 맞는 구체적인 측정 사양과 마모 한계치를 제공하여, 시즌 전 점검을 통해 실질적인 개선 방안을 마련하실 수 있도록 도와드립니다.
편집자: Cxm


