
Sezon Öncesi Denetim Mantığı: Sistemlerden Önce Bölgeler
Çoğu sezon öncesi kontrol listesi, bileşen kategorisine göre düzenlenir: "kayışlar", "zincirler", "rulmanlar". Bu, balya makinesini yakından tanıyan biri için iyi sonuç verir. Hiçbir şeyi atlamayan, sistematik ve güvenilir bir inceleme için, fiziksel bölgeye göre düzenleme daha etkilidir: balya makinesinde önden arkaya ve yerden yukarıya doğru ilerleyerek, bir sonraki bölgeye geçmeden önce her bölgedeki her bileşeni incelersiniz. Zihinsel olarak sistem değiştirmeyi unuttuğunuz için hiçbir şey atlanmaz.
Yuvarlak balya makinesinin sezon öncesi muayenesinin on bölgesi: (1) PTO ve tahrik mili, (2) toplama sistemi, (3) ürün alımı ve besleyici, (4) kayış sistemi, (5) tahrik zincirleri ve dişliler, (6) balya haznesi silindirleri ve rulmanları, (7) arka kapak ve menteşe sistemi, (8) ağ sargısı veya ip sistemi, (9) elektrik ve hidrolik, (10) ilk balya saha testi. Her bölgenin belirli ölçümleri, görsel kontrolleri ve geçme/kalma kriterleri vardır. Her bölge için muayene sonucu kaydedilir, böylece aşınma oranlarındaki yıllık eğilimler görülebilir.
PTO / Tahrik Hattı
Toplamak
Giriş / Besleme
Kemer Sistemi
Zincirler
Makaralar / Rulmanlar
Bagaj kapağı
Sarma Sistemi
Elektrik / Hidrolik
Saha Testi
Bölge 1: PTO Mili ve Tahrik Hattı — Güvenlik ve Fonksiyon Kontrolü
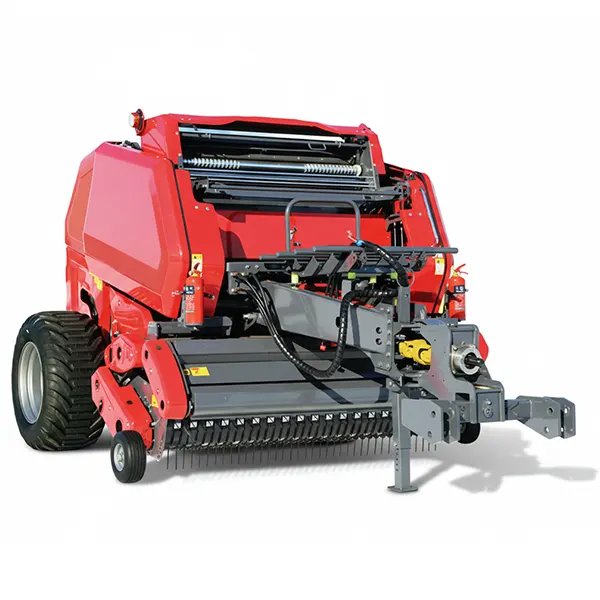
Tüm PTO ve tahrik sistemi kontrolleri, traktör motoru kapalı ve PTO tamamen devreden çıkarılmış haldeyken yapılmalıdır. Dönen PTO parçalarının yakınında asla kontrol, ayar veya temizlik yapmayın. Herhangi bir tahrik sistemi parçasına dokunmadan önce PTO'nun devreden çıkarıldığını ve motorun kapalı olduğunu doğrulayın.
2-3. Bölgeler: Toplama ve Mahsul Alımı — Tırmık ve Sıyırma Aleti Kontrolü
Balya makinesinin en tozlu ve en çok darbe alan bölgesi toplama kısmıdır; tırmıklar hem mahsul malzemesine hem de ara sıra toprağa temas eder, bu da onları en hızlı aşınan parça haline getirir. Sezon öncesi toplama kısmı kontrolü 10-15 dakikadan fazla sürmemeli, ancak tırmıkların kısa veya bükülmüş olması durumunda sezon boyunca görünmez bir şekilde biriken tarla kayıplarını önleyecektir.
Her bir çatalı aynı parça numarasına sahip yeni bir çatalla karşılaştırın; yeni uzunluktan 20%'den daha kısa olan çatalları değiştirin. Dizideki her çatalda tasarım açısından 10°'den fazla bükülme olup olmadığını kontrol edin. 2 veya daha fazla çatalın değiştirme uzunluğunun altında olduğu herhangi bir sıradaki tüm çatalları değiştirin; bir sıradaki çatalların noktasal olarak değiştirilmesi, düzensiz toplama yüksekliğine neden olur. Yıllık aşınma oranı karşılaştırması için her sıra için çatal durum derecesini (İyi/Yakında Değiştirin/Hemen Değiştirin) kaydedin.
Toplama aleti sabitken, her bir sıyırma parmağı ile bitişik tırmık yolu arasına düz bir cetvel yerleştirin; en yakın noktadaki boşluk 3-8 mm olmalıdır. Orijinal uzunluğunun 60%'sinden daha kısa hale gelen aşınmış sıyırma parmakları, boşluğun 12 mm'den fazla açılmasına ve mahsulün etrafına dolanmasına olanak tanır. Sezon başlamadan önce orijinal uzunluğunun 60%'sinden daha kısa olan tüm sıyırma parmaklarını değiştirin. Komple bir sıyırma parmağı değişimi atölyede 30 dakikalık bir iştir; çamurlu bir tarlada, bekleyen bir yığınla birlikte 90 dakikalık bir iştir.
Kızak pabucunun kalınlığını ölçün ve orijinal kalınlıkla (kullanım kılavuzundaki boyut tablosundan) karşılaştırın. Orijinal kalınlığın 3 mm'den fazla altına inmiş bir pabuç, ayar aralığının en üst noktasına yeniden konumlandırılmalı ve ilk kesim için yakından izlenmelidir. Orijinal kalınlığın 60%'sine kadar aşınmış pabuçlar değiştirilmelidir; sezon öncesi incelemede değiştirilmezse, kalan ayar aralığı sezon ortasında tükenecektir. Mevcut pabuç yüksekliği ayarını, sezon içi karşılaştırma için temel değer olarak belgeleyin.
Bölge 4: Kuşak Sistemi — Uzama Temel Değeri ve Görsel Araştırma
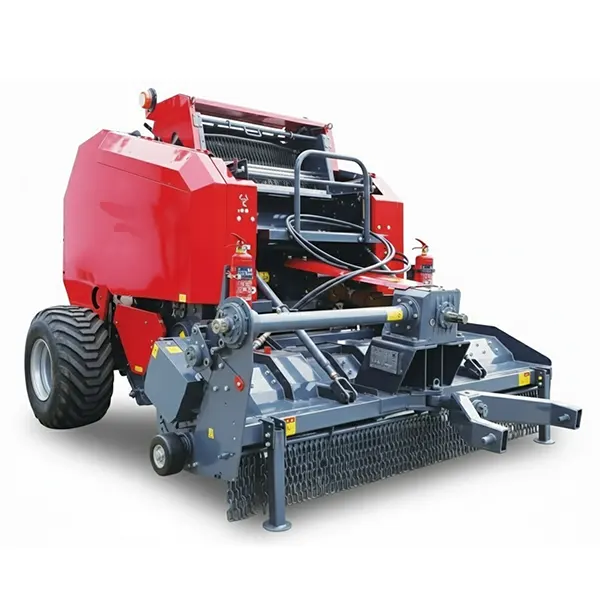
Sezon öncesi kayış ölçümü, balya makinesinin kullanıma hazır hale getirilmesinde en yüksek kaldıraç etkisine sahip 20 dakikalık yatırımdır. Mart ayında ölçülen ve 1,6% uzama gösteren bir kayış seti size şunları söyler: bu kayışlar teknik özelliklere uygundur; üretim hacminize göre sezonda yaklaşık 0,4–0,6% uzarlar; bir sonraki sezon dışında değiştirilmeleri gerekecektir. Bu bilgi ölçüm yapılmadan elde edilemez ve görünümden güvenilir bir şekilde tahmin edilemez.
| Kemer # | Yeni uzunluk (kullanım kılavuzundan) | Bu sezon ölçüldü | Uzama % | Durum |
|---|---|---|---|---|
| Kemer 1 | _____ mm | _____ mm | _____% | □ Tamam □ Değiştir |
| Kemer 2 | _____ mm | _____ mm | _____% | □ Tamam □ Değiştir |
| Kemer 3 | _____ mm | _____ mm | _____% | □ Tamam □ Değiştir |
| Kemer 4 | _____ mm | _____ mm | _____% | □ Tamam □ Değiştir |
| Kemer 5 | _____ mm | _____ mm | _____% | □ Tamam □ Değiştir |
Herhangi bir kayışın uzama değeri 2,0%'yi aşarsa, tüm kayış setini değiştirin. Herhangi bir kayışın uzama değeri 1,6%'nin üzerindeyse, hemen yedek parça siparişi verin; siparişten teslimata kadar geçen süre genellikle 5-14 iş günüdür.
Bölge 5: Tahrik Zincirleri, Dişliler ve Şanzıman
Tahrik zincirleri, PTO dönüşünü hazne silindiri ve toplama tamburu dönüşüne dönüştürür. Zincir uzaması aynı anda iki soruna yol açar: zincir artık dişli çark dişleriyle hassas bir şekilde temas halinde kalamaz (bu da atlama ve gürültüye yol açar) ve zincir temas geometrisi, hem zincir hem de dişli çark aşınmasını hızlandıracak şekilde değişir. Sezon öncesi zincir ölçümü, her iki sorunun da sezon boyunca gelişmesini önler.
Her zincirin en kolay erişilebilir düz çalışma bölümünde 12 bakla ölçün. Bu ölçümü, o zincir boyutu için yeni bir zincirin 12 bakla ölçümüyle karşılaştırın (kullanım kılavuzundan). 2% uzamada değiştirin. 12 inçlik yeni bir zincir spesifikasyonunda 12,24 inç ölçülen bir zincir 2,0%'dir - değiştirin. Çoğu balya makinesi zinciri standart ANSI makaralı zincir boyutlarındadır (#40, #50, #60) ve herhangi bir tarım veya endüstriyel zincir tedarikçisinden temin edilebilir. Aşınma oranlarını anlamak ve bir sonraki değiştirme zamanlamasını tahmin etmek için yıl yıl kaydedin ve karşılaştırın.
Her bir tahrik dişlisini, kanca şeklinde veya köpekbalığı yüzgeci gibi diş profilleri açısından görsel olarak inceleyin; bu, uzamış bir zincirle çalışmış bir dişlinin karakteristik aşınma desenidir. Simetrik olarak yuvarlak bir profil yerine keskin, geriye doğru kanca şeklinde bir diş profili, dişlinin değiştirilmesi gerektiğini gösterir. Kancalı dişlilere yeni bir zincir takmak yanlış bir tasarruftur; yeni zincir, aşınmış dişlilerde beklenen hizmet ömrünün yarısında uzama sınırına kadar aşınır.
Şanzıman yağı seviyesini kontrol penceresinden veya doldurma tapasından kontrol edin. Kullanım kılavuzunda belirtilen doğru özelliklere sahip yağ ile tamamlayın. Tüm şanzıman conta yüzeylerinde yağ sızıntısı olup olmadığını kontrol edin — küçük bir sızıntı genellikle kabul edilebilir; aktif damlama veya contanın etrafında yağlı bir halka, sezon başlamadan önce conta değişiminin gerekli olduğunu gösterir. Mart ayında bulunan sızdıran bir şanzıman contası 1 saatlik bir onarımdır; biçme işlemi sırasında bulunan ise planlanmamış, gün boyu süren bir saha onarımıdır.
6-7. Bölgeler: Makaralar, Rulmanlar ve Bagaj Kapağı Menteşesi

Bölge 8: Ağ Sarma Sistemi — Yol, Bıçak ve Besleme Doğrulaması
Ağ sarma sistemi, her balyaya ağ sargısını besler, uygular ve keser. Sezon öncesi tüm sarma yolunun doğrulanması, sezon ortasında en sık karşılaşılan sarma sorunlarını önler: aşınmış veya yanlış hizalanmış bir kılavuz nedeniyle ağın tutarsız beslenmesi, körelmiş bir bıçak nedeniyle ağın düzgün kesilmemesi ve bir sayım sensörü sorunu nedeniyle ağın çok az tur atması.
Ağ sargı rulosunu yükleyin ve haznede balya olmadan sargı sistemini etkinleştirin (modelinize göre işlem için kullanım kılavuzuna bakın). Ağ, rulodan sorunsuz bir şekilde beslenmeli, tüm kılavuz silindirlerden topaklanmadan geçmeli, hazneye doğru açıyla girmeli ve sayaç tetiklendiğinde temiz bir şekilde kesilmelidir. Beslemede herhangi bir tereddüt, kılavuzda topaklanma veya temiz kesimde başarısızlık, sezon öncesinde hangi alt bileşenin bakıma ihtiyaç duyduğunu gösterir.
Her sezon öncesinde, görünümüne bakılmaksızın ağ sarma bıçağını değiştirin; bıçak başına $10–$25 maliyeti, hasat ortasında sarma sistemini sıkıştıran başarısız bir kesim olayına kıyasla önemsizdir. Geçen sezonun sonunda temiz bir şekilde kesim yapan bir bıçak, bir sezon daha eskidir ve arıza olayına bir sezon daha yakındır. Mart ayında bıçak değişimi için ayrılan beş dakika, tüm balya makinesi için en uygun maliyetli önleyici işlemdir.
Balya devir sayacının doğru okuduğunu doğrulamak için, balya haznesini işaretleyin ve deneme çalıştırması sırasında ekranda gösterilen değerle karşılaştırarak manuel olarak sayın. Sıfır veya tutarsız okuma yapan bir sensör, sargının öngörülemeyen bir şekilde uygulanacağı anlamına gelir; balya makinesi çok az veya çok fazla devirden sonra kesme işlemini tetikleyebilir. Sensör yüzeyini temizleyin ve üretici spesifikasyonuna göre tetikleme hedefiyle olan mesafeyi kontrol edin.
Sezonluk bakım kontrol listesinin tamamı — servis aralıkları, yağlama özellikleri ve sezon öncesi temel kontrollerden sonra gelen sezon içi kontrol noktaları dahil — şurada yer almaktadır: yuvarlak balya makinesi mevsimlik bakım kontrol listesiSezon öncesi incelemede kök nedeni belirsiz bir sorun ortaya çıktığında, belirtiden nedene teşhis kılavuzu şurada yer alır: yuvarlak balya makinesi sorun giderme kılavuzuPTO şaftı ve şanzıman bileşenlerinin muayene özellikleri aşağıdadır. tarımsal şanzıman ve PTO tahrik sistemi bileşenlerinin özellikleri.
Bölge 10: İlk Balya Saha Testi ve Kalibrasyon Protokolü
Sezonun ilk balyası, üretim balyası değil, kalibrasyon işlemidir. Bunu, yılın en iyi biçme günündeki en iyi saman yerine, küçük ve düşük değerli bir saman yığını bölümünde yapın. İlk balya, ayarları doğrulamak, balya şeklini ve yoğunluğunu beklentilerle karşılaştırmak, sargının doğru şekilde uygulandığını teyit etmek ve tam saha operasyonuna geçmeden önce son ayarlamaları yapmak için kullanılır.
İlk balyayı çıkardıktan sonra, yumruğunuzu balya yüzeyine bastırarak fiziksel olarak kontrol edin; belirgin bir direnç göstermelidir. Maksimum yoğunluk ayarında süngerimsi bir ilk balya, devam etmeden önce uzama ölçümü gerektiren aşınmış kayışları gösterir. Sezon boyunca karşılaştırma için temel değer olarak monitörden yoğunluk okumasını kaydedin.
Balya yapısını arkadan ve yandan inceleyin. Düzgün şekillendirilmiş bir balya, uçları eşit çapta ve kenarları dik olan gerçek bir silindirdir. Yumurta veya D şeklinde bir balya, genellikle yanlış hizalanmış bir toplama mekanizması veya merkezden uzak sıra izleme nedeniyle, bant genişliği boyunca düzensiz ürün dağılımını gösterir. Aynı sorunla birden fazla balya daha yapmadan önce teşhis edin ve düzeltin.
İlk balyanın üzerindeki sargının, balyanın tüm çevresi boyunca eşit şekilde kaplandığını, geçişler arasında doğru örtüşme olduğunu ve arka kenarının düz bir şekilde bastırılarak temiz bir şekilde kesildiğini kontrol edin. Kaplamada herhangi bir boşluk, düzensiz örtüşme veya yırtık bir arka kenar varsa, üretim başlamadan önce sargı sisteminde ayarlama yapılması gerekir.
Sezon Öncesi Hazırlık Sıkça Sorulan Sorular
Balya makinenizin modeli için sezon öncesi kontrol özelliklerini edinin.
Bize balya makinenizin modelini, geçen sezonki balya sayısını ve geçen sezondan kaynaklanan performans sorunlarını bildirin. Size tam konfigürasyonunuz için özel ölçüm özellikleri ve aşınma eşiklerini sağlıyoruz, böylece sezon öncesi incelemeniz uygulanabilir kararlar üretmenizi sağlıyor.
Editör: Cxm


