Handleiding voor probleemoplossing · Alle 9YF-modellen · 12 oorzaken behandeld
Vierkante balenpers bindt niet: 12 oorzaken en hoe je ze kunt verhelpen
Een vierkante balenpers die stopt met binden – of af en toe bindt – zorgt voor gewasverlies, tijdverlies en inkomstenverlies tijdens de kortste gunstige periode van het seizoen. Elke mislukte binding heeft een specifieke mechanische of operationele oorzaak. Deze handleiding behandelt alle 12 oorzaken, georganiseerd per diagnosezone, zodat u het exacte probleem kunt identificeren en oplossen zonder te hoeven gissen.
Onderwerpen: draadgeleiding · spanschijven · schaarhaken · naaldtiming · nokkenslijtage · aftakassnelheid · eenzijdige versus tweezijdige missers
Stap 1: Lokaliseer de probleemzone voordat u iets aanraakt.
Het knopersysteem heeft vier afzonderlijke zones, elk verantwoordelijk voor een specifiek onderdeel van het knoopproces. Door vijf korte vragen te beantwoorden, kunt u de foutzone lokaliseren voordat u ook maar één omslag opent. Dit bespaart u de tijd die anders verloren zou gaan door eerst de verkeerde onderdelen te controleren.
Vraag 1 — Patroon van missers
Elke baal? → Mechanische storing (permanent).
Met tussenpozen? → Probleem met timing, vermogen of gewasdichtheid.
Vraag 2 — Welke knoper?
Slechts één kant? → Storing beperkt tot die knopereenheid.
Beide kanten? → Gedeelde component — aftakassnelheid, hoofdaandrijving of draadaanvoer.
Q3 — Toestand van het touwuiteinde
Is er een lus aanwezig op de baal? → Het mes sneed niet → Oorzaak 7 of 9.
Helemaal geen lus? → De naald heeft geen draad afgegeven → Oorzaak 8 of een inrijgfout.
Vraag 4 — Touw om de baal?
Losjes omwikkeld met touw? → Spanningsprobleem → Oorzaak 4 of 5.
Is er touw doorheen getrokken? → Billhaak houdt niet vast → Oorzaak 6.
Vraag 5 — Wanneer gebeurt het?
Alleen in dichte zwaden? → Stroomtekort → Oorzaak 11 of 12.
Ongeacht het gewas? → Mechanische storing, niet gerelateerd aan de belasting.
| Breukzone |
Onderdelen |
Oorzaken in deze zone |
| Zone 1 — Touwpad |
Geleidingsogen, spoelhouder, draadgeleiding |
Oorzaken 1, 2, 3 |
| Zone 2 — Knoopmechanisme |
Spanschijven, schaarhaak, mesblad, wisserarm |
Oorzaken 4, 5, 6, 7 |
| Zone 3 — Naald en nokkenas |
Naaldarm, nokkenas, nokvolger, timing |
Oorzaken 8, 9, 10 |
| Zone 4 — Energie en gewassen |
PTO-toerental, tractorbelasting, zwaddichtheid |
Oorzaken 11, 12 |
Zone 1 — Problemen met het touwpad (Oorzaken 1–3)
Problemen in zone 1 zijn het gemakkelijkst op te lossen en worden het vaakst over het hoofd gezien. Controleer altijd eerst het touwtraject voordat u tijd besteedt aan het knopmechanisme – een verkeerd ingeregen of versleten geleider veroorzaakt symptomen die er identiek uitzien als defecten aan het knopmechanisme.
1
Verkeerd ingeregen touwpad
Symptoom: aanhoudend mislukken aan één kant vanaf de eerste baal na het wisselen van de spoel.
Hoofdoorzaak
Het touw volgt niet precies het pad dat in de gebruiksaanwijzing staat aangegeven. Een enkel verkeerd geleideoogje zorgt voor een onjuiste spanningsvariatie bij het insteekpunt van de knoper — de lus vormt zich onjuist of helemaal niet, waardoor er vanaf het moment dat de nieuwe spoel wordt ingeregen, steeds een fout optreedt.
Reparatieprocedure
Verwijder al het touw van beide knopers. Gebruik het inrijgschema in de gebruiksaanwijzing – niet uw geheugen – om beide zijden opnieuw in te rijgen, van de spoel naar het naaldoog. Controleer of elk geleidingsoogje correct is gebruikt en of het touw nergens kruist. Draai 5 testbalen voordat u terugkeert naar de normale snelheid.
2
Beschadigde geleideogen — Groeven, bramen en scherpe randen
Symptoom: het touw breekt op een geleidingspunt, of het touw vertoont een constante slijtagegroef op één locatie.
Hoofdoorzaak
Metalen geleidingsoogjes slijten door het jarenlang snel doorvoeren van touw een groef in hun binnenoppervlak. Een gegroefd oogje blijft haken aan het touw bij elke baalcyclus, waardoor wrijving ontstaat die de gelijkmatige spanning verstoort en het touw na voldoende herhalingen kan doorsnijden. Braam van veldafval veroorzaakt hetzelfde probleem.
Reparatieprocedure
Ga met uw vinger langs de binnenkant van elk geleidingsoogje in het touwtraject. Elke groef, ruwe rand of braam die u voelt, beschadigt het touw bij herhaaldelijk gebruik. Maak kleine oneffenheden glad met fijn schuurpapier. Vervang elk oogje met een groef dieper dan 0,5 mm; de vervangingskosten zijn minimaal en het probleem blijft bestaan totdat het oogje is vervangen.
3
Inzakking van de spoelkern of verwarde aanvoer
Symptoom: intermitterende hapering; bij het trekken aan het touwtje voelt men weerstand van de spoelhouder in plaats van een soepele aanvoer.
Hoofdoorzaak
Een spoel die in vochtige omstandigheden wordt bewaard, kan een binnenkern hebben die zachter wordt en inzakt onder het gewicht van het touw erboven. Naarmate de spoel zich in de buurt van de kern afwikkelt, zorgt de ingezakte kern voor een onregelmatige aanvoersnelheid: het touw wordt met tussenpozen aangevoerd en vervolgens slap, waardoor spanningsvariaties ontstaan die het knopermechanisme niet kan compenseren.
Reparatieprocedure
Verwijder de spoel en controleer of deze vrij in de houder draait met lichte vingerdruk. Als de kern zacht of vervormd aanvoelt, vervang dan de spoel – ga niet verder met een beschadigde spoel. Voorkom dit probleem door touwspoelen op een droge, overdekte plaats te bewaren, uit de buurt van de grond. Laat nooit spoelen op de machine zitten tussen de seizoenen.
Zone 2 — Problemen met het knoopmechanisme (Oorzaken 4–7)
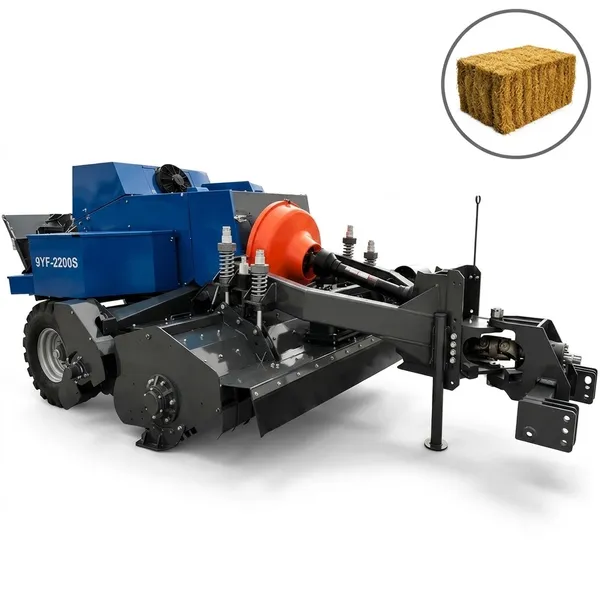
Storingen in zone 2 bevinden zich in de knopereenheid zelf: de spanschijven, de haak, het mes en de wisserarm. Dit zijn de meest voorkomende oorzaken van mislukte knopen bij machines die langer dan één seizoen in gebruik zijn geweest zonder een volledige onderhoudsbeurt aan de knopereenheid.
4
Spanplaten te los afgesteld
Symptoom: grote, slappe lus zichtbaar rond de baal; er vormt zich een knoop, maar deze glijdt van de snavel af voordat er gesneden wordt.
Hoofdoorzaak
De spanschijven regelen de weerstand die het touw ondervindt tijdens het doorvoeren door de knoper. Als ze te los staan, loopt het touw te gemakkelijk door – de lus die zich om de haak vormt, is groot en slap in plaats van strak. De haak kan een slappe lus niet goed vastgrijpen en glijdt eraf voordat de wisserarm de knoop losmaakt.
Reparatieprocedure
Verhoog de veerdruk van de spanschijf met een halve slag op de stelschroef. Test met 5 balen. Als de lus nog steeds te groot is, verhoog de veerdruk dan met nog een halve slag en test opnieuw. De gewenste lus moet stevig en nauwsluitend om de balen zitten. Beide spanschijven moeten gelijk afgesteld zijn; ongelijke spanning resulteert in één nette knoop en één losse knoop per baalcyclus.
5
Spanschijven te strak afgesteld
Symptoom: het touw breekt bij of vlakbij de knoop; er vormt zich een knoop en vervolgens schiet de baal met een ruk los.
Hoofdoorzaak
Te strak aangedraaide spanschijven zorgen ervoor dat het touw tijdens de hele baalcyclus onder constante spanning staat. Wanneer de knoop zich tijdens het uitwerpen om de baal heen trekt, overschrijdt de gecombineerde spanning van de spanschijf en de compressiekracht van de baal de knoopsterkte van het touw. Dit komt met name vaak voor bij hogere baaldichtheden zonder een overeenkomstige verhoging van de knoopsterkte van het touw.
Reparatieprocedure
Verminder de spanning van de spanschijven met een halve slag. Als het touw bij de knoop blijft breken en de schijven al op de minimale spanning staan, is de treksterkte van het touw onvoldoende voor de ingestelde dichtheid. Gebruik dan touw met een hogere treksterkte (minimaal 130 kg knoopsterkte voor balen met een hoge dichtheid van meer dan 28 kg). Verlaag de dichtheid van de baal niet om het zwakke touw te compenseren; vervang het touw zodat het overeenkomt met de dichtheid.
6
Versleten, beschadigde of verkeerd gehoekte biljethaak
Symptoom: de lus glijdt van de snavel; de baal wordt uitgeworpen met losse uiteinden van het touw in plaats van een gevormde knoop.
Hoofdoorzaak
De punt van de snavelhaak grijpt de lus van het touw vast en houdt deze vast terwijl de wisserarm de knoop afwikkelt. Een snavel met een versleten of beschadigde punt heeft niet langer de juiste geometrie om de lus stevig vast te houden; de lus rolt van de snavel af in plaats van vastgehouden te worden tijdens het afwikkelen. Een snavel die weliswaar scherp is, maar een verkeerde hoek heeft, biedt het verkeerde aangrijpvlak voor de binnenkomende lus.
Reparatieprocedure
Verwijder de haak van de knoop en inspecteer het uiteinde. Ga met een vingernagel over het gebogen uiteinde; elke platte plek, afsplintering of afronding wijst erop dat de knoop vervangen moet worden. Controleer de hoek van de haak aan de hand van de specificaties in de gebruiksaanwijzing met behulp van een gradenboog of het meegeleverde meetinstrument. Vervang beide knopen tegelijk wanneer er één slijtage vertoont; het gebruik van een nieuwe knoop tegen een versleten knoop resulteert in ongelijkmatige knopen, zelfs als beide kanten tijdens een snelle test goed leken te knopen.
7
Bot of versleten mesblad
Symptoom: een lange, rafelige draad aan het uiteinde van de baal; de draad wordt getrokken in plaats van afgesneden, waardoor de knoop losraakt.
Hoofdoorzaak
Het mes moet het touw netjes doorsnijden nadat de knoop is losgemaakt. Een bot mes snijdt niet – het trekt en zaagt het touw over een afstand van enkele millimeters door voordat het loskomt. Deze trekkende beweging oefent een zijwaartse kracht uit op de knoop terwijl deze nog op de baal zit, waardoor de knoop uit positie draait voordat het losmaken is voltooid. Het resultaat is een misvormde of losse knoop die de druk van de baal niet kan weerstaan.
Reparatieprocedure
Vervang beide mesbladen aan het begin van elk seizoen als onderdeel van het routineonderhoud. De kosten zijn laag en een scherp mes is de basis voor betrouwbaar knopen. Halverwege het seizoen is vervanging nodig als er rafelige uiteinden verschijnen vóór het einde van het seizoen. Controleer na vervanging of de afstand tussen het mes en de draadgeleider binnen de specificaties valt. Een mes dat te ver van de geleider verwijderd is, snijdt op het verkeerde moment in de cyclus en levert zelfs met een scherp mes onbetrouwbare resultaten op.
Zone 3 — Problemen met naald- en nokkenastiming (Oorzaken 8–10)
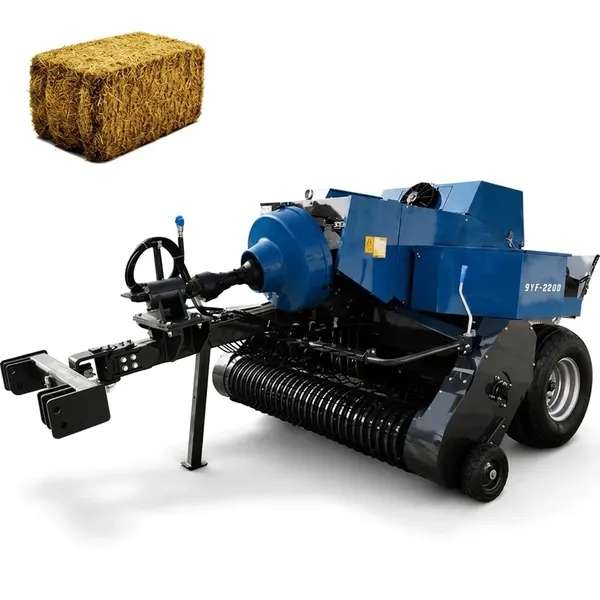
Problemen met de timing vormen de lastigste categorie, omdat de symptomen niet te onderscheiden zijn van fouten in Zone 2 totdat het mechanisme in slow motion wordt bekeken. Een timingfout betekent dat de knoper mechanisch correct werkt, maar dat de naald het touw op het verkeerde moment afgeeft – buiten het grijpvenster van de haak.
8
Naaldbaan niet gecentreerd of gebogen naaldarm
Symptoom: helemaal geen touw aan een of meer uiteinden van de baal; naald zichtbaar, maar het touw bereikt de zone waar de snaar de baal vastpakt niet.
Hoofdoorzaak
De naald moet een precieze boog beschrijven om het touw precies op de juiste positie aan te bieden, zodat de snavelhaak het kan vastgrijpen. Een verbogen naaldarm – veroorzaakt door een blokkade, een steen in de kamer of een slag van de zuiger – verandert de positie van de punt op het aangrijppunt met slechts enkele millimeters. Deze kleine afwijking is voldoende om ervoor te zorgen dat de snavel het aangeboden touw bij elke handeling mist.
Reparatieprocedure
Beweeg de machine langzaam met de hand (aftakas losgekoppeld) en let op de naaldpunt op het verste punt van de beweging. De punt moet exact uitgelijnd zijn met de positie van de haak van de werkbank, zoals aangegeven in het specificatiediagram in de bedieningshandleiding. Elke zijdelingse afwijking duidt op een verbogen arm. Het rechtbuigen van een verbogen naaldarm wordt afgeraden; het metaal is gehard en de rechtgebogen punt is zwakker dan het origineel. Vervang de naaldarm en controleer de positie van de punt opnieuw aan de hand van de specificaties voordat u de machine weer in gebruik neemt.
9
Versleten nokvolger — Timingvertraging bij maximale compressie
Symptoom: incidentele missers die in frequentie toenemen naarmate het seizoen vordert; erger bij dichte windhopen.
Hoofdoorzaak
De nokvolger beweegt over het oppervlak van de nok en zet de rotatie van de nok om in een beweging van de naald. Naarmate de punt van de volger slijt, verandert de effectieve straal aan de punt – de volger komt bij elke nokomwenteling iets later omhoog dan zou moeten. Deze vertraging in de timing zorgt ervoor dat het afleverpunt van de naald buiten het bereik van de naaldhaak komt, wat een misser veroorzaakt. De vertraging wordt groter naarmate de slijtage voortschrijdt, waardoor timingfouten beginnen als incidentele missers en na verloop van tijd consistente storingen worden.
Reparatieprocedure
Verwijder de nokvolgerarm en meet de radius van de punt met een schuifmaat ten opzichte van de specificaties in de gebruikershandleiding. Slijtage boven de minimale specificatie vereist vervanging. Controleer ook het draaipuntlager van de nokvolgerarm; een versleten draaipuntlager veroorzaakt zijdelingse beweging in de punt van de nokvolger, wat de timingfout verergert, zelfs als de radius van de punt binnen de specificaties valt. Vervang beide onderdelen tegelijk wanneer een van beide de slijtagelimiet bereikt.
10
Nokkenasvlakke plek — Versleten piekgeometrie
Symptoom: consequent mis bij elke baal, zowel van beide kanten tegelijk; een doffe klap hoorbaar op een specifiek punt in de plunjercyclus
Hoofdoorzaak
De noktop zorgt ervoor dat de volger zijn maximale slagpositie bereikt, wat overeenkomt met het moment waarop de naald het touw op de juiste diepte in de snaarvangzone brengt. Een gepolijst vlak gedeelte op de noktop betekent dat de volger zijn maximale slag niet meer bereikt — de naald stopt vóór de volledige afleverpositie en de snaar mist het touw. Slijtage van de noktop wordt versneld door onvoldoende smering van het nokoppervlak.
Reparatieprocedure
Met de aftakas volledig uitgeschakeld en de machine stilstaand, draai je de hoofdknoopas langzaam met de hand rond en observeer je de beweging van de volger. Bij een goede nokkenas beweegt de volger soepel omhoog tot een duidelijk punt en keert dan soepel terug. Een vlakke plek zorgt voor een hapering – de volger pauzeert of komt nauwelijks omhoog in de hoogste positie. Meet de hoogte van de nokkenas in de hoogste positie en vergelijk deze met de specificaties in de gebruikershandleiding. Een versleten nokkenas moet worden vervangen – de nokkenas is een nauwkeurig bewerkt onderdeel en mag niet worden gelast of opgevuld als reparatie in het veld.
Zone 4 — Problemen met stroomvoorziening en gewasdichtheid (Oorzaken 11–12)
De oorzaken in zone 4 zijn uniek omdat het knoopmechanisme volledig correct functioneert — de fout zit hem in de bedrijfsomstandigheden. Dit zijn de meest voorkomende oorzaken die verkeerd worden gediagnosticeerd, omdat machinisten die het knoopmechanisme al hebben gecontroleerd zonder gebreken te vinden, de tractor of het zwad niet als mogelijke oorzaak van het probleem beschouwen.
11
Bij een aftakastoerental lager dan 540 tpm verandert de timing over het gehele mechanisme.
Symptoom: miskoppelingen hangen samen met een lager of moeizaam klinkend tractormotor; betere binding bij een lagere rijsnelheid.
Hoofdoorzaak
De timing van de knoper is gekalibreerd op een aftakastoerental van 540 tpm. Elke nokkenaspositie, naaldverplaatsing en rotatie van de grijphaak is afgestemd op een specifieke fase van dat toerental. Wanneer het tractortoerental onder belasting onder de 540 tpm zakt – omdat de tractor te klein is voor de balenpers of het zwad bijzonder dicht is – verschuiven alle timingrelaties in het mechanisme. De naald komt dan in een andere fase van de grijphaakrotatie terecht dan ontworpen, waardoor de grijper niet goed vastzit.
Reparatieprocedure
Houd het motortoerental van de tractor in de gaten op het instrumentenpaneel gedurende het hele balenpersproces. Als het motortoerental daalt tijdens de balenperscyclus – met name op het punt van maximale compressie – verlaag dan de rijsnelheid totdat de motor het nominale toerental zonder moeite kan handhaven. Als de tractor het nominale toerental bij geen enkele rijsnelheid kan handhaven, is de tractor te klein voor de balenpers of de gewasomstandigheden. correct passende vierkante balenpers Het vermogen moet onder standaardomstandigheden variëren van 60 tot 80 ton aftakasvermogen, met voldoende reserve voor piekbelastingen.
12
De dichtheid van het windzwad overschrijdt de reservecapaciteit van de tractor bij maximale compressie.
Symptoom: willekeurige missers die zich met name voordoen in de zwaarste gedeelten van het veld; nette binding in de lichtere gedeelten van het veld.
Hoofdoorzaak
Een tractor die op 100% van zijn nominale aftakasvermogen werkt in een gemiddeld zwadgedeelte, heeft geen reserve voor de korte piekbelasting wanneer de plunjer zijn maximale slag bereikt. In zware zwadgedeelten – samengevoegde zwaden, gebieden met een hogere gewasopbrengst of gedeelten waar de vorige harkgang een dikkere ophoping heeft gecreëerd – schiet de piekbelasting gedurende 0,5 tot 1 seconde boven het nominale vermogen van de tractor uit. Deze korte piek verlaagt het aftakastoerental voldoende om de timing van de knoper te verschuiven en een misser te veroorzaken, zelfs bij een tractor die in principe geschikt is voor het balenpersmodel.
Reparatieprocedure
Verlaag de rijsnelheid bij het naderen van zichtbaar zwaardere zwaden – het grotere materiaalvolume per persbeweging veroorzaakt de piekbelasting. Als alternatief kunt u de consistentie van de zwaden verbeteren door de harkinstellingen aan te passen, zodat er een gelijkmatiger zwaad over het hele veld ontstaat. De oplossing op lange termijn voor bedrijven waar samengevoegde zwaden routine zijn, is om over te stappen op een tractor met 10-15 pk meer aftakasvermogen om een reële reserve te creëren boven het nominale minimum van het balenpersmodel.
Eenzijdige versus tweezijdige misser: wat het patroon je vertelt.
Mis aan slechts één kant
Een storing aan één kant wijst erop dat de fout beperkt is tot de individuele knopereenheid aan die kant. Het gedeelde aandrijfsysteem, het aftakastoerental en het inrijgen van het touw spelen vrijwel zeker geen rol; als dat wel het geval was, zouden beide kanten tegelijkertijd een storing vertonen.
Controleer in de juiste volgorde: Toestand van de meshaak (Oorzaak 6) → instelling van de spanschijf (Oorzaak 4 of 5) → mesblad (Oorzaak 7) → uitlijning van de naaldarm (Oorzaak 8) → nokvolger aan die kant (Oorzaak 9). Eenzijdige missers worden bijna altijd opgelost in Zone 2 of Zone 3.
Aan beide kanten tegelijk missen
Een gelijktijdige misser aan beide zijden wijst altijd op een gedeeld onderdeel. De twee knopereenheden delen geen mechanische onderdelen, maar wel: het geleidingspad van het touw naar de spoelhouders, de aftakas-aandrijfsnelheid en de aandrijfketting van de knoper.
Controleer in de juiste volgorde: Het inrijgen van het touw aan beide zijden (Oorzaak 1) → aftakassnelheid (Oorzaak 11) → dichtheid van de zwad (Oorzaak 12) → spanning en conditie van de aandrijfketting van de hoofdknoopmachine. Mislukkingen aan beide zijden die reageren op het verlagen van de rijsnelheid zijn altijd oorzaken in Zone 4.
Het verificatieprotocol na de reparatie
Een enkele testbaal na een reparatie is onvoldoende verificatie. Elke aanpassing aan de knoper of vervanging van een onderdeel vereist een gestructureerde verificatierun voordat de normale productiesnelheid wordt hervat. Een reparatie die voor één baal werkt, kan bij de zesde baal met een hogere dichtheid falen.
STAP 1Rijd met 5 balen met een normale voorwaartse snelheid van 60%. Controleer elke binddraad aan beide uiteinden van alle 5 balen.
STAP 2Trek elk touw stevig weg van het uiteinde van de baal. Een correcte knoop trekt aan onder spanning. Een lus die verschuift, wijst erop dat de geometrie van de haak of de spanningsinstelling nog niet correct is.
STAP 3Rijd nog 5 balen met normale voorwaartse snelheid. Controleer alle binddraden opnieuw. Als alle 10 balen netjes gebonden zijn, ga dan verder met de volledige productie.
STAP 4Bij het eerste gedeelte met een dikke zwad in het veld, moet u het toerental van de tractormotor nauwlettend in de gaten houden. Als het toerental bij maximale compressie zichtbaar daalt, verlaag dan de rijsnelheid en controleer het vastbinden in die gedeelten opnieuw.
OPMERKINGAls de storing na 20-30 balen normaal gebruik terugkeert – in plaats van direct – is de oorzaak waarschijnlijk progressieve slijtage (nokvolger, hakbijl) in plaats van een instelfout. Bij progressieve slijtage moet een onderdeel worden vervangen, niet afgesteld.
Wanneer moet u stoppen en de technische ondersteuning bellen?
De meeste problemen met de timing in zones 1, 2 en 4 kunnen worden opgelost door een monteur met basiskennis van mechanica en de handleiding. Timingfouten en nokkenasslijtage in zone 3 zijn complexer en kunnen verergerd worden door onjuiste afstellingspogingen. Neem contact op met de technische ondersteuning wanneer:
Het probleem blijft zich voordoen, zelfs nadat alle oorzaken in Zone 1 en Zone 2 zijn aangepakt. — Een defect aan de nokkenas of de distributie is waarschijnlijk de oorzaak en vereist nauwkeurige meting en afstelling.
De as van de knoper draait niet soepel met de hand. — Een vastgelopen lager of een verbogen as vereist demontage in de werkplaats, geen afstelling ter plaatse.
Tijdens de inspectie worden scheuren in het frame of verbogen constructieonderdelen geconstateerd. — Structurele schade vereist een professionele beoordeling van de laswerkzaamheden voordat verdere werkzaamheden worden uitgevoerd.
Er is een nieuw onderdeel gemonteerd, maar het probleem blijft zich voordoen. — De diagnose kan onjuist zijn en een nieuwe diagnose door een technicus voorkomt verspilling van onderdelen en tijd.
PTO- en aandrijflijnreferentie voor vierkante balenpersbediening
Problemen met de aandrijving in zone 4 wijzen vaak op een probleem met de aftakas: een onjuiste aslengte, versleten homokinetische koppelingen of een beschadigde slipkoppeling die geen constant koppel overbrengt. Specificaties voor de aandrijfas en de waarden van de slipkoppeling voor alle vermogensklassen van de balenpers worden behandeld in de documentatie. Maattabel voor aftakas-aandrijfassen en homokinetische koppelingen.
Veelgestelde vragen — Vierkante balenpers bindt niet
Mijn vierkante balenpers werkte gisteren nog prima, maar vanochtend slaat hij alle balen over. Wat is er veranderd?+
Een plotselinge verandering van consistent binden naar consistent misbinden bij elke baal wordt bijna altijd veroorzaakt door een van de volgende drie dingen. Ten eerste is het bindtouwpad verstoord geraakt aan het einde van de sessie of tijdens het wisselen van een spoel – controleer of beide zijden nog steeds correct zijn ingeregen volgens het diagram. Ten tweede is een onderdeel dat bijna aan zijn slijtagegrens zat, 's nachts bezweken door thermische krimp bij lage temperaturen (de punt van de grijphaak vertoont soms scheurtjes aan de rand bij inspectie in het ochtendlicht die niet zichtbaar waren tijdens een warme middagsessie). Ten derde heeft een botsing met veldafval tijdens het laatste uur van de vorige sessie een naaldarm verbogen of een grijphaak beschadigd zonder dat er voldoende misbinden is opgetreden om aan het einde van de sessie opgemerkt te worden. Controleer eerst de inrijging van Zone 1 en inspecteer vervolgens beide grijphaken en naaldarmen visueel op verse beschadigingen voordat u de motor start.
Hoe weet ik of mijn spanplaten afgesteld of vervangen moeten worden?+
Spanplaten die afgesteld moeten worden, vertonen consistent problemen met de knoopkwaliteit: te grote lussen (los) of het touw breekt bij de knoop (te strak). De oppervlakken van de platen zelf zijn echter glad en onbeschadigd. Platen die vervangen moeten worden, vertonen zichtbare slijtagekanalen, krassen of ruwheid op de wrijvingsvlakken, of een veer die na compressie niet meer terugkeert naar de beginpositie. Een nuttige test: trek, met de machine stil en de aftakas uitgeschakeld, het touw met de hand door de spanplaat. Er moet een matige, constante weerstand zijn gedurende het hele trekken. Als de weerstand varieert – soepel op de ene plek, strak op de andere – zijn de oppervlakken van de platen ongelijk en moet de spanplaat vervangen worden. Als de weerstand constant is, maar gewoon te hoog of te laag, is afstellen de juiste oplossing.
Kan ik doorgaan met balen persen als er één knoper ontbreekt en die later repareren?+
U kunt doorgaan met het persen van balen met één knoper die niet goed bindt, alleen als de defecte kant consequent helemaal geen knoop produceert – de baal komt dan met twee losse touweinden naar buiten. In dit geval wordt de baal door de correct gebonden kant in de perskamer vastgehouden en veilig uitgeworpen, hoewel hij tijdens het hanteren niet bij elkaar zal blijven. Als de defecte knoper echter een gedeeltelijke knoop of een lus produceert die onvolledig om de baal heen wikkelt, ga dan niet verder – een gedeeltelijke lus kan tijdens het uitwerpen vast komen te zitten aan obstakels op het veld of aan het balenuitwerpmechanisme en een blokkade in de perskamer of schade aan de apparatuur veroorzaken. In beide gevallen betekent een gemiste knoop dat de baal slechts één touwverbinding heeft en aanzienlijk zwakker is bij het stapelen en hanteren. Plan om de balen met één touwverbinding direct na de sessie opnieuw te knopen of met de hand te binden. Repareer de knoper vóór de volgende sessie, ongeacht hoe de huidige sessie is verlopen.
Hoe vaak moeten de hakselaars en messen van een vierkante balenpers worden vervangen?+
De messen van de hooihaken moeten aan het begin van elk seizoen standaard worden vervangen, ongeacht hun conditie. Ze zijn niet duur en door elk seizoen met scherpe messen te beginnen, wordt een variabele in het diagnoseproces geëlimineerd wanneer er problemen optreden. De haken van de hooihaken zijn duurzamer en gaan 2 tot 4 seizoenen mee onder standaard hooi- en stroomstandigheden, maar moeten bij elke onderhoudsbeurt vóór het seizoen zorgvuldig worden gecontroleerd en vervangen zodra de punt afgerond, beschadigd of plat is. Bij gewassen met harde stengels (maïsresten, sorghum), waar het risico op schade door vuil groter is, moeten de haken na elke 100 bedrijfsuren tijdens het seizoen worden gecontroleerd. Vervang beide haken tegelijk wanneer er één aan vervanging toe is. Het verschil in slijtage tussen een nieuwe en een versleten haak zorgt voor een inconsistente knoopkwaliteit, zelfs als beide kanten tijdens een korte test na de onderhoudsbeurt correct lijken te knopen.
Waarom bindt mijn balenpers goed in dunne zwaden, maar mist hij in dikke zwaden?+
Het selectief missen van de plunjer in dikke zwaden, terwijl de plunjer in dunnere zwaden wel netjes bindt, is het klassieke symptoom van Zone 4 – een door vermogen veroorzaakte timingverschuiving. In dikke zwaden is de compressiekracht van de plunjer bij de maximale slag hoger, waardoor de koppelvraag van de aftakas kortstondig toeneemt. Als de tractor al op of nabij zijn maximale aftakasvermogen werkt, veroorzaakt deze piekbelasting een tijdelijke verlaging van het aftakastoerental. Het knoopmechanisme is ontworpen om te werken met 540 tpm – zelfs een verlaging van 20-30 tpm bij de maximale compressie is voldoende om de timing van de naaldtoevoer buiten het bereik van de balenhaak te verschuiven, met een misser tot gevolg. De oplossing is ofwel de rijsnelheid verlagen om het materiaalvolume per plunjercyclus te verminderen, de consistentie van de zwaden verbeteren om extreme dichtheidsvariaties te elimineren, of overstappen op een tractor met een groter aftakasvermogen dan het minimum van de balenpers.
De balen zitten goed vast, maar het uiteinde van het touw is altijd rafelig — is dat een probleem?+
Een rafelig uiteinde van het touw – gerafeld in plaats van netjes afgesneden – is een vroeg teken dat het mes bot wordt, zelfs als de baal nog goed vastzit. Het mes snijdt het touw niet netjes door; het trekt eraan en scheidt het. Naarmate het mes verder bot wordt, zal de trekkracht op het touw tijdens de snijbeweging de knoop verstoren voordat deze volledig vastzit. Dit leidt tot misknopen, ook al scheidt het mes het touw technisch gezien nog steeds bij elke cyclus. Rafelige uiteinden zijn een voorbode van falen: vervang de mesjes aan het einde van de huidige sessie in plaats van te wachten tot er in de volgende sessie een volledige misknoop ontstaat. Schone, afgesneden uiteinden van het touw met een duidelijk snijvlak duiden op een scherp mes in de juiste positie. Als de uiteinden van uw baal consistent schone sneden vertonen, draagt de conditie van het mes niet bij aan eventuele bindproblemen die u ondervindt.
Kan touw van slechte kwaliteit leiden tot mislukte knopen, zelfs als de knoper in goede staat verkeert?+
Ja, de kwaliteit van het bindtouw heeft op twee manieren direct invloed op de betrouwbaarheid van het knopen. Ten eerste, de consistentie van de diameter: hoogwaardig bindtouw heeft een constante diameter over de hele spoel, wat zorgt voor een constante weerstand van de spanplaat en een consistente lusvorm bij de haak. Bij goedkoper bindtouw varieert de diameter vaak binnen één spoel: dikkere gedeelten zorgen voor een hogere spanning (risico op breuk) en dunnere gedeelten voor een lagere spanning (risico op losse lussen). Ten tweede, de oppervlaktestructuur: ruwe of beschadigde oppervlakken van het bindtouw blijven haken aan de geleideogen en spanplaten, waardoor wrijvingspieken ontstaan die de soepele aanvoer verstoren die nodig is voor een consistente lusvorming. Door UV-straling aangetast bindtouw – dat op de machine blijft zitten of tussen de seizoenen in direct zonlicht wordt bewaard – verliest treksterkte op moleculair niveau, waardoor de knoop tijdens het uitwerpen van de balen kan breken, zelfs als het knoopmechanisme correct functioneert. Gebruik altijd bindtouw dat geschikt is voor uw dichtheidsinstelling en bewaar ongebruikte spoelen binnenshuis, uit de buurt van UV-straling.
Na het vervangen van de hakselaarhaken mist de balenpers nog steeds. Wat moet ik nu controleren?+
Als het vervangen van de biljethaken het probleem niet heeft opgelost, hangen de volgende controles af van of het patroon van de missers is veranderd na de vervanging. Als het patroon onveranderd is gebleven – dezelfde frequentie, dezelfde kant – waren de biljethaken niet de primaire oorzaak. Ga verder met de spanschijven (oorzaak 4 of 5) en de mesbladen (oorzaak 7) voordat u de timingproblemen onderzoekt. Als het patroon enigszins is veranderd – minder frequente missers, of missers die nu onder andere omstandigheden optreden dan voorheen – waren de biljethaken een bijdragende factor, maar niet de enige. Controleer vervolgens de nokvolger op slijtage (oorzaak 9), aangezien een versleten volger het naaldaanvoerpunt verschuift en zelfs met correcte nieuwe biljethaken een misser veroorzaakt. Als de misser aanhoudt na alle controles in Zone 2, laat de machine dan handmatig op lage snelheid draaien en observeer de positie van de naaldpunt bij maximale uitslag – een afwijking van de specificatiepositie in de gebruikershandleiding bevestigt een timingfout in Zone 3 die aandacht van de nok of naaldarm vereist.
Nog steeds geen koppeling na het controleren van alle 12 oorzaken?
Als uw 9YF-serie vierkante balenpers Als er na het doorlopen van de bovenstaande diagnosezones nog steeds knopen ontbreken, kan ons technische team de oorzaak van het probleem vaststellen aan de hand van de symptomen en u begeleiden bij de oplossing of serviceondersteuning regelen. Neem contact met ons op en beschrijf het probleempatroon, welke kant is getroffen en wat u al hebt gecontroleerd.