Bean Harvest Timing Guide

Kidney Bean Pulling Timing: Harvest Window and Field Loss Guide

The harvest window for kidney beans opens and closes within a period of days, not weeks. Pull too early and upper pods are not mature — valuable yield is lost. Pull too late and lower pods shatter from the plant during extraction. The correct timing is determined by reading specific visual indicators in the field and verifying against field-loss assessment after the first pull passes — not by calendar date, heat unit calculations alone, or the date the neighbor started. This guide shows you how to read the window accurately.

Maturity Indicators

The Biology of the Harvest Window: Why Timing Is Non-Negotiable

Kidney bean pods at physiological maturity undergo a rapid transition from flexible-but-full to brittle-and-dry. This transition accelerates exponentially with temperature and low humidity — a field that looks 2–3 days from optimal pulling in early morning can be past optimal by late afternoon on a hot, dry day. The physical mechanism driving this transition is lignification of the pod suture — as the pod dries, the junction holding the two pod halves together becomes progressively more rigid and ultimately splits spontaneously under the mechanical stress of pulling or windrowing.

The upper limit of the harvest window is defined by the point where pod shattering losses from pulling exceed the economic value of waiting for upper pods to finish maturing. This trade-off is variety-specific, weather-dependent, and cannot be generalized to a fixed number of days after planting or a specific heat unit accumulation without field validation. Producers who harvest by a rule-of-thumb rather than direct field assessment regularly miss the window by 2–4 days — in either direction — with significant consequences.

3–10 days
Typical harvest window width — varies by variety, weather, and market class
5–12%
Additional field loss for each day of harvest delay past the optimal pull date under hot dry conditions
80–90%
Target pod maturity percentage at pulling for most Michigan kidney bean varieties

Five Visual Maturity Indicators to Assess Before Pulling

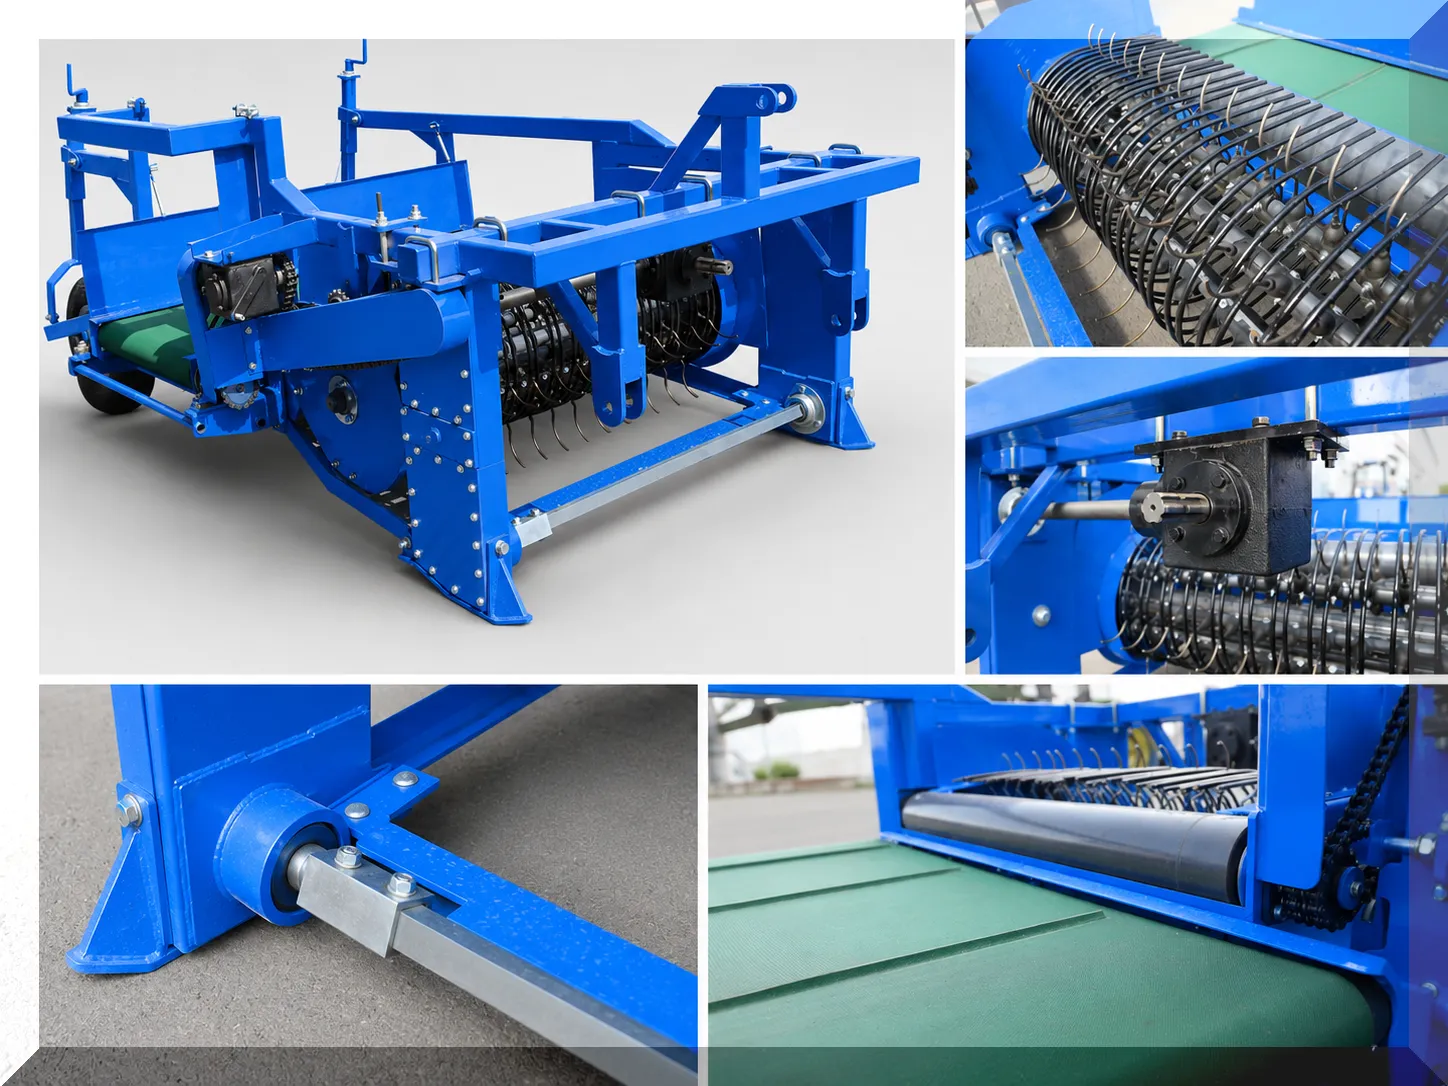
kidney bean puller shoe and vine detail — visual assessment of pod color, stem dryness, and lower leaf condition before pulling determines whether the harvest window is open or still early

Walk 100 feet of a representative row in each field you plan to pull on a given day. Assess all five indicators together — no single indicator is definitive alone. The combination gives you a reliable picture of where you are relative to the optimal window.

1
Pod color — the primary readiness indicator

Ready to pull: 80–90% of pods on the plant are yellow-tan to light brown. Lower pods may have begun to dry completely; upper pods still have some green coloring or are transitioning through yellow. Too early: More than 25% of pods still green, particularly on the middle and upper sections of the plant. Too late: Lower pods are fully dry and brittle; the suture on the lowest pods begins to split when handled. Count pods at 20 plants in your field walk — target 80–90% yellow-brown for standard varieties, 85% for narrow-window DRK varieties.

2
Stem and main branch condition

At optimal pull timing, the main stem has begun to dry — it is no longer fully green and turgid but is transitioning toward tan or brown from the base upward. The lower 30–40% of the main stem should feel dry and slightly rigid. If the entire stem is still green and fully turgid from base to tip, the plant has not reached physiological maturity and pulling will result in high green-pod losses. If the stem is fully dry and snaps easily under light pressure, the plant is past optimal and pod suture integrity is failing.

3
Bean seed hardness and color inside pods

Open 5–10 pods from different heights on the plant and assess the seeds inside. Seeds at physiological maturity have reached their final size, have a firm (not waxy or soft) texture, and show their characteristic market class color — red for DRK, lighter red for LRK. Seeds that are still soft or waxy when pressed between fingers have not reached physiological maturity. This test is particularly useful for identifying fields that look visually mature (yellowed leaves, drying pods) due to drought stress but have not achieved full seed development — premature drought stress maturity is a trap that produces poor yield even when pulled at the visually correct time.

4
Lower leaf condition

The lower leaves of a plant approaching harvest maturity naturally yellow and drop in response to the plant’s redistribution of nitrogen from leaves to seed. At optimal pulling time, the lower 50–60% of the plant’s leaves should be yellow to brown and beginning to drop. A plant that still has green lower leaves to 12 inches above the ground is typically 3–5 days from optimal for most Michigan varieties. Note: disease (white mold, root rot) also causes premature lower leaf death — distinguish pathological leaf death (which is usually accompanied by visible disease symptoms on the stem or root crown) from normal maturity-driven leaf loss before using leaf condition as a timing indicator.

5
Manual shatter test on lowest pods

Grip the lowest 3–4 pods on 10 representative plants and manually pull each pod off the plant with a firm snap. Count how many pop cleanly off the stem (indicating mature seed and pod attachment) versus how many split open (suture failure). If more than 1 in 10 pods splits when manually removed, the lower pods have reached or are approaching the shatter threshold — the field should be pulled within 24 hours, not 48–72 hours. This is the most direct and actionable of the five indicators for establishing whether you are at the leading edge or trailing edge of the harvest window.

Morning vs. Afternoon Pull Timing: When Weather Controls the Window

kidney bean puller — the optimal time of day for pulling depends on pod moisture at the time of harvest; morning pulling when pods contain residual overnight humidity reduces suture shatter compared to afternoon pulling under dry conditions

Within the harvest window, the time of day at which you pull has a measurable effect on field losses — particularly when the field is at the latter portion of the window where pods are drier and shatter risk is elevated. This time-of-day effect is driven by diurnal moisture cycling in the pods.

Early morning pulling (6–9 AM)

Overnight humidity and potential morning dew slightly raise pod moisture to 16–22%, making the pod walls and suture more flexible and less prone to shattering under the mechanical stress of pulling. Research comparing early-morning vs. afternoon pulls on Michigan kidney beans consistently shows lower suture-failure rates when pods are at this elevated morning moisture.

Best choice when the field is at the latter portion of the harvest window or when you are in a narrow-window DRK variety. Accept 1–2 hours of morning dew drying time before starting if dew is heavy enough to wet clothing when walking the field.
Afternoon pulling (1–5 PM)

Afternoon conditions — lower humidity, higher temperature — produce drier, more brittle pods at the same maturity stage. For fields that are at the early portion of the harvest window and still have significant green-pod percentage, afternoon pulling is acceptable because the green pods are flexible regardless. For fields that are clearly within optimal, afternoon pulling works well. Only avoid afternoon pulling for fields clearly at or past the trailing edge of the harvest window.

Rain during the harvest window: Rain that wets pulled windrows resets the moisture cycle — pods that had dried to 12% moisture will return to 18–22% after a rain event and must be allowed to re-dry before combining. This is not necessarily a quality loss (re-wetting does not damage bean quality in short rain events) but extends the time from pulling to combining. The risk is when rain-re-wetting is followed by another drying period that drives pods below 10% moisture — at that point, the re-dried pods shatter much more aggressively than they would have without the rewetting cycle. Monitor closely after any rain event during the windrow period.

The Field Loss Assessment: Measuring Whether Your Timing Was Correct

Field loss assessment after the first pull passes in each field is the definitive feedback mechanism for timing decisions. Walk the pulled row immediately behind the puller — before any equipment traffic compacts the row — and count the beans on the soil surface within a 1-meter length of the pulled row. Multiply by the appropriate conversion factor for your row spacing to estimate field loss in lbs per acre.

Field Loss Assessment Procedure
1

Stop the puller after 200 feet. Walk back to the pulled row 30–50 feet behind the puller (to avoid the area immediately behind the puller where shoes may have scattered some beans from equipment contact).

2

Count all beans (individual seeds and intact pods) on the soil surface in a 1-meter section of the pulled row. Include beans that are still attached to small stem fragments — they would not have been captured by the combine. Record the count.

3

Convert to lbs/acre loss: For 28-inch rows: beans per linear meter ÷ 1.4 = lbs per acre loss. For 30-inch rows: beans per meter ÷ 1.3 = lbs per acre. Repeat at 3 additional locations in the field and average. Compare to your expected yield to calculate loss percentage.

4

決定ルール: Field loss below 5% of expected yield = acceptable — continue at current timing and speed. Field loss 5–10% = borderline — consider whether timing or speed adjustment is appropriate. Field loss above 10% = significant — stop and identify whether the cause is pulling-speed, puller-depth, or variety-timing, and correct before continuing.

Weather-Forced Pulling: When the Calendar Overrides the Crop

The harvest window is ideally determined by crop maturity assessment, but two weather events may force pulling before the crop reaches ideal maturity: frost and extended wet weather. Both require a different timing framework than optimal-window pulling.

Pre-frost pulling — the priority override

A killing frost (28°F or below for 4+ hours) on immature kidney beans destroys the seeds inside pods that have not reached physiological maturity — the seeds turn dark, shrivel, and become unmarketable. When a frost forecast is confirmed with 48–72 hours’ lead time, the correct response is to pull any field with 70%+ pod maturity immediately, regardless of whether it has reached the full 80–90% maturity target. Pulling at 70% maturity loses some yield from immature upper pods, but that loss is small compared to the total field loss from a killing frost on unpulled plants. The threshold: if a hard frost is forecast within 5 days and the field shows 70%+ maturity, pull now. Fields below 70% maturity cannot be saved by early pulling — immature seeds at 60% maturity stage will not finish developing in the windrow.

Extended wet weather — waiting vs. pulling early

Extended wet periods during the harvest window (3–5+ days of rain) create a difficult decision: pull in a wet window before the crop passes optimal, or wait for dry conditions and accept the timing risk. General guidance: pull in light rain or overcast conditions if the crop is clearly within the optimal window (80–90% maturity) — wet soil increases pulling resistance and increases soil disturbance at the shoe, but does not significantly increase pod shatter at optimal maturity. Do not pull in heavy rain conditions — soil disturbance from the puller in saturated soil can uproot adjacent rows and create compaction issues. Wait out heavy rain events even if they push the timing past the center of the optimal window; assess shatter risk carefully on the first clear day after the rain.

Puller Setup for Different Maturity Stages

field equipment detail — puller operating speed and shoe depth both require adjustment based on current pod moisture and maturity stage to minimize field losses throughout the harvest window

The correct puller setup — particularly ground speed and shoe depth — should be adjusted as the crop progresses through the harvest window. A setup optimized for the leading edge of the window (earlier, greener conditions) is not optimal for the trailing edge (drier, more brittle conditions), and vice versa.

Window position Speed adjustment Depth setting Primary loss risk
Leading edge
70–80% mature
+10% above standard
(3.5–4.5 mph)
Standard — 1–2 in below crown Immature upper pods — cannot pull deeper to capture them; they will finish in windrow
Optimal center
80–90% mature
Standard (3–4 mph) Standard Minimal loss risk at correct speed and depth; this is the target operating condition
Trailing edge
90–100% mature
−15% below standard
(2.5–3 mph)
Slightly shallower — reduce contact force on lower pods Suture shatter on lower pods from mechanical contact — slower speed reduces impact force
Past window
>100% (late)
Minimum speed (2 mph) Shallowest achievable without crop escape High shatter regardless of settings — minimizing mechanical disturbance is all that can be done; morning pull only

The row spacing configuration and working width adjustment for the 4BYH-1.3 puller that positions the shoes correctly relative to each plant row is in the puller row spacing and working width guide. The variety selection decisions that determine which varieties produce the widest harvest windows and lowest shatter risk are covered in the kidney bean variety selection guide. For the gearbox specifications that determine the maximum ground speed the drive system can sustain at the puller’s design pulling force in heavy or wet soil, see 農業用ギアボックスおよびPTO駆動系部品の仕様.

Windrow Management After Pulling: Protecting Quality in the Critical Drying Period

The period between pulling and combining is when the crop is most vulnerable to weather damage and quality loss. The windrow management practices that protect quality during this period require minimal equipment but specific decision-making that can prevent significant losses.

Windrow width for drying efficiency

Narrow windrows (single pulled row width, 8–10 inches) dry fastest because maximum surface area is exposed to air circulation. Wide merged windrows (2–3 rows combined) dry more slowly because the interior mass is insulated from airflow. For single-pass combines, narrow windrows are preferred. If you are merging rows before combining, time the merger to occur when the exterior of the windrow is dry but the interior still retains some moisture — merging fully dry windrows on windy days causes pod shattering as the merger’s tines contact the dried plant mass.

Row orientation and sun exposure

East-west field orientation maximizes sun exposure on the windrow from both south-facing and direct overhead angles. North-south windrows receive less direct sun exposure per day. On fields where row orientation cannot be changed, pulling slightly later in the day on north-south rows (to allow partial field warm-up before pulling) can improve the windrow drying rate by beginning with warmer material that holds less surface moisture.

Protecting from wind damage

High winds during the windrow period can scatter the lightweight dried plant material and cause pod shatter from windrow-to-windrow contact. If a wind event (sustained 20+ mph) is forecast within the first 3 days of the windrow period, combining should be accelerated even at slightly above-target moisture (up to 16%) rather than accepting the losses from wind-scattered windrows. Wind damage to windrows is an irreversible loss; slightly elevated combine moisture results only in a modest cleaning cost at delivery.

Kidney Bean Pulling Timing FAQs

Can I use heat unit accumulations to predict the pull date for my bean fields?+
Heat unit models can predict approximate maturity dates with reasonable accuracy within a 5–7 day window, and many Michigan producers use them as a planning tool for equipment scheduling. However, heat unit predictions do not account for within-field variability — the same heat unit total may put sandy knolls at 90% maturity while heavy low spots in the same field are still at 70%. They also do not account for the final 3–4 days of the maturity transition where conditions change rapidly and the optimal pull day requires field walking, not calendar arithmetic. Use heat unit models for planning (scheduling the puller operator, alerting the custom harvester to prepare) — then confirm with daily field walks as the predicted date approaches. Never pull on the predicted heat-unit date without walking the field first.
My field has significant within-field maturity variation — some areas clearly ready and others 5+ days behind. What do I do?+
Within-field maturity variation is common and results from soil texture differences, stand establishment variation, drainage differences, and sometimes disease pressure in portions of the field. The practical approach: if the variation is less than 5 days (some areas at 85%, others at 70–75%), pull the whole field at 80% average and accept slightly elevated immature-pod losses in the behind-schedule areas — those pods will finish in the windrow. If the variation is 7–10+ days, consider making two pulls — pull the advanced areas at optimal timing, then return 5–7 days later for the remaining areas. Many Michigan producers with variable fields use this two-pass approach and find the additional equipment time is justified by better average quality across the whole field. The logistical challenge is having the puller available for the return pass during the peak harvest period when equipment demand is highest.
How do I distinguish normal maturity-driven pod drying from drought stress maturation?+
Drought-stressed premature maturation and normal physiological maturity look similar on the outside — both produce yellowing leaves and drying pods — but differ fundamentally in seed quality. Open pods from drought-stressed and normal-maturity plants and compare the seeds: drought-stressed seeds are often undersized, shrunken at the seed hilum area, and lighter in weight than normal seeds at equivalent moisture. The seed coat may appear normal in color but will be thinner and more prone to cracking during handling. Normal maturity seeds are fully rounded, firm, and have reached their characteristic varietal weight. If your field shows early maturity signs but the visual appearance is preceded by a documented drought stress period (visible wilting, low soil moisture readings), do not assume the field is at optimal harvest timing based on the yellow pods alone — walk the field carefully and assess the seeds inside the pods before committing to pull timing.
What is the recommended windrow period after pulling before combining?+
The windrow period should continue until the beans in the windrow reach 14–16% moisture for combining. This typically requires 3–7 days after pulling in normal late-summer Michigan weather, but can be as short as 2 days in hot, dry, windy conditions or as long as 10+ days during cool, cloudy weather following a rain event. Test windrow moisture before combining — do not combine on a calendar schedule. Combining at above 18% moisture produces split beans and seed coat damage that reduces grade; combining at below 12% produces excessive shatter in the combine cylinder. The same probe-type moisture meters used for hay work for bean windrows — sample multiple points in the windrow at different depths, as the base of the windrow retains more moisture than the top exposed surface. Target the middle of the windrow mass for a representative reading.
My puller is leaving whole plants in the row rather than extracting them. What causes this?+
Plants left in the row after the puller passes indicate that the pulling force was insufficient to extract the root system, or that the crown was missed by the puller shoes. Three most common causes: (1) too-shallow shoe depth — the shoes are passing above the crown rather than gripping it; increase shoe depth by 0.5 inches and test; (2) soil moisture too high — in wet, heavy soil the root system creates excessive extraction resistance; reduce speed by 20% and maintain correct shoe depth; (3) plants that lodged before harvest (fell over) are no longer upright in the row, so the puller passes above the crown. Lodged plants often require manual assistance or must be accepted as harvest losses. Check shoe depth against the specific variety’s crown depth for your row spacing — a variety with a deep crown in your soil type may require deeper shoe setting than the standard adjustment range allows. The complete shoe adjustment procedure is documented in the puller setup guides.
Is it better to pull all fields simultaneously at optimal timing or stagger by field maturity?+
Always prioritize each field’s individual optimal timing over a simultaneous harvest schedule. The losses from pulling at suboptimal timing — whether early (immature pods) or late (shatter) — are almost always larger than any scheduling efficiency gained from simultaneous harvest. The practical approach: rank your fields by earliest-to-latest expected maturity at planting time; confirm and update this ranking with field walks in the week before the first pull; schedule the puller to move through fields in maturity order, allowing each field to be pulled when it individually reaches the optimal window. If scheduling constraints force a compromise (only one puller, multiple fields simultaneously ripe), prioritize DRK and narrow-window varieties over LRK and wider-window varieties — DRK has the highest market value and the most to lose from even a 2-day timing error.
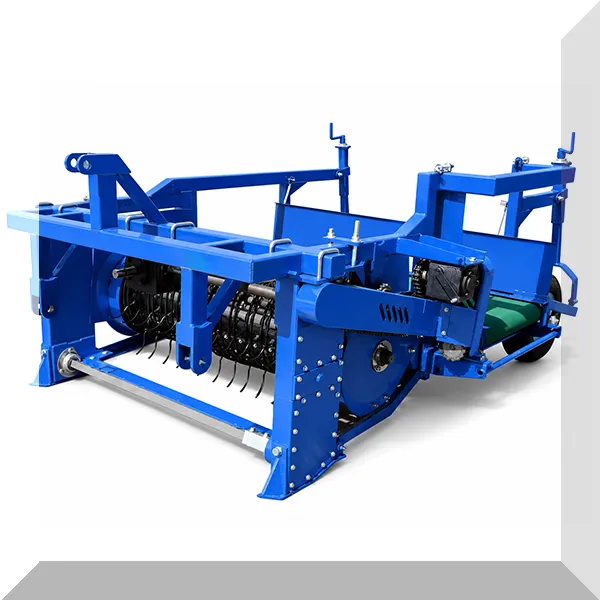
foragebaler.com 4BYH-1.3 kidney bean puller — adjustable shoe depth and speed settings for precision timing through the full harvest window from leading to trailing edge

Get Your Bean Puller Setup for Precise Harvest Window Timing

Tell us your variety, row spacing, soil type, and estimated pulling date. We confirm the 4BYH-1.3 shoe depth and speed settings optimized for your variety’s harvest window characteristics before the season begins.

Configure Your Puller

編集者: Cxm