チェーンメンテナンスが見落とされがちな理由、そしてそれがなぜコスト増につながるのか
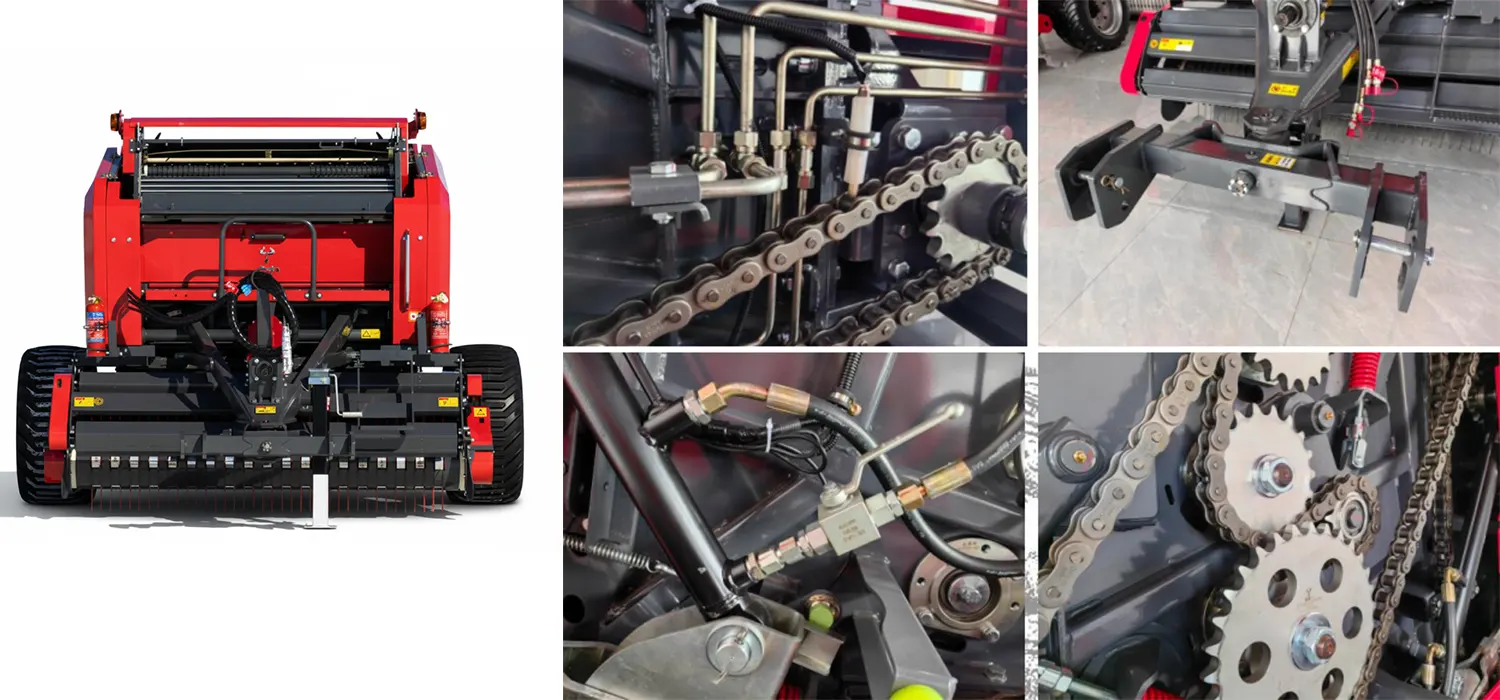
丸型ベーラーのチェーンは、ほとんど目に見えないところで作動します。ベルトシステムはテールゲートから見ることができ、ベアリングは熱と音で故障を知らせますが、チェーンはガードやハウジングの内部を走行するため、伸びや摩耗が目に見えない形で蓄積されます。スプロケットの歯がチェーンを飛ばす(これがトラブルの最初の音の兆候です)頃には、チェーンは通常、許容伸び限界の1.5~2倍まで伸びており、張力調整だけでなく交換が必要になります。
チェーンの故障による作業上の影響は、丸型ベール製造において特に深刻です。なぜなら、チェーンはピックアップリール、コンベアシステム、ローター機構を駆動し、作物を列からチャンバーへと連続的に流すために不可欠だからです。ピックアップ駆動チェーンが切れると、ピックアップは列の途中で停止します。ベーラーは停止せず、作物の流れも止まりますが、ベール形成機構は作動し続けるため、柔らかく不完全なベールができ、ベール製造を再開する前に手動での片付け作業が必要になります。天候の厳しい状況下では、チェーン関連の作業中断は、貴重な収穫機会を奪うことになります。
覚えておくべき重要な数字: 標準ASAE/ANSI農業用ローラーチェーンは、伸びが一定量に達したら交換する必要があります。 公称ピッチ長より3%高い公称ピッチが0.625インチ(1/2インチチェーン)のチェーンの場合、12リンクにわたる測定ピッチが7.73インチを超え、新品チェーンの仕様である7.50インチを超えた時点で交換が必要です。この3%のしきい値は、スキップ現象が発生するずっと前ですが、張力調整だけで補正できる範囲をはるかに超えています。
丸型ベーラーのチェーンの種類:それぞれの機能と摩耗具合
一般的な固定式チャンバー型丸型ベーラーには、3~5本の異なるチェーン駆動装置が搭載されており、それぞれが異なる機能を持ち、異なる負荷や汚染条件にさらされます。各チェーンの目的と摩耗特性を理解することで、どのチェーンを優先的に点検すべきかを判断するのに役立ちます。
関数: ギアボックスの出力からフライホイールまたは主駆動軸へ動力を伝達します。ベーラーに搭載されているチェーンの中で、最も高い持続荷重を支えます。
摩耗率: 高負荷対応 ― このチェーンは、ベール形成サイクルごとにPTOの最大トルクを伝達します。大量の刈り草を積み上げる作業では、2,500~4,000ベールごとに交換が必要です。
故障モード: リンクの破損前にサイドプレートに疲労亀裂が生じ、リンクは破断前に目に見える伸びを示す。そのため、定期的なピッチ測定が不可欠である。
関数: メインドライブまたは専用のPTO駆動シャフトからピックアップタインリールを駆動します。高速で動作し、作物残渣、粉塵、土壌汚染にさらされます。
摩耗率: 中~高レベル ― 作物残渣による汚染は、ピンとブッシングの接触面の摩耗を加速させます。土壌への頻繁な曝露により伸びが2.5%に達したら交換してください。
故障モード: リンクの破損前にブッシングの摩耗(内径の拡大)が発生します。測定なしでは検出が困難で、リンクのスキップ現象が最初の目に見える兆候となります。
チェーンタイプ3
ネットラップ/紐システムチェーン
関数: ネットラップまたは紐巻き取りアームを巻き取りサイクルに沿って駆動します。低速・低負荷で断続的に動作しますが、ネットラップの残留物や潤滑油による汚染にさらされる可能性があります。
摩耗率: 低負荷・断続運転とは、連続運転チェーンに比べて1時間あたりの負荷サイクルがはるかに少ないことを意味します。そのため、交換することなくベーラーの耐用年数全体にわたって使用できる場合がほとんどです。
故障モード: ネット包装用溶剤による腐食や紫外線照射は、リンクの剛性低下の原因となります。伸びだけでなく、すべてのリンクがスムーズに動くことを確認してください。
チェーンタイプ4
チョッパー/ナイフシステムチェーン
関数: チョッパーシステムを搭載したベーラーにおいて、プレカットナイフバンクを駆動する。ナイフが作動しているときは高速で動作し、硬い作物材料からの衝撃荷重を受ける。
摩耗率: 作動時は高負荷状態になります。作物の衝撃荷重により、チェーンに定常状態の設計負荷を超える衝撃力が加わります。ナイフシステムのスプロケットのアライメントを確認してください。偏摩耗があると、チェーンの回転速度が著しく上昇します。
故障モード: スプロケットの歯の摩耗(歯の形状が鉤状になっているのが目視できる)とチェーンの伸びが同時に発生している場合、両方を同時に対処しないと、摩耗したスプロケット上で新しいチェーンが早期に摩耗してしまう。
チェーンの伸びを正確に測定する方法
チェーンの伸びの測定は、交換の判断を下すための決定的なテストです。目視検査や「たるみテスト」(チェーンのたるみ側を押す)に頼ってはいけません。どちらの方法も精度が低すぎて、交換のトリガーとなる重要な伸びの閾値である2.5~3%のチェーンを検出できません。正しい方法は次のとおりです。
標準12リンク測定方法
1
チェーンの張力を緩める アイドラーまたはテンショナーを完全に緩めることで調整できます。張力がかかったチェーンは、リンクが自由状態の形状を超えて伸びてしまうため、正確な測定はできません。
2
連続する12個のリンクを選択してください チェーンの最も負荷のかかる部分、つまり通常は駆動スプロケットと最初のアイドラースプロケットの間の部分で摩耗が激しくなります。負荷のかかる部分は、負荷のかからない部分よりも早く摩耗します。
3
中心間距離を測定する スチール定規またはノギスを使用して、最初のピンから13番目のピンまで(12リンク分)の距離を測定します。測定はピンの中心から中心までで、内側の端から外側の端までではありません。
4
仕様と比較する: 公称12リンクの長さ = チェーンピッチ × 12。#50チェーン(5/8インチピッチ)の場合:0.625 × 12 = 公称7.500インチ。3%の伸びの場合:7.500 × 1.03 = 7.725インチ — この測定値に達するか、それ以前に交換してください。
| チェーンサイズ |
投球(イン) |
12リンク公称値(インチ) |
(3%伸長)で交換 |
| #35 (3/8″) |
0.375 |
4.500 |
4.635 |
| #40 (1/2″) |
0.500 |
6.000 |
6.180 |
| #50 (5/8″) |
0.625 |
7.500 |
7.725 |
| #60 (3/4″) |
0.750 |
9.000 |
9.270 |
チェーン張力の適切な設定:中央スパンたわみ基準
チェーンの張力が緩すぎると、負荷がかかったときにスプロケットの歯が飛んでしまいます。張力が強すぎると、チェーンリンクのピンとブッシングの接合部、および接続されているすべてのスプロケットのシャフトベアリングの両方でベアリングの摩耗が加速します。農業用ローラーチェーンの適切な張力基準は次のとおりです。 中央スパンたわみ法:適度な手荷重をかけた状態で、たわみ側のスパンの中央点における全たわみ(たわみ量)を測定する。
標準たわみ計算式
目標たわみ量 = スパン長 × 0.02
(自由スパン長の2%)
例:18インチの自由スパン
目標偏向 = 18 × 0.02 = 0.36インチ (約3/8インチ)
チェーンのたるみ側を中央付近で指で約10ポンドの力で押して、たわみを測定します。上下方向の合計移動量は、計算された目標値±25%と一致するはずです。
緊張感の解釈
正しい: 中央部のたわみはスパンの1.5~2.5%です。チェーンはスムーズに回転し、高速走行時でも異音は発生しません。
緩すぎる: 3%のスパンにわたってたわみが発生します。チェーンが高速でガードに叩きつけられ、負荷がかかった状態でのチェーンの滑りリスクが高まります。
きつすぎる: スパン1%未満でのたわみ。チェーンの動作が硬く、ぎくしゃくするため、すべてのスプロケットシャフトのベアリング摩耗が加速します。
注意: テンショナーが適切な張力を得るための調整範囲の限界に達している場合は、チェーンの交換が必要であり、それ以上の調整は不要です。
チェーン潤滑:種類、方法、および間隔
適切な潤滑は、チェーンの寿命を延ばす最も効果的な方法であり、張力調整よりもはるかに大きな効果があります。農業用ローラーチェーンは、主にピンとブッシングの接合部で摩耗します。リンクが動くたびにピンがブッシング内で回転するため、この接触面には金属同士の摩耗を防ぐために潤滑油膜が常に必要です。埃っぽい牧草地で潤滑油が不足した状態でチェーンを使用すると、800~1,200ベールで3%の伸び限界まで摩耗してしまう可能性があります。一方、適切に潤滑された同じチェーンは、交換が必要になるまで3,000~4,000ベールまで使用できます。
| 潤滑方法 |
最適な潤滑剤の種類 |
間隔 |
効果 |
注記 |
| 手動ブラシまたはオイル缶 |
SAE 30~50非洗剤系オイル、チェーン特異的浸透油 |
8~10時間ごと |
高(完了時) |
チェーンの内側(スプロケットに面するリンク側)に塗布すると最も効果的です。潤滑剤は外側のプレートだけでなく、ピンとブッシングの接合部にも届く必要があります。 |
| 自動チェーンオイラー |
チェーン潤滑油、粘度50~100cSt |
連続(流量設定) |
最高 |
工場装着またはアフターマーケットの給油装置。手動給油に比べてチェーン寿命を2~3倍延長。大量給油作業に最適。 |
| エアゾール式チェーン潤滑スプレー |
ドライフィルムPTFEまたはワックスベースのチェーンスプレー |
4~6時間ごと |
適度 |
防塵性に優れ、乾燥した埃っぽい環境下で露出したチェーンに適しています。油膜が薄いため、オイルよりも高い頻度での洗浄が必要です。 |
| グリース(非推奨) |
— |
— |
貧しい |
グリースはピンとブッシングの接合部まで浸透せず、外側のプレートに研磨性の粉塵を付着させ、外部摩耗を促進します。ローラーチェーンには絶対にグリースを使用しないでください。 |
スプロケットの摩耗:新品チェーンを劣化させる隠れた要因
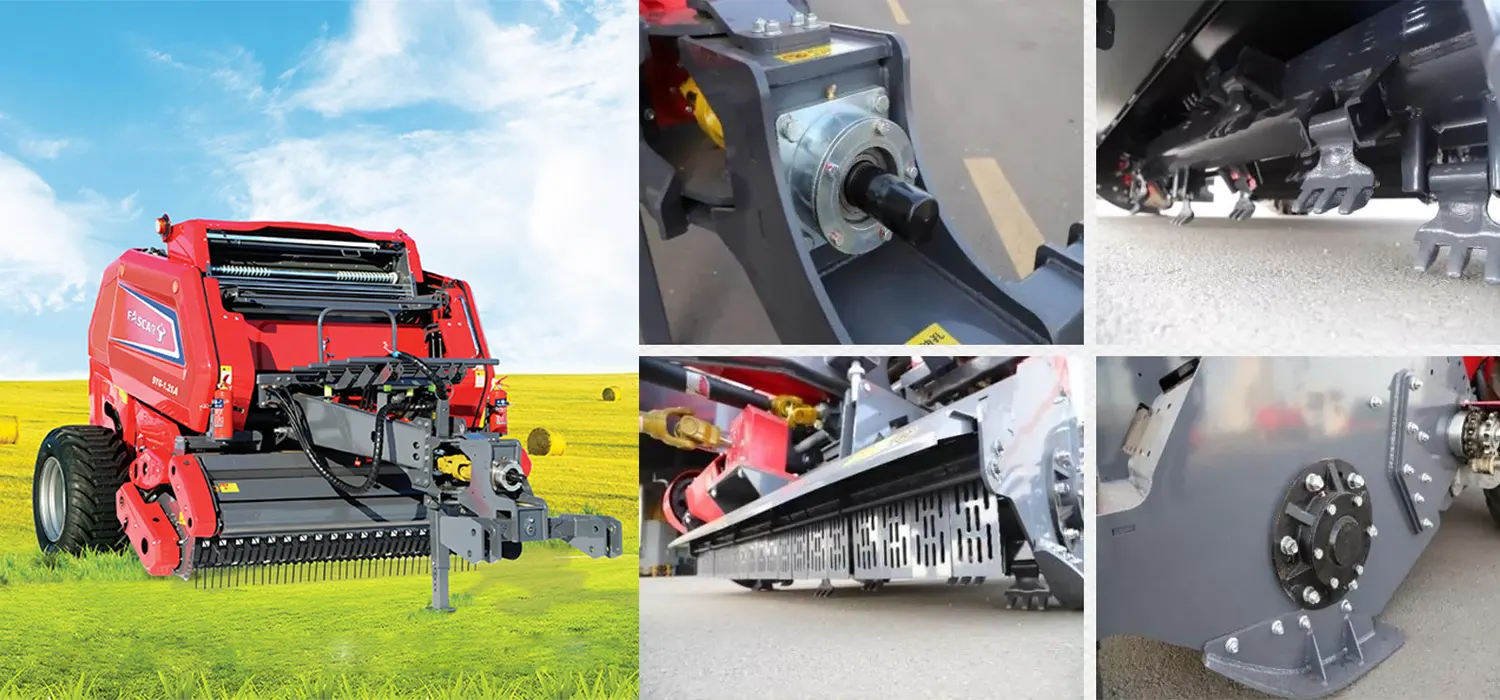
チェーン駆動式農業機械において、摩耗したスプロケットに新しいチェーンを取り付けることは、最もよくあるメンテナンスミスです。摩耗したスプロケット(何千回ものチェーンの振動によって歯形が鉤状のサメのヒレのような形状になったもの)では、新しいチェーンのローラーが正しい接触点で噛み合いません。チェーンはスプロケットの形状とは異なる位置に配置され、鋸歯状の噛み合いが生じるため、新しいチェーンは最初の500時間の使用で通常の2~3倍の速度で伸びてしまいます。
摩耗したスプロケットの見分け方
- 歯の表面は、横から見ると鉤状またはアンダーカット状の輪郭を示す(新しい歯は左右対称である)。
- チェーンリンクローラーは、歯の先端に載るのではなく、フックの中に「収まる」ように見える。
- 歯と歯のピッチを測定すると、荷重側は非荷重側よりも間隔が広いことがわかります。
- 摩耗したスプロケットは、同じサイズの新品のスプロケットよりも明らかに軽く感じます。これは、素材が摩耗しているためです。
スプロケットをチェーンに交換するタイミング
- チェーンが3%の伸び限界まで摩耗した場合は、スプロケットも交換してください。チェーンの摩耗によってスプロケットもそれに合わせて摩耗しているからです。
- チェーンが使用中に切れた場合(伸びによる交換ではない場合)、交換部品を取り付ける前にスプロケットの歯を点検してください。チェーンの切れは、スプロケットの歯に最大応力がかかるような負荷イベントが発生したことを示している場合が多いです。
- 小型スプロケット(歯数17未満)は大型スプロケットよりも摩耗が早く、チェーンと歯の噛み合い角度がより急になるため、小型スプロケットの交換頻度が高くなることを考慮して予算を組んでください。
ベルト、タイン、ベアリング、チェーンなど、他のすべてのベーラー摩耗部品との関連でチェーンを網羅する完全な摩耗部品フレームワークは、 ベーラー摩耗部品ガイド現場でチェーン関連の症状(ピックアップの減速、ドライブノイズ、スラッグフィードなど)が現れた場合、特定のチェーンと原因を特定するための診断手順は次のとおりです。 ベーラーのトラブルシューティングガイドPTOシャフトのトルク仕様(チェーンの最大負荷定格を決定するもの)については、以下を参照してください。 農業用ギアボックスおよびPTO駆動系部品.
シーズン前のチェーン点検チェックリスト
このチェックリストは、ベーラーが圃場で稼働しているシーズン中盤ではなく、各ベーラー作業シーズンの開始時に実行してください。目的は、圃場での作業停止を引き起こす前に、来シーズン中に故障する可能性のあるチェーンとスプロケットを特定し、交換することです。
メインドライブチェーン
上記の方法に従って12リンクの伸びを測定します。リンクピンの接続部分に亀裂がないかサイドプレートを点検します。アイドラースプロケットベアリングのガタつきを確認します。伸びが3%の限界値に達しているか、それに近い場合は、チェーンとスプロケットの両方を交換します。
ピックアップ駆動チェーン
伸びを測定します。各リンクを手で曲げてみてください。リンクが固い、または固着している場合は、ブッシングが乾燥しているか腐食で損傷していることを示しています。リンクが固いチェーンは、伸びに関係なく交換する必要があります。ピックアップドライブスプロケットのアライメントを確認します(チェーン面と平行から1/16インチ以内である必要があります)。
すべてのマスターリンク
すべてのマスターリンク(接続リンク)の位置を確認し、スプリングクリップまたは割りピンが所定の位置にあり、損傷がないことを確認してください。マスターリンクのクリップが欠落している場合は、即座に故障の原因となります。クリップに変形や疲労亀裂が見られるマスターリンクは交換してください。
スプロケットの歯
噛み合っているすべてのスプロケットの歯を目視で点検し、歯形がフック状またはアンダーカット状になっていないか確認してください。特に、小型の駆動スプロケット(歯数が17未満)と、負荷が最も大きい主駆動部のスプロケットに注意してください。
チェーンガード
チェーンガードがすべて所定の位置にあり、損傷がなく、適切に固定されていることを確認してください。露出したチェーンは、ガード付きのチェーンに比べて3~5倍速くゴミや汚れが蓄積します。シーズン開始前に、紛失または曲がったガードを交換してください。
潤滑油の初期充填
今シーズン最初の作業を行う前に、チェーンを静止させた状態で、チェーンの両面にSAE 30オイルをブラシで丁寧に塗布し、すべてのチェーンに注油してください。その後、作物を積載する前に、運転速度で3分間空運転してオイルを全体に行き渡らせてください。これにより、最初の高負荷ベールが形成される前に、新シーズンの潤滑膜が確実に形成されます。
チェーンメンテナンスに関するよくある質問
マスターリンクを新品に交換して修理したチェーンは、再利用できますか?+
チェーンが切れた後に修理した場合、軽負荷または二次駆動用途(例えば、ネット巻き取りシステム)には再利用できますが、修理後に高負荷の一次駆動用途(メイン駆動チェーン、ピックアップ駆動チェーン)に戻してはなりません。チェーンの切れ目は通常、疲労限界に近い最も弱い部分で発生します。マスターリンクで接続すると物理的な連続性は回復しますが、チェーン本来の疲労寿命は回復しません。切れ目の両側のリンクはすでに疲労限界に近い状態まで摩耗しているためです。重要な駆動用途における安全性と信頼性を確保するためには、切れたチェーンは修理せずに完全に交換する必要があります。切れたチェーンを再利用することによるコスト削減は、収穫作業中の現場での故障リスクに見合うものではありません。
ベーラーのチェーンが高速回転時にカチカチという音を立てます。これは張力の問題でしょうか、それとも伸びの問題でしょうか?+
特定のスプロケットの回転と同期して一定間隔で発生するカチッという音は、ほぼ間違いなくリンクの損傷または固着が原因です(固着したリンクはスプロケットの歯と異なる接触をするため、駆動スプロケットを通過するたびにカチッという音が発生します)。特定のスプロケットと同期しない一般的なガタガタ音やパタパタ音は、通常、張力の問題です。チェーンが緩みすぎてガードまたはチェーン自体に振動している可能性があります。この2つを区別するには、ベーラーを停止し、駆動スプロケットを通してチェーンを1リンクずつ手動で進めます。固着したリンクがある場合は、手で動かそうとしたときに、隣接するリンクよりも明らかに曲げにくいことがわかります。すべてのリンクが自由に曲がり、明らかな固着したリンクがない場合は、音は張力に関連している可能性が高いので、中央スパンたわみ法に従って確認および調整してください。
チェーンアイドラーの交換が必要なのか、それとも単に張り直しが必要なのか、どうすれば分かりますか?+
チェーンアイドラーは、調整可能な張力設定部品として機能します。通常、アイドラースプロケットが移動してチェーンのたるみを吸収できるように、スロットまたはねじ式の調整機構を備えています。アイドラーは、次の 3 つの状況で交換 (単なる再調整ではなく) する必要があります。調整スロットの移動範囲がなくなった場合、つまりチェーンがアイドラーの調整範囲を超えて伸びた場合。アイドラースプロケットベアリングにラジアル方向の遊びが生じた場合 (スプロケットを握ってシャフトに対して垂直に動かして確認します。1/16 インチ以上の遊びがある場合は、ベアリングが摩耗していることを示します)。または、アイドラースプロケットの歯がドライブスプロケットと同じフック状の形状に摩耗した場合。アイドラースプロケットにかかる負荷がドライブスプロケットよりも低い場合でも、アイドラーはドライブスプロケットよりも回転あたりの歯の接触回数が多いため、摩耗したスプロケットを備えたアイドラーは新しいチェーンをより速く摩耗させます。
自動車用のチェーン潤滑剤をベーラーのチェーンに使用できますか?+
自動車用チェーン潤滑剤、特にオートバイ用チェーンや自転車用チェーン用に配合されたものは、一般的に農業用ローラーチェーンにも適しており、乾燥した埃っぽい環境でも効果を発揮します。これは、これらの製品の多くがドライフィルムまたはワックスベースであるため、油性潤滑剤に比べて埃が付着しにくく、埃が付きにくいからです。一方、WD-40や同様の浸透性液体は適していません。これらは水分を置換しますが、膜強度がほとんどなく、すぐに蒸発してしまうためです。また、粘度の高いグリースベースの製品も避けてください。農業用チェーンに最適な潤滑剤は、ピンとブッシングの接合部まで浸透し(浸透には低粘度が必要)、チェーン作動時の遠心力にも耐え、所定の位置に留まる(十分な膜強度が必要)ものです。SAE 30~50の非洗剤鉱物油は、両方の条件を満たす従来からの低コストな選択肢です。チェーン専用の浸透性オイル製品も同様に効果的で、狭い場所でも塗布しやすくなっています。
交換用チェーンを注文する際、チェーンのサイズは重要ですか?純正品よりも強度のあるチェーンを使用できますか?+
チェーンのピッチは完全に一致させる必要があります。チェーンのピッチによってスプロケットの歯間隔が決まるため、ピッチが半分異なるだけでも(例えば、#41 スプロケットに #40 チェーンを使用する場合)、チェーンとスプロケットの両方が正しく噛み合わず、摩耗が早まります。同じピッチであれば、標準のシングル ストランドからヘビー (H シリーズ) またはダブル ストランドにアップグレードすると、疲労寿命と衝撃荷重に対する耐性が向上します。チェーンとその交換部品が既存のガードとテンショナーの可動範囲内に物理的に収まる場合は、通常このアップグレードは許容されます。純正品よりも重いチェーンを取り付けても機械的に有害ではなく、高負荷用途では交換頻度を実際に減らすことができます。決して許容されないのは、コスト削減のために軽いチェーンにダウングレードすることです。高負荷駆動装置に定格以下のチェーンを使用すると、早期に故障し、安全上の危険が生じます。
梱包作業の時期には、予備のチェーンリンクと予備のチェーン一式を現場に持ち運ぶべきでしょうか?+
両方持ち歩きましょう。チェーンブレーカーツールと、ベーラーの各チェーンサイズに対応するマスターリンクがあれば、チェーンが切れても現場で約15分で修理できます。この現場での修理で、すぐに収穫作業を終えることができます。ピックアップドライブチェーンとメインドライブチェーン(故障リスクが最も高い2つのチェーン)の予備を、ベーリングシーズン中は常にトラクターのキャブに積んでおきましょう。チェーンのサイズは各リンクのサイドプレートに刻印されています。シーズン前にベーラーに結び付けたタグにサイズを書いておけば、すぐに正しい交換品を注文できます。丸型ベーラーのピックアップドライブチェーンまたはメインドライブチェーンの交換用チェーン一式は、チェーンのサイズと長さによって$25~$60程度です。天候の良い時期にベーリング作業ができなくなる損失に比べれば、この費用は微々たるものです。
編集者: Cxm